Easy Ingredient Strawberry Yogurt Bites Recipe
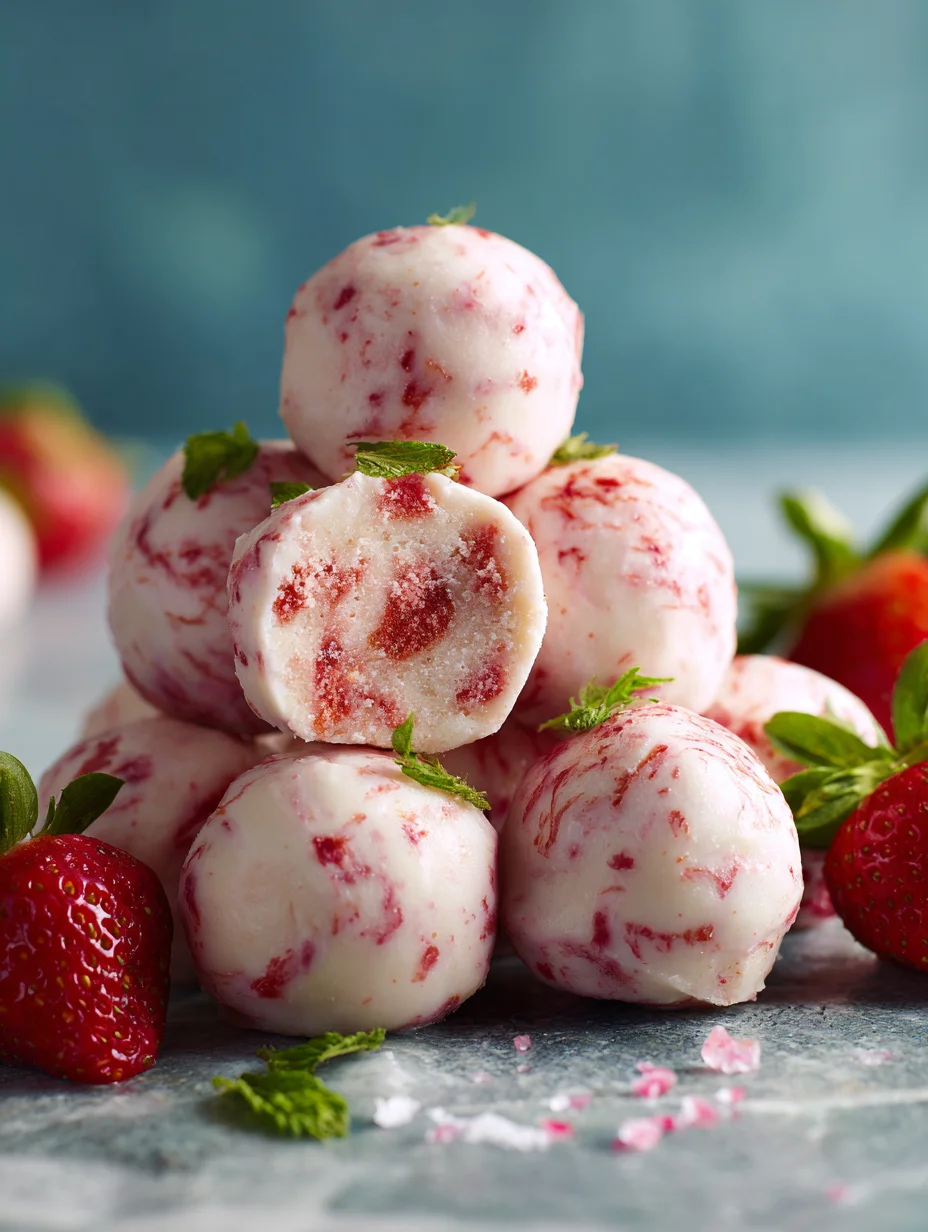
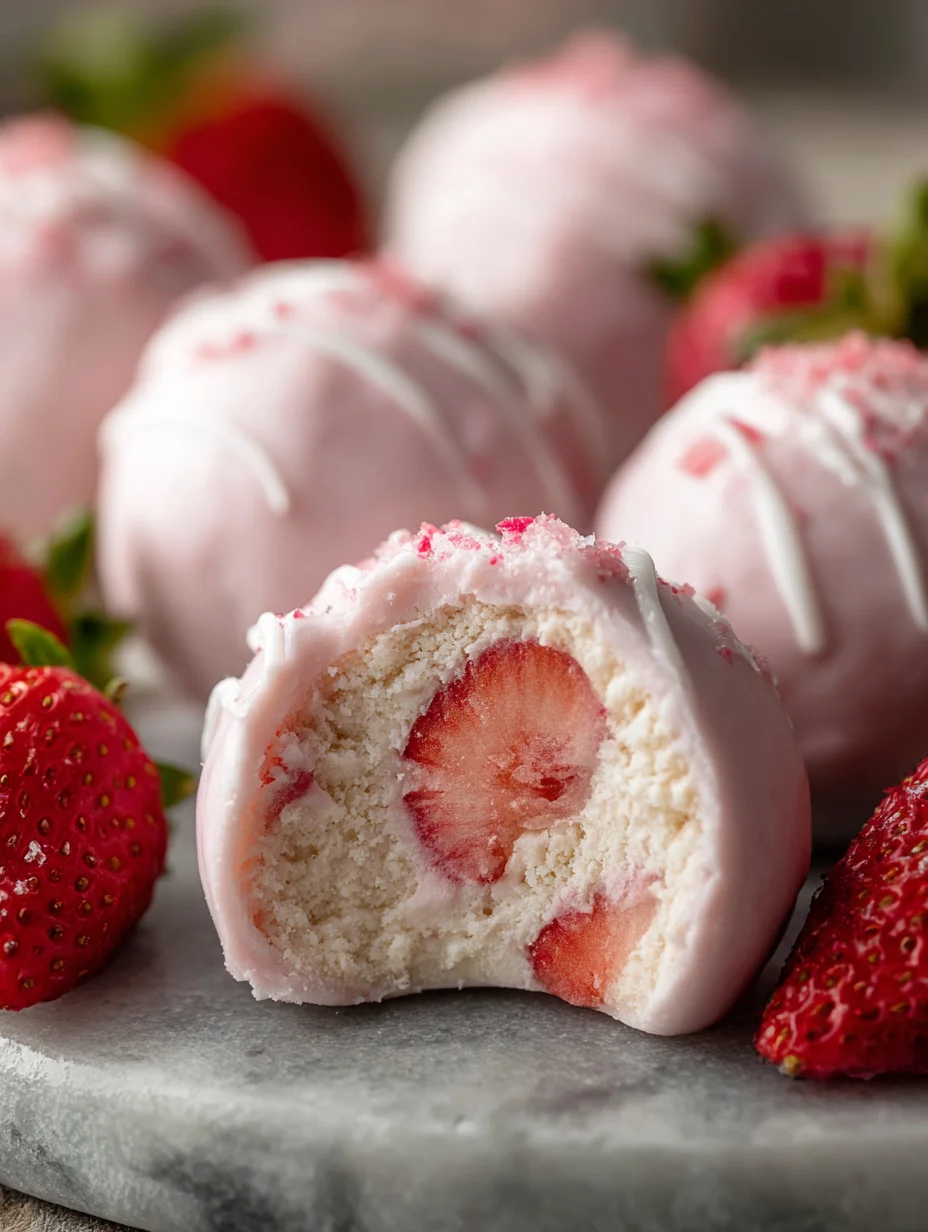
3 Ingredient Strawberry Yogurt Bites are the answer to your sweet cravings, a simple yet utterly delightful treat that proves you don’t need a pantry full of fancy ingredients to create something truly special. Imagin extracte a burst of fruity freshness combined with creamy, cool yogurt, all in a perfectly portioned bite. These little wonders are incredibly popular for their effortless charm and satisfying taste, making them an instant hit with kids and adults alike. What sets these 3 Ingredient Strawberry Yogurt Bites apart is their incredible simplicity; they’re a healthy-ish indulgence you can whip up in minutes, perfect for a quick snack, a party appetizer, or even a light dessert. They offer a delightful contrast of textures and a vibrant flavor profile that will leave you reaching for more.
Ingredients:
- ½ cup granola (plus more for topping)
- 1 cup yogurt of choice
- ½ cup fresh strawberries (hulled and diced)
- ¾ cup fresh strawberries (sliced or chopped)
- ¼ cup granola (smaller pieces work better)
Preparing the Strawberry Yogurt Bites
This recipe for 3 Ingredient Strawberry Yogurt Bites is incredibly simple and rewarding, perfect for a quick and healthy snack or a delightful dessert. We’ll be working with just a few key components to create these delightful frozen treats. The base of our bites will be creamy yogurt, infused with the vibrant flavor and texture of fresh strawberries. To add a satisfying crunch and a touch of wholesome goodness, we’ll incorporate granola. The beauty of this recipe lies in its adaptability; feel free to use your favorite type of yogurt – whether it’s Greek yogurt for extra protein, a dairy-free alternative like coconut or almond yogurt, or even a classic plain yogurt. The strawberries, of course, are the star, providing natural sweetness and a beautiful color.
Before we begin extract assembling, ensure your ingredients are prepped. For the ½ cup of hulled and diced strawberries, aim for small, bite-sized pieces. This will ensure they distribute evenly throughout the yogurt mixture and are enjoyable in every bite. The ¾ cup of sliced or chopped strawberries will be our primary flavor and texture component within the bites. For the granola, having both a larger-grained portion (½ cup) and a finer-grained portion (¼ cup) will be beneficial for texture and topping. Having everything measured and ready to go will make the assembly process seamless and enjoyable.
Step-by-Step Instructions
Step 1: Combine the Yogurt and Diced Strawberries
Begin by gently combining the 1 cup of your chosen yogurt with the ½ cup of hulled and diced fresh strawberries. Use a spatula or a large spoon to carefully fold the strawberries into the yogurt. We don’t want to overmix here; the goal is to create a harmonious blend where the yogurt coats the strawberry pieces without completely mashing them. This initial step ensures that the strawberry flavor is distributed throughout the yogurt base, providing bursts of fruity goodness in every bite. If you’re using a thicker yogurt, like Greek yogurt, you might find it easier to achieve a smooth, consistent mixture. If your yogurt is on the thinner side, don’t worry, the freezing process will firm it up beautifully.
Step 2: Incorporate the Granola for Texture
Now, it’s time to add the textural element. Gently fold in the ¼ cup of granola. It’s important to use smaller pieces of granola here if possible, as they will mix more easily and evenly into the yogurt and strawberry mixture. We’re aiming for a delightful crunch within the bites, not large clumps. This granola will soften slightly as it freezes, providing a chewy and satisfying texture that complements the creamy yogurt and tender strawberries. Be mindful not to overwork the mixture; a few gentle folds will suffice to distribute the granola without breaking down the strawberries too much.
Step 3: Portioning and Freezing the Bites
Prepare a baking sheet or a flat tray by lining it with parchment paper or a silicone baking mat. This is crucial to prevent the yogurt bites from sticking to the surface once frozen, making them easy to remove. Using a tablespoon or a small cookie scoop, carefully drop portions of the yogurt and strawberry mixture onto the prepared baking sheet. Aim for uniform sizes so that they freeze evenly and are consistent in their deliciousness. You can make them as small or as large as you prefer, keeping in mind that smaller bites will freeze faster. Once all the mixture is portioned, carefully place the baking sheet into the freezer. Allow the bites to freeze for at least 2 to 3 hours, or until they are completely solid and firm to the touch. The key here is patience; ensuring they are fully frozen will make them easy to handle and enjoy.
Step 4: Preparing the Topping and Coating
While the yogurt bites are solidifying in the freezer, let’s prepare the outer layer. In a separate small bowl, combine the remaining ½ cup of granola with the ¾ cup of sliced or chopped fresh strawberries. If your granola pieces are quite large, you can give them a gentle chop to create smaller, more manageable pieces for coating. Gently mix these two components together. The idea here is to create a delicious and visually appealing coating for our frozen yogurt bites. The fresh strawberries will add a pop of color and a slightly softer texture to the crunchy granola, creating an interesting contrast. You want enough of this mixture to generously coat each yogurt bite.
Step 5: Coating the Frozen Yogurt Bites
Once your yogurt bites are fully frozen and solid, remove the baking sheet from the freezer. Now comes the fun part: coating the bites. Take each frozen yogurt bite and gently roll it in the prepared granola and strawberry mixture. Press lightly to ensure the topping adheres well. The cold surface of the yogurt bite will help the granola and strawberry mixture stick. You might need to use your fingers or a small spoon to help press the topping onto the sides and top. Work relatively quickly, as the bites will start to soften if left out of the freezer for too long. Once coated, return the yogurt bites to the parchment-lined baking sheet.
Step 6: Final Freezing and Storage
After all the yogurt bites have been coated, return the baking sheet to the freezer for another 30 minutes to an hour. This final freeze will help to set the coating and ensure the bites maintain their shape. Once they are firm and ready, you can transfer them to an airtight container for storage. Layering them with parchment paper in between can prevent them from sticking together. These 3 Ingredient Strawberry Yogurt Bites are best enjoyed within a week or two, though they are so delicious, they might not last that long! Remember to keep them frozen until you’re ready to indulge.
Conclusion:
There you have it – a simple yet delightful recipe for 3 Ingredient Strawberry Yogurt Bites! We’ve explored how easily these can come together, making them a perfect treat for both kids and adults alike. These bites are wonderfully versatile, offering a healthy and refreshing option for snack time, a light dessert, or even a fun addition to a packed lunch. Don’t be afraid to get creative with the serving suggestions – they’re fantastic on their own, but also wonderful layered in a parfait with granola and fresh fruit, or even as a topping for pancakes or waffles. Experiment with different fruit purees or even a touch of honey for added sweetness and flavor in your variations. The beauty of the 3 Ingredient Strawberry Yogurt Bites lies in their simplicity and adaptability. So, gather your ingredients and give them a try. I’m confident you’ll find them to be a new favorite!
Frequently Asked Questions:
Q1: Can I use a different type of yogurt for these 3 Ingredient Strawberry Yogurt Bites?
Absolutely! While Greek yogurt offers a nice thickness, you can certainly use plain regular yogurt or even a dairy-free alternative like coconut or almond yogurt. Just be mindful that the consistency might be a little thinner, so you might need to adjust the freezing time slightly.
Q2: How long do the 3 Ingredient Strawberry Yogurt Bites last in the freezer?
Properly stored in an airtight container or freezer bag, these 3 Ingredient Strawberry Yogurt Bites should stay fresh and delicious for up to 2-3 months. It’s always best to consume them sooner rather than later for the best texture and flavor, but they hold up quite well for an extended period.
Easy Ingredient Strawberry Yogurt Bites Recipe
Simple and delicious frozen yogurt bites packed with fresh strawberries and granola, perfect for a healthy snack or dessert.
Ingredients
-
1 cup yogurt of choice
-
½ cup fresh strawberries (hulled and diced)
-
¼ cup granola (smaller pieces work better)
-
½ cup granola (plus more for topping)
-
¾ cup fresh strawberries (sliced or chopped)
Instructions
-
Step 1
Gently combine the 1 cup of your chosen yogurt with the ½ cup of hulled and diced fresh strawberries. Fold gently to create a harmonious blend without completely mashing the strawberries.
-
Step 2
Gently fold in the ¼ cup of smaller-grained granola. Aim for a delightful crunch within the bites. Do not overwork the mixture.
-
Step 3
Prepare a baking sheet lined with parchment paper. Using a tablespoon or small cookie scoop, drop portions of the yogurt mixture onto the sheet. Freeze for at least 2 to 3 hours, or until completely solid.
-
Step 4
In a separate bowl, combine the remaining ½ cup of granola with the ¾ cup of sliced or chopped fresh strawberries for the topping. Gently mix.
-
Step 5
Once the yogurt bites are frozen, remove them from the freezer and gently roll each bite in the prepared granola and strawberry topping. Press lightly to adhere. Return coated bites to the baking sheet.
-
Step 6
Return the baking sheet to the freezer for another 30 minutes to an hour to set the coating. Transfer to an airtight container for storage, keeping them frozen until ready to enjoy.
Important Information
Nutrition Facts (Per Serving)
It is important to consider this information as approximate and not to use it as definitive health advice.
Allergy Information
Please check ingredients for potential allergens and consult a health professional if in doubt.
Begin by gently combining the 1 cup of your chosen yogurt with the ½ cup of hulled and diced fresh strawberries. Use a spatula or a large spoon to carefully fold the strawberries into the yogurt. We don’t want to overmix here; the goal is to create a harmonious blend where the yogurt coats the strawberry pieces without completely mashing them. This initial step ensures that the strawberry flavor is distributed throughout the yogurt base, providing bursts of fruity goodness in every bite. If you’re using a thicker yogurt, like Greek yogurt, you might find it easier to achieve a smooth, consistent mixture. If your yogurt is on the thinner side, don’t worry, the freezing process will firm it up beautifully.
Step 2: Incorporate the Granola for Texture
Now, it’s time to add the textural element. Gently fold in the ¼ cup of granola. It’s important to use smaller pieces of granola here if possible, as they will mix more easily and evenly into the yogurt and strawberry mixture. We’re aiming for a delightful crunch within the bites, not large clumps. This granola will soften slightly as it freezes, providing a chewy and satisfying texture that complements the creamy yogurt and tender strawberries. Be mindful not to overwork the mixture; a few gentle folds will suffice to distribute the granola without breaking down the strawberries too much.
Step 3: Portioning and Freezing the Bites
Prepare a baking sheet or a flat tray by lining it with parchment paper or a silicone baking mat. This is crucial to prevent the yogurt bites from sticking to the surface once frozen, making them easy to remove. Using a tablespoon or a small cookie scoop, carefully drop portions of the yogurt and strawberry mixture onto the prepared baking sheet. Aim for uniform sizes so that they freeze evenly and are consistent in their deliciousness. You can make them as small or as large as you prefer, keeping in mind that smaller bites will freeze faster. Once all the mixture is portioned, carefully place the baking sheet into the freezer. Allow the bites to freeze for at least 2 to 3 hours, or until they are completely solid and firm to the touch. The key here is patience; ensuring they are fully frozen will make them easy to handle and enjoy.
Step 4: Preparing the Topping and Coating
While the yogurt bites are solidifying in the freezer, let’s prepare the outer layer. In a separate small bowl, combine the remaining ½ cup of granola with the ¾ cup of sliced or chopped fresh strawberries. If your granola pieces are quite large, you can give them a gentle chop to create smaller, more manageable pieces for coating. Gently mix these two components together. The idea here is to create a delicious and visually appealing coating for our frozen yogurt bites. The fresh strawberries will add a pop of color and a slightly softer texture to the crunchy granola, creating an interesting contrast. You want enough of this mixture to generously coat each yogurt bite.
Step 5: Coating the Frozen Yogurt Bites
Once your yogurt bites are fully frozen and solid, remove the baking sheet from the freezer. Now comes the fun part: coating the bites. Take each frozen yogurt bite and gently roll it in the prepared granola and strawberry mixture. Press lightly to ensure the topping adheres well. The cold surface of the yogurt bite will help the granola and strawberry mixture stick. You might need to use your fingers or a small spoon to help press the topping onto the sides and top. Work relatively quickly, as the bites will start to soften if left out of the freezer for too long. Once coated, return the yogurt bites to the parchment-lined baking sheet.
Step 6: Final Freezing and Storage
After all the yogurt bites have been coated, return the baking sheet to the freezer for another 30 minutes to an hour. This final freeze will help to set the coating and ensure the bites maintain their shape. Once they are firm and ready, you can transfer them to an airtight container for storage. Layering them with parchment paper in between can prevent them from sticking together. These 3 Ingredient Strawberry Yogurt Bites are best enjoyed within a week or two, though they are so delicious, they might not last that long! Remember to keep them frozen until you’re ready to indulge.
Conclusion:
There you have it – a simple yet delightful recipe for 3 Ingredient Strawberry Yogurt Bites! We’ve explored how easily these can come together, making them a perfect treat for both kids and adults alike. These bites are wonderfully versatile, offering a healthy and refreshing option for snack time, a light dessert, or even a fun addition to a packed lunch. Don’t be afraid to get creative with the serving suggestions – they’re fantastic on their own, but also wonderful layered in a parfait with granola and fresh fruit, or even as a topping for pancakes or waffles. Experiment with different fruit purees or even a touch of honey for added sweetness and flavor in your variations. The beauty of the 3 Ingredient Strawberry Yogurt Bites lies in their simplicity and adaptability. So, gather your ingredients and give them a try. I’m confident you’ll find them to be a new favorite!
Frequently Asked Questions:
Q1: Can I use a different type of yogurt for these 3 Ingredient Strawberry Yogurt Bites?
Absolutely! While Greek yogurt offers a nice thickness, you can certainly use plain regular yogurt or even a dairy-free alternative like coconut or almond yogurt. Just be mindful that the consistency might be a little thinner, so you might need to adjust the freezing time slightly.
Q2: How long do the 3 Ingredient Strawberry Yogurt Bites last in the freezer?
Properly stored in an airtight container or freezer bag, these 3 Ingredient Strawberry Yogurt Bites should stay fresh and delicious for up to 2-3 months. It’s always best to consume them sooner rather than later for the best texture and flavor, but they hold up quite well for an extended period.
Easy Ingredient Strawberry Yogurt Bites Recipe
Simple and delicious frozen yogurt bites packed with fresh strawberries and granola, perfect for a healthy snack or dessert.
Ingredients
-
1 cup yogurt of choice
-
½ cup fresh strawberries (hulled and diced)
-
¼ cup granola (smaller pieces work better)
-
½ cup granola (plus more for topping)
-
¾ cup fresh strawberries (sliced or chopped)
Instructions
-
Step 1
Gently combine the 1 cup of your chosen yogurt with the ½ cup of hulled and diced fresh strawberries. Fold gently to create a harmonious blend without completely mashing the strawberries. -
Step 2
Gently fold in the ¼ cup of smaller-grained granola. Aim for a delightful crunch within the bites. Do not overwork the mixture. -
Step 3
Prepare a baking sheet lined with parchment paper. Using a tablespoon or small cookie scoop, drop portions of the yogurt mixture onto the sheet. Freeze for at least 2 to 3 hours, or until completely solid. -
Step 4
In a separate bowl, combine the remaining ½ cup of granola with the ¾ cup of sliced or chopped fresh strawberries for the topping. Gently mix. -
Step 5
Once the yogurt bites are frozen, remove them from the freezer and gently roll each bite in the prepared granola and strawberry topping. Press lightly to adhere. Return coated bites to the baking sheet. -
Step 6
Return the baking sheet to the freezer for another 30 minutes to an hour to set the coating. Transfer to an airtight container for storage, keeping them frozen until ready to enjoy.
Important Information
Nutrition Facts (Per Serving)
It is important to consider this information as approximate and not to use it as definitive health advice.
Allergy Information
Please check ingredients for potential allergens and consult a health professional if in doubt.