Easy Homemade Aioli Recipe-Garlic Mayo Perfection
Aioli recipe: the mere mention of this creamy, garlicky concoction can conjure up images of sun-drenched Mediterranean meals and the irresistible aroma of roasted garlic mingling with olive oil. It’s no wonder why an authentic Aioli recipe is so beloved. More than just a simple sauce, aioli is a luxurious emulsion that transforms even the most humble ingredients into something extraordinary. It’s the secret weapon that elevates grilled vegetables, pan-seared fish, and even crispy fries from delicious to divine. What truly makes this classic aioli recipe so special is its elegant simplicity. The magic lies in the perfect balance of fresh garlic, rich olive oil, and often a touch of acidity, creating a depth of flavor that is both bold and beautifully nuanced. Prepare to be captivated by this foolproof guide to creating your own perfect Aioli recipe at home.
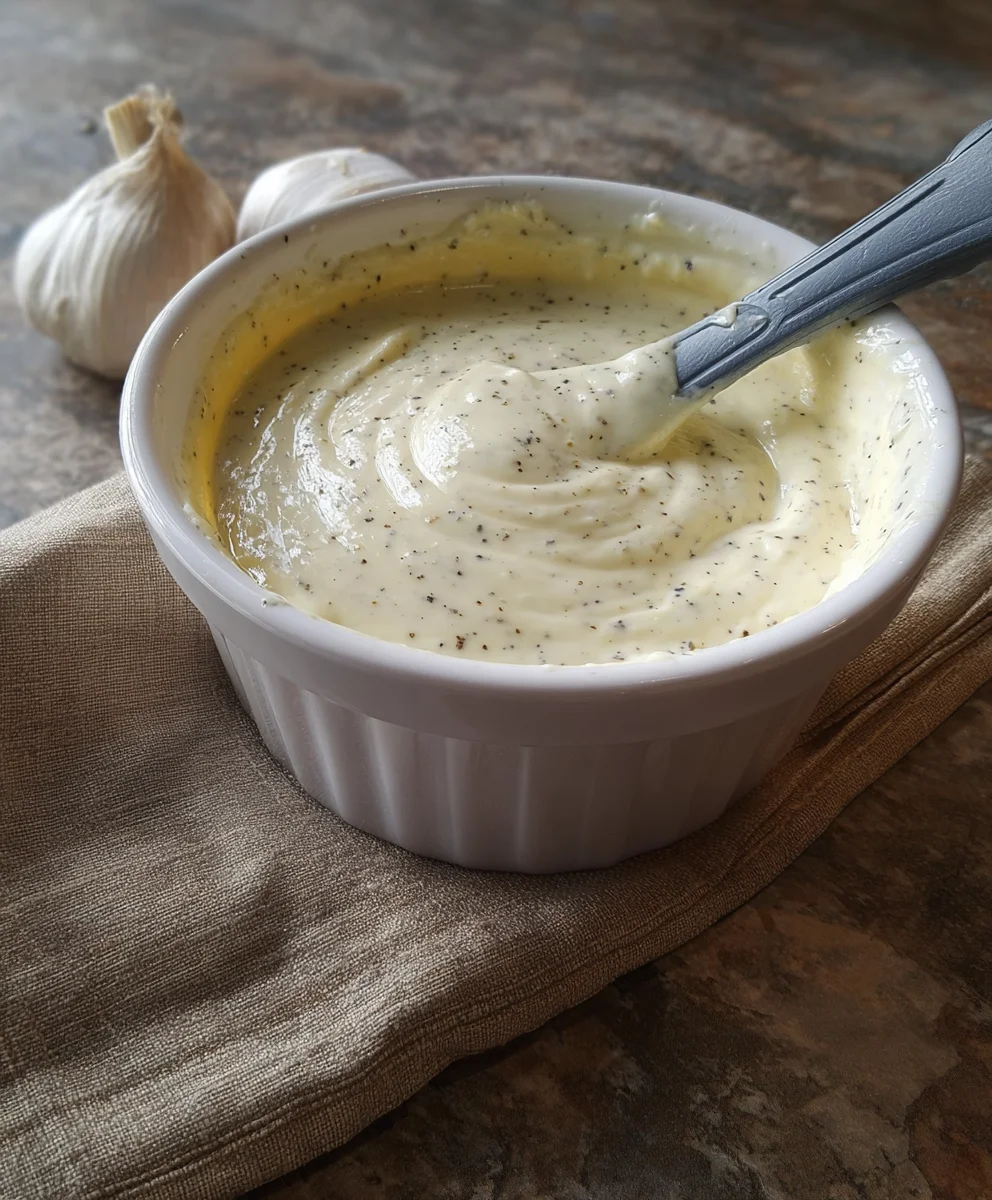
Ingredients:
- 1 cup mayonnaise
- 3 tablespoons fresh lemon juice
- ½ teaspoon black pepper
- 3 tablespoons garlic, finely minced
- 1 teaspoon fresh parsley, finely chopped
- 3 tablespoons ketchup
Preparing Your Flavorful Aioli
Gathering and Prepping Your Ingredients
Before we dive into creating this incredibly versatile aioli, let’s ensure you have everything ready to go. Having all your ingredients measured and prepped will make the process smooth and enjoyable. First, measure out your mayonnaise; a good quality, full-fat mayonnaise will yield the best results, providing a rich base for our aioli. Next, squeeze your lemons to get 3 tablespoons of fresh lemon juice. Freshly squeezed juice is crucial here, as bottled lemon juice often lacks the bright, vibrant flavor we’re aiming for. If you don’t have fresh lemons, a good quality bottled lemon juice can be a substitute, but the taste will be slightly different.
Now, for the star of our aioli: garlic! You’ll need 3 tablespoons of finely minced garlic. The finer you mince it, the more evenly the garlic flavor will distribute throughout the aioli. You can use a garlic press for an extra fine mince or finely chop it with a sharp knife. If you’re not a fan of raw garlic’s intensity, you can lightly sauté the minced garlic in a teaspoon of olive oil until it’s fragrant and slightly softened, then let it cool completely before adding it to the mayonnaise. This mellows the raw garlic bite while still providing a wonderful aroma and flavor.
Measure out ½ teaspoon of black pepper. Freshly ground black pepper will offer a more pungent and aromatic kick than pre-ground pepper, so if you have a pepper mill, now is the time to use it. Finally, finely chop your fresh parsley. Parsley adds a lovely freshness and a touch of herbaceousness that balances the richness of the aioli. You’ll need about 1 teaspoon of chopped parsley. Don’t underestimate the power of fresh herbs; they can elevate simple dishes to something truly special. Lastly, measure out 3 tablespoons of ketchup. This might seem like an unusual addition to a traditional aioli, but it’s the secret ingredient that gives this recipe a unique twist and a beautiful color.
The Simple Aioli Assembly
Combining the Base Elements
In a medium-sized mixing bowl, begin extract by adding your 1 cup of mayonnaise. This is the foundation of our aioli, so choose one you enjoy the taste of. Next, pour in the 3 tablespoons of fresh lemon juice. The acidity from the lemon juice will help to cut through the richness of the mayonnaise and brighten the overall flavor profile. At this stage, gently whisk the lemon juice into the mayonnaise until it’s well combined. You’ll notice the mayonnaise might lighten slightly in color and become a bit looser in consistency.
Now, it’s time to introduce the pungent goodness of garlic. Add the 3 tablespoons of finely minced garlic to the bowl. Whisk it thoroughly into the mayonnaise and lemon juice mixture. Ensure that the garlic is evenly distributed; you don’t want any large clumps of raw garlic. If you’re concerned about the raw garlic being too strong, remember the tip about lightly sautéing it beforehand. The longer the aioli sits, the more the garlic flavor will meld and mellow, so don’t be afraid to let it rest for a bit before serving.
Next, add the ½ teaspoon of black pepper. Stir it in until it’s fully incorporated. The pepper adds a subtle warmth and a hint of spice that complements the other flavors. Don’t overdo it with the pepper; you can always add a little more to taste later if you prefer a spicier aioli.
Adding the Finishing Touches
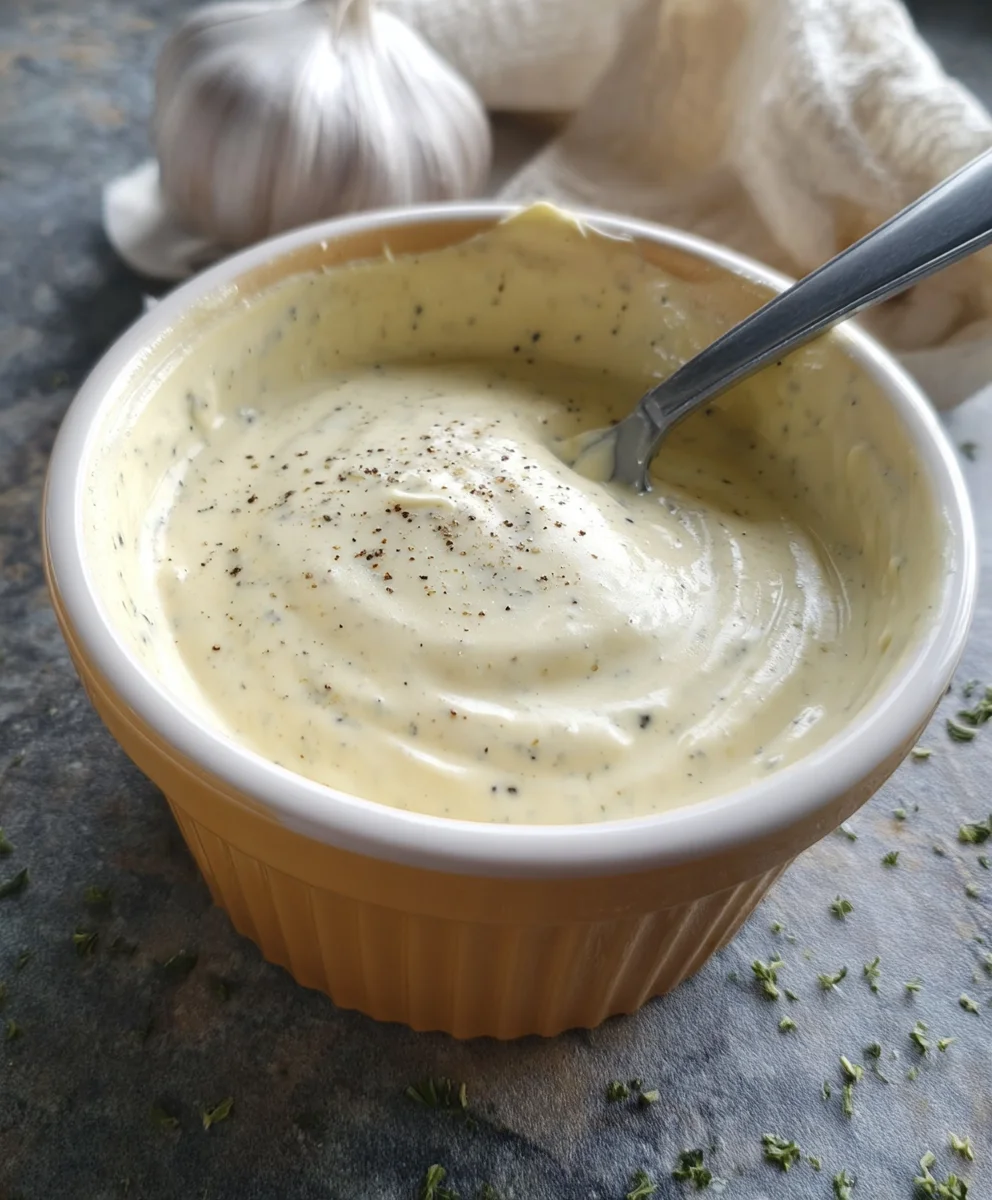
Now for the unexpected, yet delightful, addition: the ketchup. Carefully add the 3 tablespoons of ketchup to the bowl. This ingredient will not only contribute a slightly sweet and tangy note but also give your aioli a beautiful, rosy hue, making it visually appealing. Gently fold the ketchup into the mixture. Avoid vigorous whisking at this point, as you want to incorporate it without making the aioli too thin. You’re aiming for a lovely, marbled effect initially, then a consistent color as you continue to fold.
Finally, sprinkle in the 1 teaspoon of finely chopped fresh parsley. Fold this in gently. The parsley adds a burst of freshness and a vibrant green color that contrasts beautifully with the pinkish hue of the aioli. It also provides a lovely visual appeal, making your aioli look as good as it tastes.
Resting and Serving Your Aioli
Allowing Flavors to Meld
Once all your ingredients are thoroughly combined, cover the bowl tightly with plastic wrap or transfer the aioli to an airtight container. For the best flavor development, it’s highly recommended to let your aioli rest in the refrigerator for at least 30 minutes. This resting period is crucial for allowing all the flavors to meld together. The garlic will become less sharp, the lemon juice will have time to work its magic, and the ketchup will integrate seamlessly. The longer it sits, the more complex and harmonious the flavors will become. Ideally, letting it rest for a couple of hours or even overnight will result in an even more incredible depth of taste.
Before serving, give your aioli a good stir. Sometimes, a bit of liquid can separate, especially with the lemon juice. A quick whisk will bring it all back together. Taste your aioli and adjust seasonings if needed. You might find you want a little more pepper, a touch more lemon juice for brightness, or even a pinch of salt if your mayonnaise wasn’t very salty. Remember, this is your aioli, so make it exactly to your liking!
This aioli is incredibly versatile. It’s perfect as a dipping sauce for fries, roasted vegetables, or seafood. Spread it on sandwiches or burgers for an instant flavor upgrade. It also makes a fantastic base for other sauces or dressings. Enjoy the delicious results of your simple aioli-making endeavor!
Conclusion:
There you have it – your guide to mastering the classic Aioli Recipe! We’ve walked through the simple yet satisfying process of creating this versatile garlic mayonnaise from scratch. The beauty of this Aioli Recipe lies in its ability to elevate almost any dish, from crispy french fries and grilled seafood to roasted vegetables and hearty sandwiches. Don’t be afraid to get creative with your serving suggestions! Think of it as a flavor-packed dipping sauce, a luxurious spread, or even a vibrant dressing. If you’re feeling adventurous, consider adding a pinch of smoked paprika for a Spanish twist, a squeeze of lemon for extra brightness, or a touch of Dijon mustard for a subtle kick. The possibilities are truly endless! We encourage you to try this Aioli Recipe at home and discover just how easy and rewarding it is to create a homemade condiment that will impress your friends and family. Happy cooking!
Frequently Asked Questions about Aioli Recipe:
What is the best way to store leftover Aioli Recipe?
Once prepared, your Aioli Recipe can be stored in an airtight container in the refrigerator for up to 3-4 days. Ensure it’s always covered to prevent it from absorbing other odors in the fridge and to maintain its freshness.
Can I make Aioli Recipe without raw egg yolks?
Yes, absolutely! For those concerned about raw eggs, you can find many fantastic vegan Aioli Recipe variations that use aquafaba (the liquid from a can of chickpeas) or silken tofu as an emulsifier instead of egg yolks. The texture and flavor can be surprisingly close!
Easy Homemade Aioli Recipe-Garlic Mayo Perfection
A simple and flavorful homemade aioli recipe that elevates any dish with its garlic mayonnaise base and a hint of ketchup for a unique twist.
Ingredients
-
1 cup mayonnaise
-
3 tablespoons fresh lemon juice
-
1/2 teaspoon black pepper
-
3 tablespoons garlic, finely minced
-
1 teaspoon fresh parsley, finely chopped
-
3 tablespoons ketchup
Instructions
-
Step 1
Gather and prepare all your ingredients. Measure out mayonnaise, squeeze fresh lemon juice, finely mince garlic, measure black pepper, finely chop parsley, and measure ketchup. -
Step 2
In a medium mixing bowl, add the mayonnaise and fresh lemon juice. Whisk until well combined. -
Step 3
Add the finely minced garlic and black pepper to the bowl. Whisk thoroughly until evenly distributed. -
Step 4
Gently fold in the ketchup until the aioli has a consistent, rosy hue. -
Step 5
Sprinkle in the chopped fresh parsley and fold gently to incorporate. -
Step 6
Cover the bowl and refrigerate for at least 30 minutes to allow flavors to meld. Stir before serving and adjust seasonings if needed.
Important Information
Nutrition Facts (Per Serving)
It is important to consider this information as approximate and not to use it as definitive health advice.
Allergy Information
Please check ingredients for potential allergens and consult a health professional if in doubt.