Easy Twix Cookies – Decadent Caramel Chocolate Treat
Twix Cookies are about to become your new obsession! Forget the candy aisle; we’re bringin extractg that irresistible combination of crunchy shortbread, gooey caramel, and smooth chocolate right into your own kitchen. I’ve always been a sucker for the perfect balance of textures and flavors, and Twix Cookies absolutely deliver. What is it about these iconic candy bars that captivates us so? It’s that delightful interplay: the buttery crum extractble of the cookie base, the decadent stretch of the caramel, and the satisfying snap of chocolate. It’s a symphony in every bite. My version of Twix Cookies aims to capture that magic, elevating it with homemade goodness that feels both familiar and thrillingly new. Prepare yourself for a batch that will disappear faster than you can say ‘more please!’
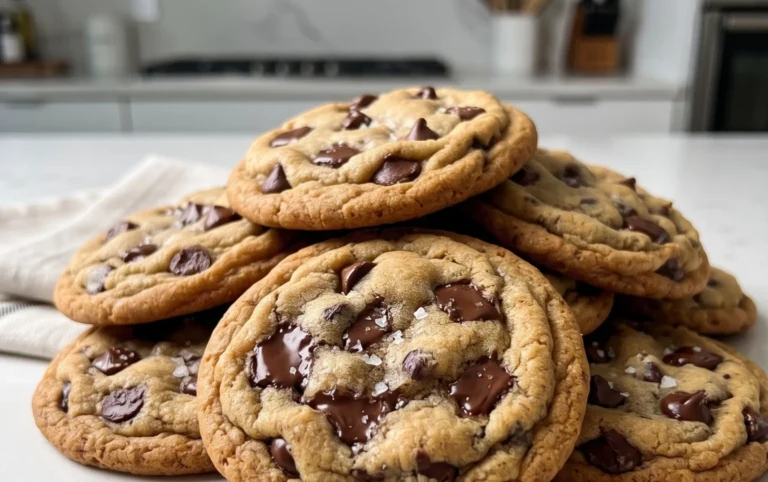
Twix Cookies
Get ready to experience a taste of pure indulgence! These Twix cookies are my absolute go-to when I’m craving something sweet, chewy, and undeniably delicious. They capture all the irresistible flavors and textures of the beloved candy bar – a buttery shortbread base, a gooey caramel center, and a decadent chocolate coating. What makes this recipe even better is how surprisingly easy it is to whip up. You don’t need to be a master baker to achieve cookie perfection. The secret lies in using a white cake mix, which provides the perfect tender and slightly crum extractbly texture that forms the foundation of our Twix cookie dream. So, preheat your ovens, gather your ingredients, and let’s dive into making these little pockets of joy.
Ingredients:
Crafting the Cookie Base
The first step to creating these amazing Twix cookies is to prepare the dough that will form the buttery, crum extractbly base. In a large mixing bowl, combine the contents of your 15.25-ounce box of white cake mix with ¾ cup of all-purpose flour. Whisk these dry ingredients together until they are well incorporated. This ensures that the leavening agents and starches from the cake mix and flour are evenly distributed, which is crucial for consistent cookie texture.
Next, add 1 cup of softened salted butter to the dry ingredients. It’s important that the butter is softened, not melted. Softened butter will cream together with the dry ingredients, creating a crum extractbly texture that will later bind together to form a cohesive dough. Using an electric mixer on low speed, or a sturdy spoon and some elbow grease, begin extract to mix the butter into the cake mix and flour. Continue mixing until the mixture resembles coarse crum extractbs, similar to wet sand. This might take a few minutes. Don’t overmix at this stage; we’re just aiming for that crum extractbly texture.
Once you have your coarse crum extractb mixture, it’s time to bring it all together into a dough. Gently press and knead the crum extractbs together in the bowl with your hands. You can also use the mixer on its lowest setting. The goal is to form a soft, pliable dough that holds together when squeezed. If the dough seems a bit too dry and won’t quite come together, you can add another teaspoon or two of all-purpose flour, but be very sparing with it. You want a dough that is manageable and not sticky.
Creating the Gooey Caramel Center
Now for the magical part – the caramel! In a small, microwave-safe bowl, combine the 1 ¼ cups of caramel bits with 1 Tablespoon of heavy cream. The heavy cream is key to achieving a smooth, luscious caramel sauce that will ooze out of your cookies.
Place the bowl in the microwave and heat in 30-second intervals, stirring well after each interval, until the caramel bits are completely melted and smooth. This usually takes about 1 to 1.5 minutes in total, depending on your microwave’s power. Be careful not to overheat the caramel, as it can become tough. Once melted, stir the caramel until it’s completely smooth and creamy. This will create the delightful caramel layer that makes these cookies so irresistible. Set this caramel mixture aside for now.
Assembling and Baking the Twix Cookies
Preheat your oven to 350°F (175°C). Line baking sheets with parchment paper. This is an important step as it prevents the cookies from sticking and makes for easier cleanup.
Now, take about 1 to 2 tablespoons of the cookie dough and flatten it into a small disc in the palm of your hand. It doesn’t need to be perfectly round; we’re going for a rustic, homemade look. Spoon about ½ to 1 teaspoon of the prepared caramel mixture onto the center of the dough disc. You don’t want to overfill it, or the caramel will ooze out too much during baking.
Carefully fold the edges of the dough up and around the caramel, enclosing it completely. Gently roll the dough between your palms to form a smooth ball, ensuring the caramel is senon-alcoholic aled inside. Place the cookie dough balls onto your prepared baking sheets, leaving about 2 inches of space between each cookie as they will spread slightly.
Bake the cookies for 10-12 minutes, or until the edges are lightly golden brown and the centers look set but still slightly soft. It’s better to underbake them slightly than overbake, as they will continue to cook as they cool. Once baked, let the cookies cool on the baking sheets for about 5 minutes before transferring them to a wire rack to cool completely. This allows them to firm up properly.
The Decadent Chocolate Drizzle
Once your Twix cookies have cooled completely, it’s time for the final flourish – a delicious chocolate drizzle. In a small, microwave-safe bowl, combine the 1 cup of semi-sweet chocolate chips (or mini semi-sweet chocolate chips) with ½ Tablespoon of salted butter. The butter helps the chocolate melt smoothly and gives it a nice sheen.
Microwave the chocolate chips and butter in 30-second intervals, stirring after each interval, until the chocolate is completely melted and smooth. Again, be careful not to overheat. Once melted, stir the chocolate until it’s glossy and pourable.
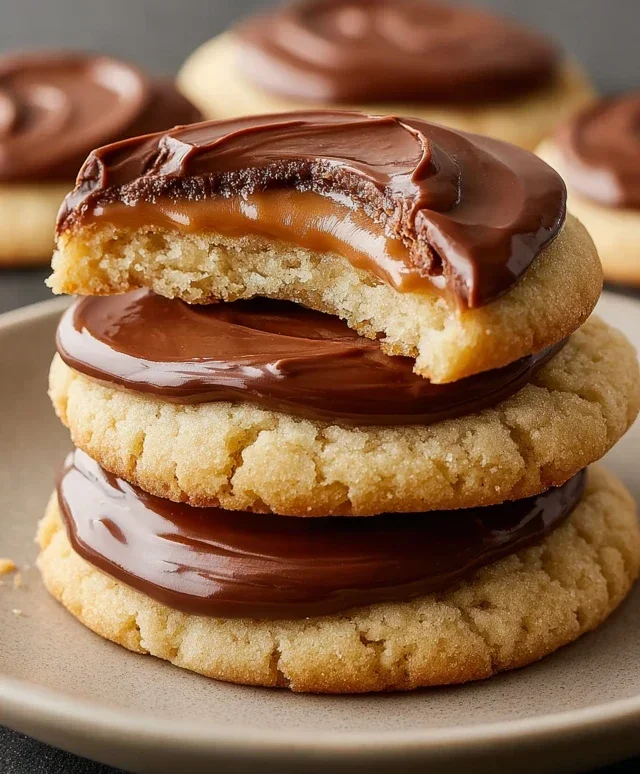
Using a spoon or a piping bag with a fine tip, drizzle the melted chocolate over the cooled cookies. You can create zig-zag patterns, lines, or even dip the bottoms of the cookies in the chocolate for a more substantial coating. Let the chocolate set completely at room temperature or speed up the process by placing the cookies in the refrigerator for about 10-15 minutes.
And there you have it! Perfectly delicious Twix cookies, ready to be devoured. These are perfect for sharing (or not!), and are sure to become a new favorite in your baking repertoire. Enjoy every delightful, caramel-filled, chocolate-covered bite!
Conclusion:
And there you have it! These Twix cookies are truly a revelation for any cookie lover. The magic lies in the perfect harmony of a buttery shortbread base, a gooey caramel center, and a rich chocolatey coating. They’re surprisingly straightforward to make, offering that delightful homemade taste that store-bought treats just can’t replicate. Whether you’re looking to impress at a bake snon-alcoholic ale, treat your family, or simply indulge your own sweet tooth, these cookies are a guaranteed winner.
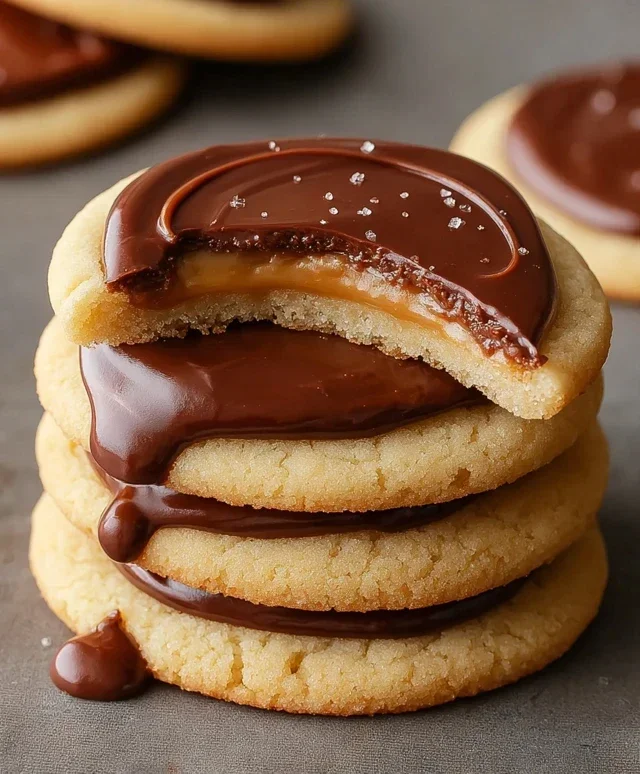
I love serving these alongside a tall glass of cold milk, or even a steaming cup of coffee for an after-dinner treat. They also make fantastic edible gifts, beautifully wrapped in cellophane or presented in a cookie tin. Don’t be afraid to get creative with variations! You could try adding a pinch of sea salt to the caramel for a salted caramel twist, or even sprinkle some chopped nuts on top of the chocolate before it sets. I truly encourage you to give this Twix cookie recipe a try – you won’t be disappointed by the incredible flavor and satisfaction of creating these delightful bites.
Frequently Asked Questions about Twix Cookies:
Q: Can I make the caramel filling from scratch?
Absolutely! While this recipe uses pre-made caramel candies for convenience, you can definitely make your own homemade caramel sauce. Just ensure it’s cooled slightly before spreading it over the shortbread base to prevent it from melting the cookie. Cooking caramel from scratch takes a bit more practice, but the reward is a wonderfully rich and personalized flavor.
Q: How should I store these Twix cookies?
Store your finished Twix cookies in an airtight container at room temperature for up to 3-4 days. If it’s particularly warm where you live, you might consider storing them in the refrigerator to prevent the chocolate from melting. They also freeze well; simply wrap them individually in plastic wrap and then place them in a freezer-safe bag for up to 2 months. Thaw them at room temperature before enjoying.
Q: Can I use different types of chocolate?
Yes, you can! While milk chocolate is traditional for a classic Twix cookie flavor, feel free to experiment. Dark chocolate will give a more intense cocoa experience, while white chocolate offers a sweeter, creamier contrast. You could even do a combination of chocolates for a visually appealing and complex flavor profile. Just ensure your chocolate is good quality for the best melting and setting results.
Twix Cookies
A delightful cookie inspired by the classic Twix bar, featuring a chewy cookie base, a layer of caramel, and a chocolate coating.
Ingredients
-
1 box white cake mix (15.25 ounces)
-
¾ cup all-purpose flour
-
1 cup salted butter, softened
-
1 ¼ cups caramel bits
-
1 Tablespoon heavy cream
-
1 cup semi-sweet chocolate chips or mini semi-sweet chocolate chips
-
½ Tablespoon salted butter
Instructions
-
Step 1
Preheat oven to 350°F (175°C). Line baking sheets with parchment paper. -
Step 2
In a large bowl, combine the white cake mix and ¾ cup all-purpose flour. -
Step 3
Add 1 cup of softened salted butter to the dry ingredients and mix until crumbly. -
Step 4
Press the dough evenly into the bottom of an 8×8 inch baking pan. -
Step 5
In a small microwave-safe bowl, combine the 1 ¼ cups caramel bits and 1 Tablespoon heavy cream. Microwave in 30-second intervals, stirring in between, until smooth and melted. Pour evenly over the cookie dough. -
Step 6
Bake for 20-25 minutes, or until the edges are golden brown and the caramel is bubbly. -
Step 7
While the cookies are still warm, melt 1 cup of semi-sweet chocolate chips with ½ Tablespoon salted butter. You can do this in a double boiler or in the microwave in 30-second intervals, stirring until smooth. -
Step 8
Spread the melted chocolate evenly over the caramel layer. -
Step 9
Let the chocolate set completely, then cut into bars.
Important Information
Nutrition Facts (Per Serving)
It is important to consider this information as approximate and not to use it as definitive health advice.
Allergy Information
Please check ingredients for potential allergens and consult a health professional if in doubt.