Easy Mini Apple Pies Delicious & Simple Recipe
Mini Apple Pies are the quintessential autumn treat, aren’t they? There’s something incredibly comforting and nostalgic about biting into a warm, flaky pastry filled with tender, spiced apples. I absolutely adore making them because they’re perfectly portioned – no need to stress about slicing a whole pie, and they’re ideal for sharing (or not!). What makes these mini apple pies truly special is that they capture all the rich, cozy flavors of a traditional apple pie but in an adorable, bite-sized package. They’re fantastic for parties, bake snon-alcoholic ales, or simply as a delightful after-school snack that feels like a special occasion. Get ready to fill your kitchen with the irresistible aroma of cinnamon and baked apples as we dive into creating these delightful treats.
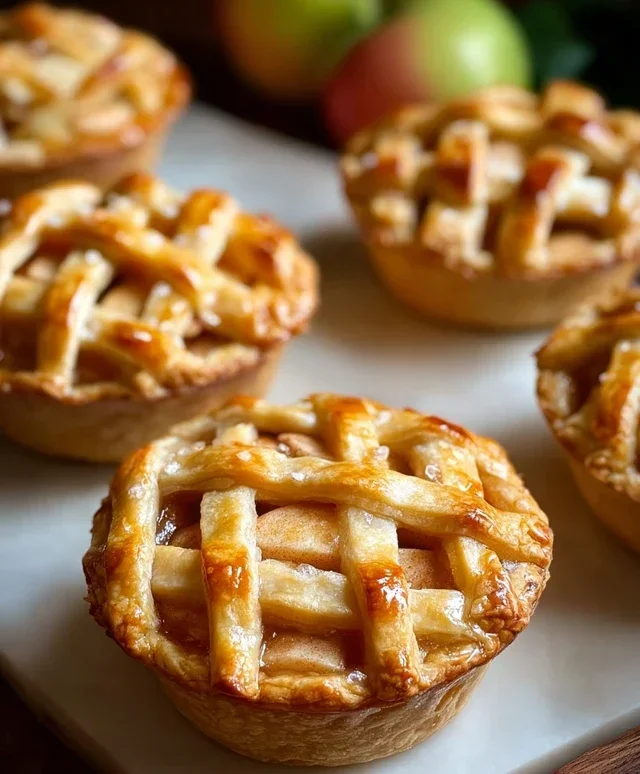
Mini Apple Pies
There’s something undeniably comforting about a warm apple pie. The sweet, slightly tart filling encased in a flaky, buttery crust is a classic for a reason. But sometimes, a whole pie feels like a commitment, or perhaps you’re hosting a gathering and want to offer individual, charming portions. That’s where these mini apple pies come in! They are the perfect size for a single serving of pure, unadulterated apple pie bliss. Whether you’re a seasoned baker or just looking for a fun and relatively easy dessert project, these miniature marvels are sure to impress. They’re also incredibly versatile – serve them warm with a scoop of vanilla ice cream or a dollop of whipped cream for an extra special treat. Let’s get baking!
Ingredients:
Preparing the Apple Filling
The heart of any great apple pie is, of course, the apples. For these mini pies, we want a filling that is tender, flavorful, and not too watery. Tart apples are my go-to because they hold their shape beautifully during baking and provide a lovely contrast to the sweetness of the sugar. Granny Smith are a fantastic choice for their tartness and firm texture, while Honey Crisp offers a delightful blend of sweet and tart with a crisp bite.
Step 1: Apple Preparation and Flavor Infusion
Begin extract by peeling, coring, and slicing your 4 tart apples. Aim for slices that are about 1/4 to 1/2 inch thick. You don’t want them too thin, or they might turn mushy, nor too thick, which could prevent them from cooking evenly. Once your apples are sliced, place them in a medium bowl. Add the 1 tablespoon of lemon juice. The lemon juice not only adds a subtle tang but also helps prevent the apples from browning, keeping your filling looking fresh and vibrant.
Step 2: Sweetness and Spice Harmony
Next, it’s time to introduce the flavor enhancers for our apple filling. Sprinkle in the 1/4 cup of granulated white sugar. This will provide the primary sweetness. Follow this with the 1/4 cup of white flour. The flour acts as a thickener, ensuring that your pie filling isn’t runny after baking. Finally, add the 1 teaspoon of ground cinnamon. Cinnamon is the quintessential spice for apple pie, and its warm, aromatic notes are essential. Gently toss all the ingredients together until the apple slices are evenly coated with the sugar, flour, and cinnamon mixture. Allow this mixture to sit for about 5-10 minutes. This resting period allows the apples to release some of their juices, which will then combine with the flour to create a lovely, syrupy consistency.
Assembling the Mini Pies
With our delicious apple filling ready, it’s time to assemble our mini pies. This is where the store-bought or homemade pie crusts come into play. If you’re using store-bought crusts, they’re usually quite forgiving and easy to work with, saving you a significant amount of time.
Step 3: Crafting the Pie Crust Bases
Preheat your oven to 400 degrees Fahrenheit (200 degrees Celsius). If you have a muffin tin or a mini pie pan, this is the perfect time to get it ready. Lightly grease the cups of your muffin tin or mini pie pan with butter or cooking spray to prevent sticking. Unroll your 2 pie crusts. Depending on the size of your muffin tin or mini pie pan, you might need to cut out circles from the pie crusts. For standard muffin tins, a 3.5 to 4-inch circle cutter is usually ideal. Gently press the pie crust circles into the prepared muffin tin cups or mini pie pan molds, ensuring they fit snugly and create a small “cup” for the filling. Don’t worry if the edges are a little uneven; it adds to the rustic charm!
Step 4: Filling and Sealing the Mini Pies
Now, carefully spoon the prepared apple filling into each pie crust shell. Try to distribute the apples and any accumulated juices evenly among the mini pies. Don’t overfill them, as the filling will bubble up slightly during baking. You want the filling to come up to just below the top edge of the crust. Now for the tops. You can either cut out smaller circles for full tops, create decorative lattice strips, or simply cut out decorative shapes like little apples or leaves to place on top. If you’re making full tops, place them over the filling and then crimp the edges of the top and bottom crusts together to seal them. This is important to keep the filling contained. You can use a fork to press down the edges, creating a nice, decorative seal.
Step 5: The Golden Finish – Egg Wash and Sugar Topping
This step is crucial for that beautiful, golden-brown finish and a delightful crunch. In a small bowl, whisk together the 1 large egg and the 1 tablespoon of water. This is your egg wash. Using a pastry brush, gently brush the tops of each mini pie with the egg wash. This will give them a lovely sheen and help them brown evenly. After applying the egg wash, sprinkle the 1 tablespoon of turbinado sugar (or granulated white sugar) evenly over the tops of the pies. Turbinado sugar has larger crystals and provides a fantastic crunch and a beautiful caramelized appearance.
Baking and Enjoying Your Mini Masterpieces
The final phase is baking. This is where the magic truly happens, transforming simple ingredients into delightful mini apple pies.
Step 6: Baking to Perfection
Place your prepared mini apple pies in the preheated oven. Bake for approximately 20-25 minutes, or until the crust is golden brown and the filling is bubbly and thickened. The exact baking time will depend on your oven and the size of your mini pies. Keep an eye on them to prevent over-browning. If the crust starts to get too dark before the filling is cooked, you can loosely tent the pies with aluminum foil. Once baked, carefully remove the muffin tin or mini pie pan from the oven. Let the mini apple pies cool in the pan for about 10-15 minutes before attempting to remove them. This allows them to set up properly. Then, carefully lift them out of the pan using a small spatula or by gently nudgin extractg them. Allow them to cool further on a wire rack. These mini apple pies are best served warm, but they are also delicious at room temperature. Enjoy the sweet, spiced apple goodness in every bite!

Conclusion:
And there you have it – your guide to crafting adorable and delicious mini apple pies! These little wonders are a fantastic way to enjoy the comforting flavors of apple pie in a perfectly portioned package. They’re incredibly versatile, making them ideal for casual get-togethers, special occasions, or even just a delightful afternoon treat. The beauty of this recipe lies in its simplicity, allowing the sweet, spiced apples and flaky crust to shine. I truly encourage you to give these mini delights a try; they’re sure to be a hit!
For serving, imagin extracte these warm little pies alongside a scoop of vanilla bean ice cream, a dollop of whipped cream, or even a drizzle of caramel sauce. They also make for a charming dessert when served with a hot cup of coffee or spiced cider. Don’t be afraid to experiment with variations! You could try adding a pinch of nutmeg or cardamom to the apple filling for an extra layer of warmth, or perhaps a handful of chopped pecans or walnuts for a delightful crunch. Feel free to use a different type of apple for a unique flavor profile – honeycrisp, fuji, or granny smith all offer wonderful results.
Frequently Asked Questions:
Can I make the crust ahead of time?
Absolutely! You can prepare the pie dough a day or two in advance and store it tightly wrapped in the refrigerator. It’s best to let it sit at room temperature for about 10-15 minutes before rolling it out.
What if I don’t have muffin tins?
No problem! You can also make these mini apple pies using ramekins or even by creating freeform hand pies. For hand pies, cut out circles of dough, fill one half, fold the other half over, and crimp the edges.
Mini Apple Pies
Individual sized apple pies with a classic cinnamon-spiced filling and a flaky crust.
Ingredients
-
4 tart apples like Granny Smith or Honey Crisp
-
1 tablespoon lemon juice
-
1/4 cup granulated white sugar
-
1/4 cup white flour
-
1 teaspoon ground cinnamon
-
2 tablespoons salted butter
-
2 store-bought or homemade pie crusts
-
1 large egg
-
1 tablespoon water
-
1 tablespoon turbinado sugar
Instructions
-
Step 1
Preheat your oven to 375°F (190°C). If using store-bought pie crusts, let them sit at room temperature for about 15 minutes. -
Step 2
Peel, core, and dice the apples. In a medium bowl, toss the diced apples with lemon juice, granulated white sugar, white flour, and ground cinnamon. -
Step 3
Cut the salted butter into small pieces and dot the apple mixture with the butter. Stir to combine. -
Step 4
Unroll or prepare your pie crusts. Use a cookie cutter or glass to cut out circles for the pie bases and tops. You should get enough for 6-8 mini pies. Line muffin tins or small pie dishes with the crust circles for the bases. -
Step 5
Divide the apple filling evenly among the pie crust bases. Place the top crust circles over the filling. Crimp the edges to seal. -
Step 6
In a small bowl, whisk together the large egg and water. Brush this egg wash over the tops of the mini pies. Sprinkle with turbinado sugar. -
Step 7
Bake for 20-25 minutes, or until the crust is golden brown and the filling is bubbly. -
Step 8
Let the mini apple pies cool slightly before serving.
Important Information
Nutrition Facts (Per Serving)
It is important to consider this information as approximate and not to use it as definitive health advice.
Allergy Information
Please check ingredients for potential allergens and consult a health professional if in doubt.