Homemade Oreo Cookies – Easy & Delicious Copycat Recipe
Homemade Oreo Cookies are a childhood dream realized, a sweet symphony of dark chocolatey goodness and creamy vanilla filling that has captivated taste buds for generations. Who doesn’t have a treasured memory associated with that iconic black disc and its luscious center? There’s something incredibly satisfying about twisting them apart, licking the cream, and then devouring the cookie. But what if I told you that you could recreate that magical experience, right in your own kitchen, and elevate it even further? Making your own Oreo cookies isn’t just about replicating a store-bought favorite; it’s about unlocking a new level of flavor and texture that store-bought simply can’t match. Imagin extracte the aroma filling your home as these delightful homemade Oreo cookies bake, a testament to your culinary prowess. Get ready to ditch the grocery aisle and embrace the joy of baking the ultimate homemade Oreo cookies!
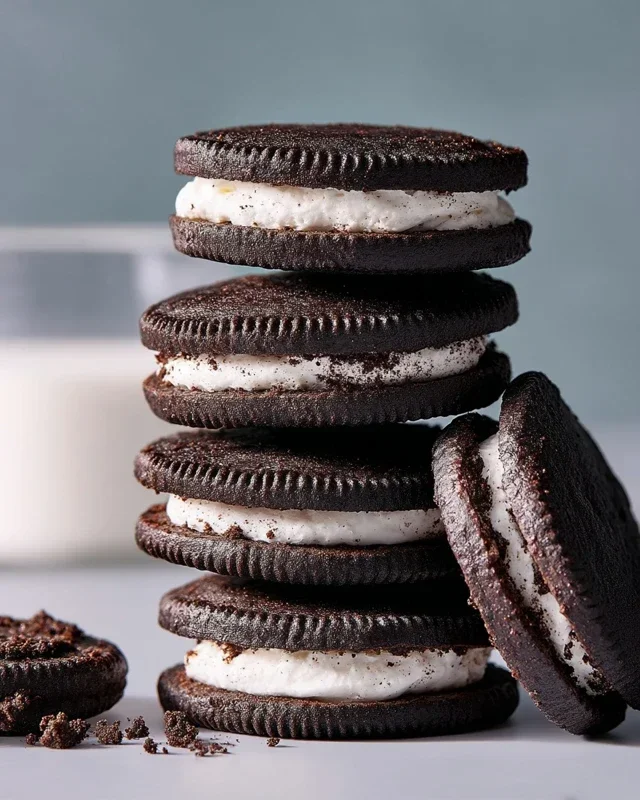
Homemade Oreo Cookies
There’s something undeniably special about a classic Oreo cookie. That perfectly crisp, dark chocolate cookie sandwiching a sweet, creamy filling is a flavor combination that has brought joy to millions. While store-bought Oreos are convenient, imagin extracte the satisfaction of creating these iconic treats right in your own kitchen! Making homemade Oreos is not as daunting as it might seem, and the reward of biting into a warm, freshly baked cookie is truly unparalleled. This recipe aims to replicate that beloved taste and texture, giving you a delicious homemade version that will impress friends and family alike. Get ready to embark on a delightful baking adventure!
Ingredients:
Cookie Dough Preparation
The foundation of any great cookie is a well-made dough. For our Oreos, we’ll be creating a rich, dark chocolate cookie that has just the right amount of crispness. The key here is to use good quality cocoa powder. While Dutch-process cocoa powder will give you a deep, dark color and a smoother flavor, if you can find black cocoa powder, you’ll achieve an even more intensely dark hue, truly mimicking the classic Oreo look.
1. Combine Dry Ingredients: In a medium bowl, whisk together the all-purpose flour, cocoa powder, baking soda, baking powder, and 1/4 teaspoon of fine sea salt. Whisking ensures that all the leavening agents and salt are evenly distributed throughout the flour, which is crucial for consistent cookie rise and flavor. Set this bowl aside.
2. Cream Butter and Sugar: In the bowl of a stand mixer fitted with the paddle attachment (or using a hand mixer and a large bowl), cream together the granulated sugar and the 10 tablespoons of cool, room-temperature unsalted butter. Beat them on medium speed until the mixture is light and fluffy, resembling pnon-alcoholic ale yellow clouds. This process, called creaming, incorporates air into the mixture, which contributes to the cookie’s texture. Scrape down the sides and bottom of the bowl as needed to ensure everything is incorporated evenly.
3. Add Egg and Vanilla: Add the room-temperature large egg and the 2 ½ teaspoons of pure vanilla extract to the creamed butter and sugar mixture. Mix on low speed until just combined. It might look a little curdled at this stage, but don’t worry, this will smooth out when you add the dry ingredients. Overmixing at this stage can develop the gluten in the flour too much, leading to tougher cookies.
4. Combine Wet and Dry Ingredients: Gradually add the reserved dry ingredients to the wet ingredients, mixing on low speed until just combined and a stiff dough forms. Be careful not to overmix. The dough will be quite dark and may seem a bit crum extractbly, but it should hold together when you squeeze it.
5. Chill the Dough: Turn the dough out onto a large piece of plastic wrap. Form it into a disc, wrap it tightly, and refrigerate for at least 2 hours, or preferably overnight. Chilling the dough is a critical step for several reasons. It solidifies the butter, making the dough easier to handle and roll out. It also allows the flavors to meld and develop, resulting in a more delicious cookie.
Forming and Baking the Cookies
Once the dough is well-chilled, we can move on to shaping and baking these delightful cookies.
1. Roll and Cut the Dough: Lightly flour your work surface and your rolling pin. Unwrap the chilled dough and let it sit at room temperature for about 5-10 minutes if it’s very stiff, just enough to make it pliable. Roll the dough out to about 1/8 to 1/4 inch thickness. This thickness is important for achieving that classic Oreo crispness. If the dough cracks around the edges, you can gently press it back together. Use a round cookie cutter (about 1.5 to 2 inches in diameter) to cut out your cookie shapes. Gently re-roll scraps as needed, but try to handle them as little as possible to avoid developing gluten.
2. Prepare for Baking: Line baking sheets with parchment paper. Carefully transfer the cut-out cookie circles to the prepared baking sheets, leaving about an inch of space between each cookie. You can lightly score a pattern onto the top of the cookies with the back of a fork at this stage if you like, though it’s not essential for the classic Oreo look.
3. Bake to Perfection: Preheat your oven to 350°F (175°C). Bake the cookies for 9-12 minutes, or until they are firm to the touch and the edges look set. The baking time will vary depending on the size and thickness of your cookies. They should not appear overly dry or brittle at this stage, as they will crisp up as they cool.
4. Cool the Cookies: Let the cookies cool on the baking sheets for 5 minutes before carefully transferring them to a wire rack to cool completely. It’s important to let them cool on the baking sheet for a few minutes because they are very delicate when hot and can easily break if moved too soon.
Creamy Filling Preparation
Now for the star of the show – that sweet, creamy filling that makes Oreos so irresistible!
1. Cream the Butter: In a medium bowl, cream together the remaining 1 stick (113 grams) of unsalted butter with the 1/8 teaspoon of fine sea salt using an electric mixer until smooth and creamy. This is the base for our delicious filling.
2. Add Powdered Sugar and Vanilla: Gradually add the sifted powdered sugar to the creamed butter, about ½ cup at a time, mixing on low speed until just combined. Sifting the powdered sugar is crucial to avoid lumps and ensure a smooth filling. Once all the sugar is incorporated, add the remaining vanilla extract.
3. Beat Until Fluffy: Increase the mixer speed to medium-high and beat the filling for 2-3 minutes, until it is light, fluffy, and smooth. You want it to be a consistency that’s easy to spread but firm enough to hold its shape. If the filling seems too stiff, you can add a teaspoon of milk or cream at a time until it reaches your desired consistency.
Assembling Your Homemade Oreos
The final, and arguably most exciting, step is assembling your homemade Oreo cookies.
1. Pair the Cookies: Once the cookie discs are completely cool, select pairs of similar-sized cookies.
2. Fill and Sandwich: Spoon about 1 to 2 teaspoons of the cream filling onto the flat side of one cookie. Gently spread it to the edges with a small spatula or the back of a spoon. Place the other cookie on top, flat side down, and gently press to sandwich the filling. Repeat with the remaining cookie halves.
Enjoy your delicious, homemade Oreo cookies! They are best enjoyed within a few days, stored in an airtight container at room temperature.
*Note on Black Cocoa Powder: Black cocoa powder is a highly alkalized cocoa with a very dark color. It can be found at specialty baking stores or online. If you can’t find it, Dutch-process cocoa powder will still yield excellent results.
Conclusion:
And there you have it – your very own batch of delicious, homemade Oreo cookies! Isn’t it amazing how simple ingredients can transform into such a beloved treat? This recipe is fantastic because it allows you to control the quality and flavor, creating a cookie that’s both visually stunning and incredibly satisfying. The rich cocoa flavor combined with the sweet, creamy filling is simply irresistible.
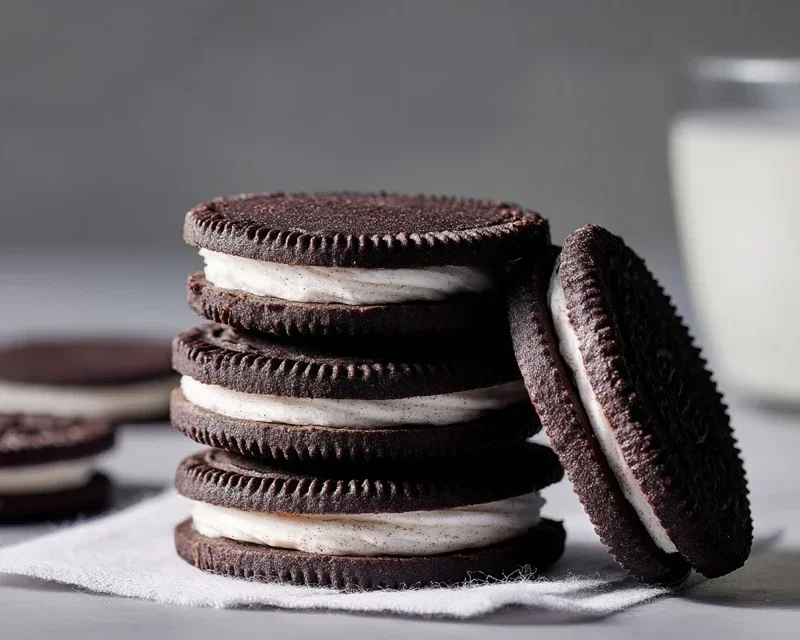
These homemade Oreo cookies are perfect enjoyed with a tall glass of cold milk, as a delightful addition to ice cream sundaes, or even crum extractbled over a cheesecake. For those looking to get creative, consider adding a pinch of espresso powder to the cookie dough for a mocha twist, or perhaps a hint of peppermint extract for a refreshing change. You could also experiment with different colored fillings for a fun, festive look!
I truly encourage you to give this recipe a try. It’s a rewarding baking project that delivers exceptional results, and the joy of biting into a cookie you made yourself is unparalleled. Don’t be intimidated; embrace the process and enjoy the delicious outcome!
Frequently Asked Questions:
Can I make these vegan?
Yes, absolutely! You can easily make these homemade Oreo cookies vegan by substituting the butter with vegan butter or coconut oil, and using a plant-based milk for the filling. Ensure your cocoa powder is also vegan-friendly.
How do I store homemade Oreos?
Store your cooled cookies in an airtight container at room temperature. They should stay fresh for about 5-7 days, though I doubt they’ll last that long!
What if my filling is too runny?
If your filling seems too runny, simply add a little more powdered sugar, about a tablespoon at a time, until it reaches your desired consistency. If it’s too stiff, a tiny splash of milk or cream can help loosen it up.
Homemade Oreo Cookies
Classic chocolate sandwich cookies with a creamy vanilla filling, made from scratch for a superior taste and texture.
Ingredients
-
1 1/4 cups (159 grams) all-purpose flour
-
1/2 cup (43 grams) Dutch-process cocoa powder
-
1 teaspoon baking soda
-
1/4 teaspoon baking powder
-
1/4 teaspoon fine sea salt
-
1 cup (200 grams) granulated sugar
-
10 tablespoons (142 grams) unsalted butter, at a cool room temperature, cut into chunks
-
1 large egg, at room temperature
-
1 stick (113 grams) unsalted butter, at a cool room temperature
-
2 1/2 teaspoons pure vanilla extract
-
2 1/2 cups (313 grams) powdered sugar, sifted
-
1/8 teaspoon fine sea salt
Instructions
-
Step 1
Whisk together flour, cocoa powder, baking soda, baking powder, and 1/4 teaspoon salt in a medium bowl. Set aside. -
Step 2
In a large bowl, cream together granulated sugar and 10 tablespoons butter until light and fluffy. Beat in the egg and vanilla extract until well combined. -
Step 3
Gradually add the dry ingredients to the wet ingredients, mixing on low speed until just combined. The dough will be stiff. -
Step 4
Divide the dough in half, flatten each half into a disc, wrap in plastic wrap, and refrigerate for at least 1 hour. -
Step 5
Preheat oven to 350°F (175°C). Line baking sheets with parchment paper. Roll out one disc of dough to 1/8-inch thickness. Cut out circles using a 1.5-inch round cutter and place on prepared baking sheets. -
Step 6
Bake for 10-12 minutes, or until edges are firm. Let cool on the baking sheets for a few minutes before transferring to a wire rack to cool completely. -
Step 7
For the filling, beat together 1 stick butter, sifted powdered sugar, and 1/8 teaspoon salt until smooth and creamy. Add more vanilla extract if desired. -
Step 8
Pair up cooled cookie halves and spread about 1 tablespoon of filling on the flat side of one cookie. Top with another cookie and gently press together.
Important Information
Nutrition Facts (Per Serving)
It is important to consider this information as approximate and not to use it as definitive health advice.
Allergy Information
Please check ingredients for potential allergens and consult a health professional if in doubt.