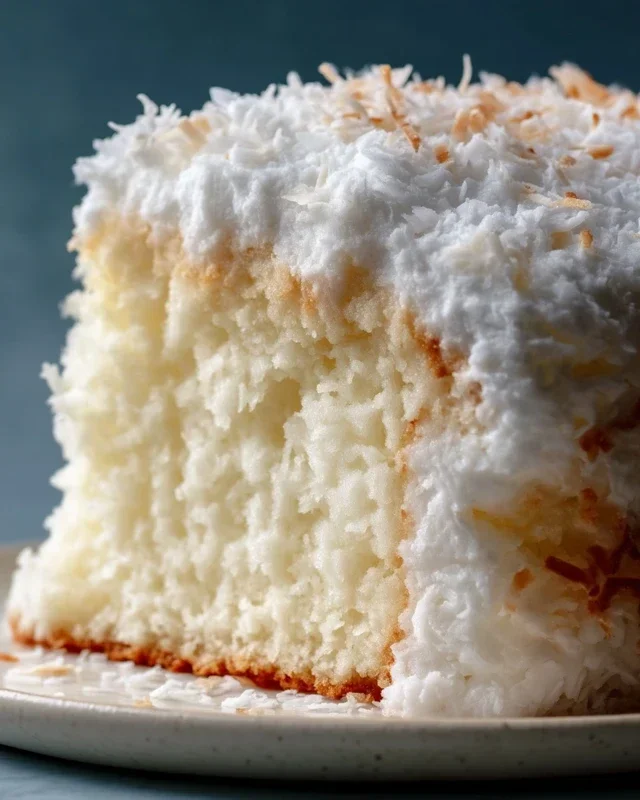
Easy Coconut Cloud Cake Recipe – Light & Airy Delight
The Coconut Cloud Cake Recipe is more than just a dessert; it’s an experience that transports you to a tropical paradise with every fluffy bite. Imagin extracte the lightest, airiest cake you’ve ever tasted, kissed with the subtle sweetness of coconut, all topped with a dreamy, billowy frosting that feels like biting into a literal cloud. It’s no wonder this Coconut Cloud Cake Recipe is a perennial favorite, a go-to for celebrations, special occasions, or simply when you need a moment of pure, unadulterated bliss. What sets this cake apart is its incredible texture – impossibly light, yet wonderfully moist, achieved through a delicate balance of ingredients and technique. The coconut flavor is present but never overpowering, allowing the pure essence of the cake to shine through, making it a universally loved treat that’s surprisingly easy to create in your own kitchen.
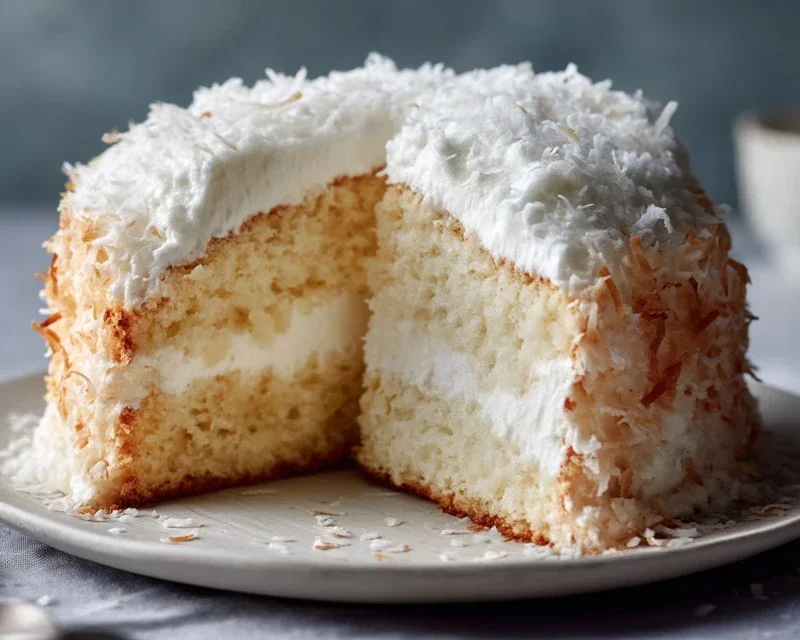
Coconut Cloud Cake Recipe
Imagin extracte a cake so light and airy, it practically floats. That’s the dream we’re chasing with this Coconut Cloud Cake! This recipe is designed to bring a delightful tropical essence to your dessert table, perfect for birthdays, special occasions, or just when you need a little slice of paradise. The combination of subtle coconut flavor in the cake, a lusciously creamy frosting, and a sprinkle of toasted coconut on top creates a truly heavenly experience. It’s a cake that’s both elegant and incredibly comforting, and surprisingly straightforward to make. Let’s get baking!
Ingredients:
Cake Preparation
1. Preheat and Prepare Pans: Before you even think about mixing ingredients, preheat your oven to 350°F (175°C). This is crucial for even baking. Grease and flour two 9-inch round cake pans. You can also line the bottoms with parchment paper for extra insurance against sticking, which is a technique I always use. This simple step saves so much heartache later.
2. Combine Dry Ingredients: In a medium bowl, whisk together the all-purpose flour, baking powder, and salt. Whisking not only combines them but also aerates the flour, which contributes to a lighter cake. Set this aside.
3. Cream Butter and Sugar: In a large mixing bowl, or the bowl of your stand mixer fitted with the paddle attachment, cream together the softened unsalted butter and granulated sugar. Beat them on medium-high speed until the mixture is light and fluffy, about 3-5 minutes. This process incorporates air into the batter, which is essential for a tender crum extractb. Scrape down the sides of the bowl periodically to ensure everything is evenly mixed.
4. Incorporate Eggs and Extracts: Add the room temperature eggs one at a time, beating well after each addition. It’s important that the eggs are at room temperature; cold eggs can cause the butter mixture to curdle. If your eggs are cold, you can place them in a bowl of warm water for about 5-10 minutes. Once the eggs are fully incorporated, beat in the vanilla extract and coconut extract. The extracts add that delightful aromatic quality that makes this cake so special.
5. Alternating Wet and Dry Ingredients: Now, we’ll alternate adding the dry ingredients and the coconut milk to the butter mixture. Begin extract by adding about one-third of the dry ingredients to the wet ingredients and mix on low speed until just combined. Then, add half of the coconut milk and mix until incorporated. Repeat this process, adding another third of the dry ingredients, then the remaining coconut milk, and finally the last third of the dry ingredients. Be careful not to overmix at this stage; overmixing can develop the gluten in the flour, leading to a tough cake. Mix only until the streaks of flour disappear.
6. Bake the Cakes: Divide the batter evenly between the prepared cake pans. Smooth the tops with a spatula. Bake for 28-35 minutes, or until a wooden skewer or toothpick inserted into the center of the cakes comes out clean. The exact baking time will depend on your oven, so start checking around the 28-minute mark. Once baked, let the cakes cool in the pans on a wire rack for about 10-15 minutes before inverting them onto the wire rack to cool completely. It’s crucial that the cakes are entirely cool before frosting; otherwise, the frosting will melt and slide right off.
Frosting Creation
1. Whip the Cream: In a clean, chilled bowl, whip the heavy whipping cream until stiff peaks form. This means that when you lift the whisk, the cream holds its shape and the peaks stand straight up. This is the foundation of our light and airy frosting.
2. Beat Cream Cheese and Sugar: In a separate bowl, beat the softened cream cheese and powdered sugar together until smooth and creamy. Ensure there are no lumps of cream cheese.
3. Combine Frosting Ingredients: Gently fold the whipped cream into the cream cheese mixture. Add the vanilla extract and coconut extract. Fold until just combined and no streaks of cream cheese remain. Be careful not to overmix, as this can deflate the whipped cream. The result should be a fluffy, slightly tangy, and delightfully coconut-infused frosting.
Assembly and Topping
1. Level the Cakes (Optional but Recommended): If your cakes have domed tops, you can level them with a serrated knife to create a flat surface for easier stacking and frosting. This gives a more professional look.
2. Frost the Cake: Place one cooled cake layer on your serving plate. Spread a generous layer of frosting over the top. Carefully place the second cake layer on top. Frost the top and sides of the entire cake. Use an offset spatula for a smooth finish, or create swirls for a more rustic look.
3. Add the Topping: Sprinkle the sweetened shredded coconut over the top and sides of the cake. For an extra pop of flavor and texture, consider toasting your shredded coconut in a dry skillet over medium-low heat until golden brown and fragrant. Let it cool completely before sprinkling. This adds a lovely nutty depth and a delightful crunch.
Serve this Coconut Cloud Cake and watch it disappear! It’s a simple pleasure that brings a touch of tropical bliss to any occasion. Enjoy every light, fluffy bite!
Conclusion:
There you have it – the recipe for our delightful Coconut Cloud Cake! This recipe truly shines with its incredibly light and airy texture, reminiscent of a fluffy cloud, and the subtle yet distinct tropical essence of coconut. It’s the perfect dessert for any occasion, from a casual afternoon tea to a celebratory gathering. The simplicity of the ingredients and the straightforward steps make it an approachable bake for even novice bakers, promising a stunning and delicious result every time. I’m confident you’ll fall in love with its delicate crum extractb and heavenly coconut flavor.
This Coconut Cloud Cake is wonderfully versatile when it comes to serving. It’s divine on its own, allowing its pure flavor to take center stage. For an extra touch of indulgence, consider serving it with a dollop of fresh whipped cream, a scattering of toasted coconut flakes, or even a light tropical fruit salsa. Looking for variations? You can easily adapt this recipe by folding in some shredded lime zest for a citrusy twist, or adding a tablespoon of rum extract extract to the batter for a hint of warmth. Don’t be afraid to experiment! I truly encourage you to give this Coconut Cloud Cake a try – you won’t regret it!
Frequently Asked Questions:
Can I make this cake ahead of time?
Absolutely! This cake can be baked a day in advance and stored at room temperature, tightly covered with plastic wrap, to maintain its freshness and moisture. It actually tastes even better the next day as the flavors have had a chance to meld.
What kind of coconut milk should I use?
For the best texture and flavor in this Coconut Cloud Cake recipe, I highly recommend using full-fat canned coconut milk. Lite coconut milk will result in a less rich and potentially drier cake.
How can I ensure my cake is light and fluffy?
The key to a light and fluffy texture lies in properly creaming the butter and sugar until pnon-alcoholic ale and fluffy, and gently folding in the dry ingredients. Be careful not to overmix once the flour is added, as this can develop the gluten and make the cake tough.
Coconut Cloud Cake Recipe
A light and airy coconut cake with a creamy coconut frosting, perfect for any celebration.
Ingredients
-
2 1/2 cups all-purpose flour
-
2 1/2 teaspoons baking powder
-
1/2 teaspoon salt
-
1 cup unsalted butter, softened
-
2 cups granulated sugar
-
4 large eggs, room temperature
-
1 teaspoon vanilla extract
-
1 teaspoon coconut extract
-
1 cup coconut milk
-
1 1/2 cups heavy whipping cream
-
8 oz cream cheese, softened
-
1/2 cup powdered sugar
-
1 cup sweetened shredded coconut
Instructions
-
Step 1
Preheat oven to 350°F (175°C). Grease and flour two 8-inch round cake pans. -
Step 2
In a medium bowl, whisk together the flour, baking powder, and salt. Set aside. -
Step 3
In a large bowl, cream together the softened butter and granulated sugar until light and fluffy. Beat in the eggs one at a time, then stir in the vanilla and coconut extracts. -
Step 4
Gradually add the dry ingredients to the wet ingredients, alternating with the coconut milk, beginning and ending with the dry ingredients. Mix until just combined. Do not overmix. -
Step 5
Divide the batter evenly between the prepared cake pans. Bake for 30-35 minutes, or until a wooden skewer inserted into the center comes out clean. -
Step 6
Let the cakes cool in the pans for 10 minutes before inverting them onto a wire rack to cool completely. -
Step 7
While the cakes cool, prepare the frosting. In a large bowl, beat the heavy whipping cream until stiff peaks form. In a separate bowl, beat the softened cream cheese and powdered sugar until smooth. Stir in the vanilla and coconut extracts. Gently fold the whipped cream into the cream cheese mixture. -
Step 8
Once the cakes are completely cool, frost the top of one cake layer, then place the second cake layer on top. Frost the top and sides of the cake with the remaining frosting. -
Step 9
Sprinkle the sweetened shredded coconut over the top of the cake.
Important Information
Nutrition Facts (Per Serving)
It is important to consider this information as approximate and not to use it as definitive health advice.
Allergy Information
Please check ingredients for potential allergens and consult a health professional if in doubt.