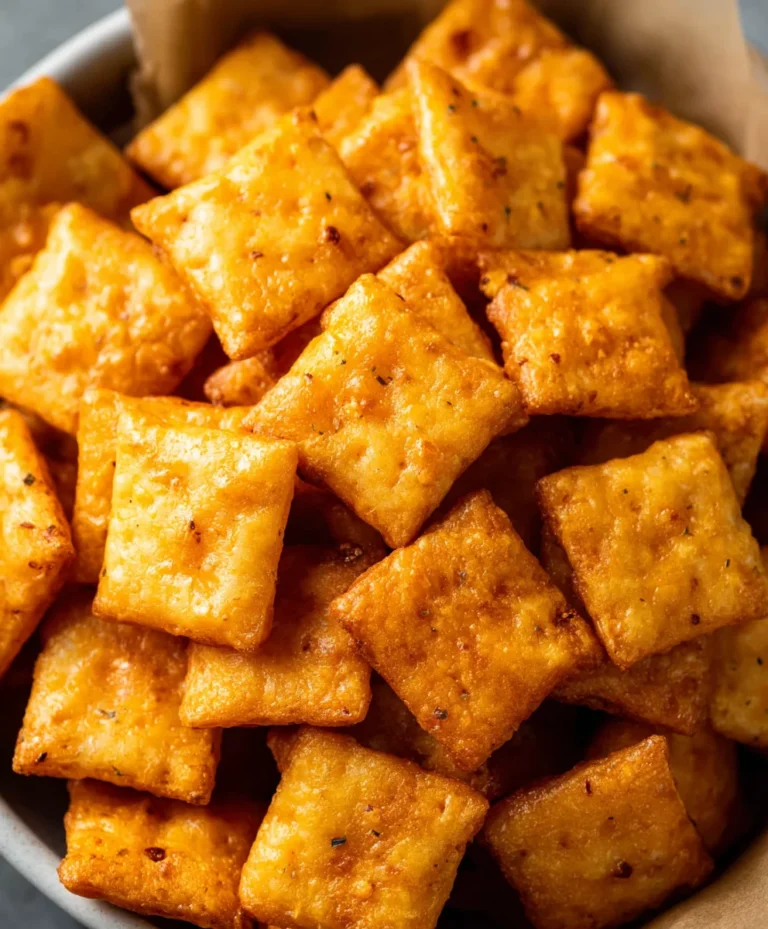
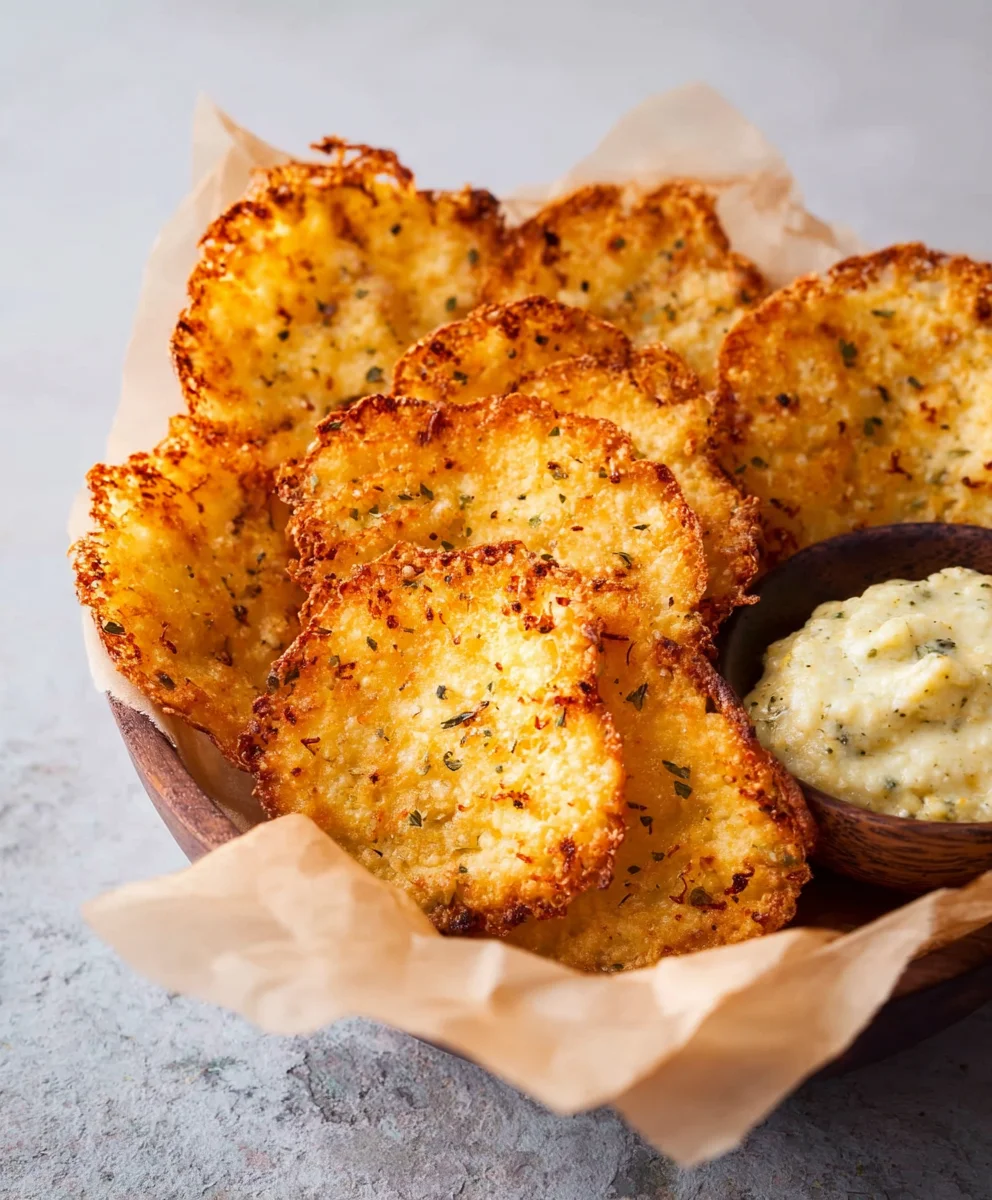
Crispy Cottage Cheese Chips- Easy & Delicious Snack
Crispy Cottage Cheese Chips are more than just a snack; they’re a revelation for your taste buds and a game-changer for anyone seeking a guilt-free crunch. Imagin extracte a chip that delivers satisfying crispness with a delightful tang, all while packing a protein punch that keeps you fueled. This is precisely what makes these Crispy Cottage Cheese Chips so incredibly beloved. Forget the greasy, empty calories of traditional chips; we’re talking about transforming humble cottage cheese into golden, irresistible bites of deliciousness. What truly sets them apart is their remarkable versatility. Whether you’re pairing them with your favorite salsa, topping a hearty salad, or simply enjoying them straight from the baking sheet, their unique texture and flavor profile offer a wholesome satisfaction that’s hard to beat. Prepare to be amazed by how simple ingredients can yield such extraordinary results.
Ingredients:
- 1 cup cottage cheese (small curds, drained very well)
- ¼ teaspoon garlic powder
- ¼ teaspoon onion powder
- ½ teaspoon dried herbs (optional, such as dried thyme, dried parsley, or a mix like Italian seasoning)
- Salt to taste
- Freshly ground black pepper to taste
- Olive oil spray
Preparing the Cottage Cheese Base
The foundation of our incredibly satisfying Crispy Cottage Cheese Chips is, of course, cottage cheese. It’s crucial to use small curd cottage cheese for the best texture. Before you begin extract, ensure you’ve drained the cottage cheese as thoroughly as possible. You can do this by placing it in a fine-mesh sieve over a bowl for at least 15-30 minutes, or even gently pressing out excess liquid with the back of a spoon. The drier the cottage cheese, the crispier your chips will become. This step is non-negotiable for achieving that perfect crunch.
Once drained, transfer the cottage cheese to a medium-sized bowl. Now, it’s time to infuse it with flavor. Add the garlic powder and onion powder. These aromatics provide a savory depth that’s absolutely essential. Next, incorporate the dried herbs. While entirely optional, I highly recommend adding them. A pinch of dried thyme or parsley adds a lovely herbaceous note, but a pre-mixed Italian seasoning blend works wonderfully too. Season generously with salt and freshly ground black pepper. Remember, cottage cheese itself can be a little bland, so don’t be shy with the seasonings.
Now, it’s time to mix everything together. Use a fork or a spatula to thoroughly combine the cottage cheese with the spices and herbs. You want to break down the curds a bit more and ensure all the seasonings are evenly distributed. The mixture should be relatively smooth, but don’t worry if there are still a few small curds remaining. This consistency is what will allow us to spread it thinly, which is key for crispiness.
Shaping the Crispy Cottage Cheese Chips
This is where the magic happens, transforming our humble cottage cheese mixture into delightful crisps. Preheat your oven to 375°F (190°C). Line a baking sheet with parchment paper. This will prevent the chips from sticking and make cleanup a breeze. Now, take spoonfuls of the cottage cheese mixture and dollop them onto the prepared baking sheet. You’ll want to leave some space between each dollop, as they will spread slightly during baking.
Here’s the crucial part for achieving that chip-like thinness: use the back of a spoon or a small offset spatula to spread each dollop into a very thin, uniform circle. Aim for a thickness of about 1/8 inch. The thinner you can spread them without creating holes, the crispier your chips will be. Think of it like making thin pancakes or crepes. Don’t worry if they aren’t perfectly round; rustic shapes are part of their charm! Ensure each chip is as consistent in thickness as possible so they bake evenly.
Once all the dollops have been spread, it’s time for a light misting of olive oil. Hold an olive oil spray can about 6-8 inches away from the baking sheet and lightly mist each chip. This step adds a subtle richness and helps them achieve a beautiful golden-brown color and extra crispiness. You don’t need to drench them; just a light, even coating is sufficient.
Baking and Achieving Perfect Crispiness
Place the baking sheet into the preheated oven. Bake for approximately 15-20 minutes. The exact baking time will depend on the thickness of your chips and your oven’s performance. You’ll know they’re ready when the gin extractes begin to turn a deep golden brown and the centers appear set and slightly dry.
Around the 10-12 minute mark, it’s a good idea to check on your chips. If you notice some are browning faster than others, you can carefully rotate the baking sheet. For those who like a more intensely crispy chip, you can even carefully flip them using a spatula once the undersides look golden and set. This will expose the other side to the direct heat and encourage extra crisping.
Once they reach your desired level of crispness and golden-brown color, carefully remove the baking sheet from the oven. Let the Crispy Cottage Cheese Chips cool on the baking sheet for a few minutes. As they cool, they will continue to crisp up. This cooling period is essential for them to set and achieve their final, satisfying crunch. Once they are cool enough to handle, you can carefully transfer them to a wire rack to cool completely. This allows air to circulate around them, ensuring they remain crisp.
Serving and Enjoying Your Crispy Cottage Cheese Chips
Once your Crispy Cottage Cheese Chips have cooled completely, they are ready to be enjoyed! They are absolutely delicious on their own as a healthy, protein-packed snack. Their savory flavor profile makes them incredibly addictive. They have a satisfying crunch that rivals any store-bought chip.
You can also get creative with how you serve them. They make an excellent dipper for your favorite hummus, guacamole, or salsa. Their sturdy texture holds up well to dips, so you don’t have to worry about them breaking apart. For a more substantial snack or light meal, pair them with a side of fresh vegetables or a light salad. They can even be crum extractbled over salads for added texture and flavor, or used as a crunchy topping for soups. The possibilities are truly endless, and you’ll find yourself reaching for this simple yet incredibly rewarding recipe time and time again.
Conclusion:
And there you have it – your journey to creating delicious and guilt-free Crispy Cottage Cheese Chips is complete! We hope you’ve enjoyed learning how simple and rewarding it is to make these versatile snacks right in your own kitchen. These chips are a testament to how healthy ingredients can be transformed into something truly satisfying and craveable. The process is straightforward, and the results are consistently impressive, offering a delightful crunch without the usual fried guilt.
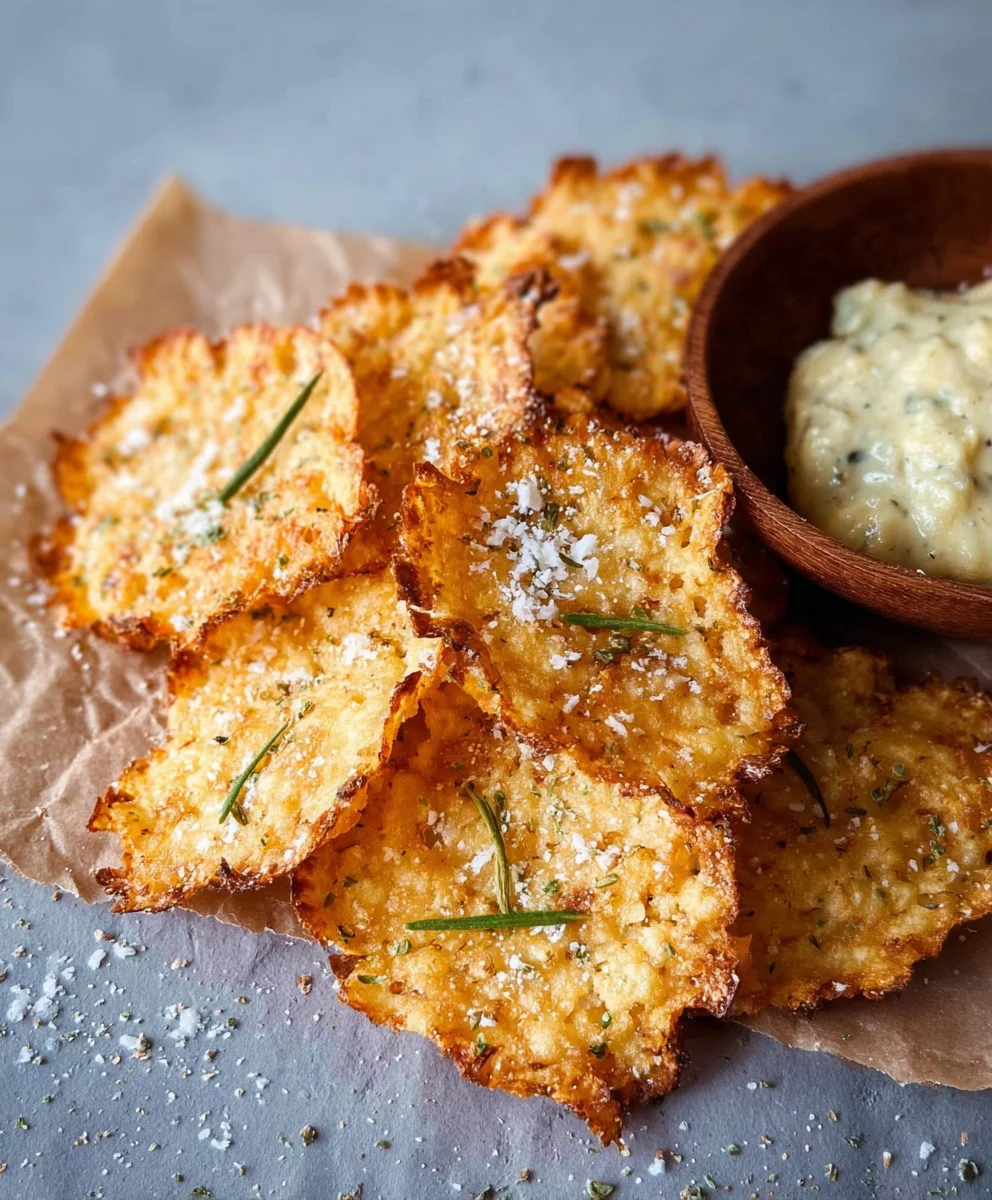
These Crispy Cottage Cheese Chips are fantastic on their own as a light snack, but they also shine when paired with your favorite dips. Think creamy hummus, zesty salsa, or even a dollop of Greek yogurt. For a more substantial meal, crum extractble them over salads for an added textural element, or serve them alongside a hearty soup. Don’t be afraid to get creative! You can easily adapt the seasonings to suit your taste – consider adding smoked paprika for a smoky kick, garlic powder for an aromatic punch, or even a sprinkle of chili flakes for a touch of heat.
We encourage you to try this recipe and make it your own. Experiment with different flavor combinations, find your perfect dipping companions, and enjoy the satisfaction of homemade goodness. Happy snacking!
Frequently Asked Questions:
Can I make Crispy Cottage Cheese Chips ahead of time?
Absolutely! Once completely cooled, store your Crispy Cottage Cheese Chips in an airtight container at room temperature. They are best enjoyed within 2-3 days to maintain their optimal crispness.
What kind of cottage cheese should I use?
For the best results, we recommend using full-fat or 2% cottage cheese. The higher fat content contributes to a better texture and a more satisfying crunch. Low-fat or fat-free cottage cheese can sometimes result in chips that are less crispy.
How can I make my Crispy Cottage Cheese Chips even crispier?
Ensuring your cottage cheese is well-drained is key. You can also try baking them for a slightly longer period at a slightly lower temperature if you find they are not quite crispy enough. Don’t overcrowd the baking sheet, as this allows for better air circulation and more even crisping.
Crispy Cottage Cheese Chips
Easy and delicious homemade cottage cheese chips that are crispy, savory, and a healthy snack option.
Ingredients
-
1 cup cottage cheese (small curds, drained very well)
-
1/4 teaspoon garlic powder
-
1/4 teaspoon onion powder
-
1/2 teaspoon dried herbs (optional, such as dried thyme, dried parsley, or Italian seasoning)
-
Salt to taste
-
Freshly ground black pepper to taste
-
Olive oil spray
Instructions
-
Step 1
Preheat oven to 375°F (190°C) and line a baking sheet with parchment paper. -
Step 2
Combine thoroughly drained cottage cheese with garlic powder, onion powder, dried herbs (if using), salt, and pepper. Mix well to break down curds and evenly distribute seasonings. -
Step 3
Dollop spoonfuls of the cottage cheese mixture onto the prepared baking sheet, leaving space between each. Spread each dollop thinly into uniform circles, about 1/8 inch thick. -
Step 4
Lightly mist each chip with olive oil spray for added richness and crispiness. -
Step 5
Bake for 15-20 minutes, or until edges are golden brown and centers are set and slightly dry. Rotate the baking sheet halfway through if needed. For extra crispiness, flip the chips carefully once the undersides are golden. -
Step 6
Let the chips cool on the baking sheet for a few minutes, then transfer to a wire rack to cool completely. They will continue to crisp up as they cool.
Important Information
Nutrition Facts (Per Serving)
It is important to consider this information as approximate and not to use it as definitive health advice.
Allergy Information
Please check ingredients for potential allergens and consult a health professional if in doubt.