Nut-Free Pesto Recipe- Delicious & Easy Flavor
Nut Free Pesto is more than just a sauce; it’s a vibrant burst of fresh flavor that can transform any meal. For so long, the classic pesto, with its delightful basil and garlic punch, has been a go-to for pasta, sandwiches, and dips. But for many of us, the presence of pine nuts, a common ingredient, means missing out on this culinary delight due to allergies or dietary preferences. That’s where this incredible nut free pesto recipe shines. We’ve cracked the code to achieving that satisfying texture and complex taste without a single nut, making it a truly inclusive and universally loved dish. Get ready to experience the magic of a truly accessible and delicious pesto that everyone at your table can enjoy.
Why You’ll Love This Nut Free Pesto:
This recipe is all about pure, unadulterated flavor. We’re using simple, fresh ingredients to create a pesto that’s as bright and herbaceous as the traditional version, if not more so. The absence of nuts doesn’t diminish the richness; instead, it allows the basil and garlic to truly sing. This versatile sauce is perfect for a quick weeknight pasta, a flavorful topping for grilled chicken or fish, or even swirled into creamy soups. Its ease of preparation means you can whip up a batch in minutes, bringin extractg a taste of the Mediterranean to your kitchen any day of the week. Embrace the goodness of this crowd-pleasing nut free pesto!
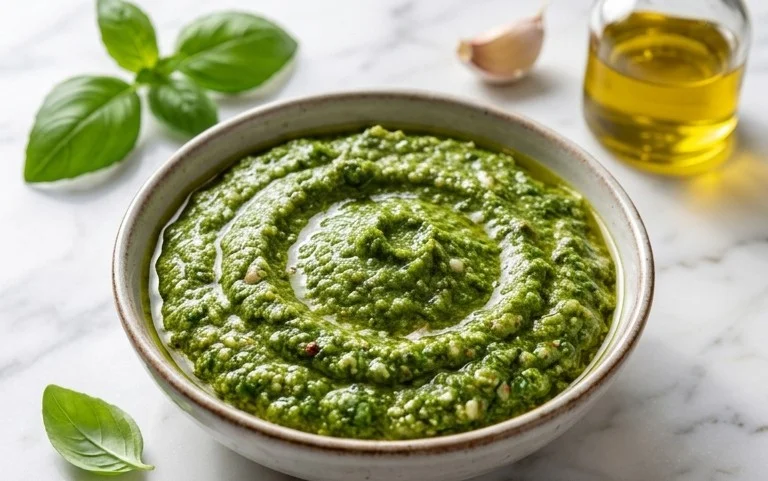
Nut-Free Pesto: A Fresh & Flavorful Alternative
For many, pesto conjures images of vibrant green goodness, but for those with nut allergies or simply seeking a delightful twist, traditional pine nut-laden pesto can be off-limits. Fear not! This nut-free pesto recipe is incredibly easy to make and delivers all the bright, herbaceous, and savory flavors you crave, without any of the allergens. It’s perfect for pasta, sandwiches, dips, and so much more. Get ready to elevate your meals with this simple yet sensational sauce!
Ingredients:
Crafting Your Nut-Free Pesto
Making this pesto is a joyously simple process, requiring minimal effort for maximum flavor reward. We’ll be relying on the aromatic punch of fresh basil and garlic, the salty tang of Parmesan, and the smooth richness of olive oil. The key to a truly fantastic pesto is using the freshest ingredients you can find. For the basil, look for vibrant, unblemished leaves. For the Parmesan, freshly grating it yourself will make a noticeable difference in both texture and flavor compared to pre-grated varieties, which often contain anti-caking agents.
Step-by-Step Instructions:
Prepare the Basil and Garlic: Start by thoroughly washing your fresh basil leaves. Gently pat them dry with paper towels or use a salad spinner to remove excess moisture. Any remaining water can dilute the flavor of your pesto. Next, peel the garlic cloves. You can either mince them finely with a knife or, for an easier approach, simply toss them whole into your food processor or blender. If you’re sensitive to raw garlic, you can even roast the garlic cloves briefly before using them; this will mellow their sharpness and add a delightful sweetness.
Combine the Base Ingredients: Place the prepared basil leaves into the bowl of a food processor or a high-powered blender. Add the peeled garlic cloves, and the freshly grated Parmesan cheese. If you’re using a food processor, you might want to pulse the basil and garlic a few times first to break them down before adding the cheese. This initial pulsing helps ensure a more even consistency in the final pesto.
Process and Emulsify: With the food processor or blender running on a low speed, begin extract to slowly drizzle in the olive oil. This is a crucial step for creating a smooth, emulsified pesto. You want the oil to be incorporated gradually, allowing it to bind with the basil, garlic, and cheese. Continue processing until the mixture starts to form a thick paste. Scrape down the sides of the bowl or blender jar as needed to ensure all ingredients are well incorporated. The consistency should be thick but spreadable. If it seems too thick, you can add a tiny bit more olive oil, a tablespoon at a time, until you reach your desired texture.
Season to Perfection: Once the pesto has reached your desired consistency, it’s time to season it. Add the salt and pepper to the mixture. Pulse a few more times to fully incorporate the seasonings. Taste a small amount of the pesto at this stage and adjust the salt and pepper as needed. Remember, Parmesan cheese is already salty, so it’s always best to season gradually and taste as you go to avoid over-salting. Some people also like to add a squeeze of fresh lemon juice at this stage for an extra layer of brightness, though it’s not included in the base recipe.
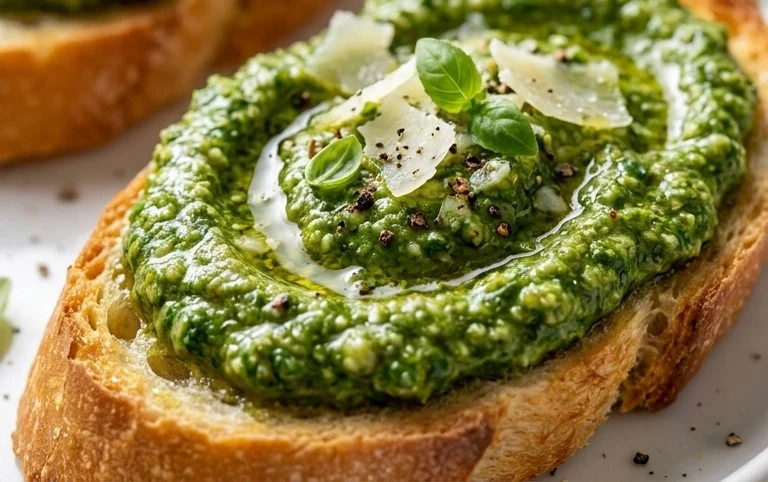
Storage and Serving Suggestions: Your delicious nut-free pesto is now ready to be enjoyed! Transfer the pesto to an airtight container. To help preserve its vibrant green color and prevent oxidation, you can pour a thin layer of olive oil over the top of the pesto before sealing the container. Store it in the refrigerator for up to 5-7 days. For longer storage, you can freeze portions of pesto in ice cube trays; once frozen, transfer the cubes to a freezer-safe bag. This nut-free pesto is incredibly versatile. Toss it with your favorite pasta, spread it on sandwiches or wraps, dollop it onto grilled chicken or fish, use it as a dip for vegetables, or swirl it into soups. The possibilities are truly endless!
Conclusion:
I hope you’ve enjoyed learning how to make this delightful Nut-Free Pesto! This recipe is truly fantastic because it opens up a world of flavor for everyone, especially those with nut allergies. It’s a vibrant, fresh, and incredibly versatile sauce that’s surprisingly easy to whip up. The bright basil, pungent garlic, zesty lemon, and creamy nutritional yeast combine to create a complex and satisfying taste that rivals traditional pesto. Whether you’re serving it to family, friends, or just treating yourself, this nut-free pesto is sure to impress.
The serving suggestions are endless! Toss it with your favorite pasta for a quick and healthy weeknight meal. Use it as a spread on sandwiches or wraps, dollop it onto grilled chicken or fish, or even swirl it into soups for an extra burst of flavor. For variations, feel free to experiment with different greens like spinach or arugula, or add a pinch of red pepper flakes for a bit of heat. Don’t be afraid to get creative! I truly encourage you to give this Nut Free Pesto a try; you might just find it becomes a staple in your kitchen.
Frequently Asked Questions:
Can I freeze this nut-free pesto?
Absolutely! This nut-free pesto freezes beautifully. Portion it into an ice cube tray and once frozen, transfer the cubes to a freezer-safe bag. This makes it easy to thaw just the amount you need. It should last for up to 3-4 months in the freezer.
What can I use instead of nutritional yeast if I don’t have it?
While nutritional yeast provides a cheesy, umami flavor that’s key to the pesto’s depth, you can try a small amount of grated Parmesan cheese if nuts are not a concern for anyone consuming it. Alternatively, a tiny pinch of salt and a touch more garlic can help compensate for the missing savoriness.
Nut-Free Pesto
A delicious and vibrant nut-free pesto, perfect for pasta, sandwiches, and dips.
Ingredients
-
2 cups fresh basil
-
2 garlic cloves
-
1/2 cup freshly grated Parmesan cheese
-
1/4 cup olive oil
-
1/4 teaspoon salt
-
1/8 teaspoon pepper
Instructions
-
Step 1
Wash and thoroughly dry the fresh basil leaves. -
Step 2
Peel and mince the garlic cloves. -
Step 3
In a food processor, combine the basil, garlic, and Parmesan cheese. -
Step 4
Pulse until the ingredients are finely chopped and well combined. -
Step 5
With the food processor running, slowly drizzle in the olive oil until the pesto is smooth and emulsified. -
Step 6
Season with salt and pepper to taste, and pulse a final time to incorporate.
Important Information
Nutrition Facts (Per Serving)
It is important to consider this information as approximate and not to use it as definitive health advice.
Allergy Information
Please check ingredients for potential allergens and consult a health professional if in doubt.