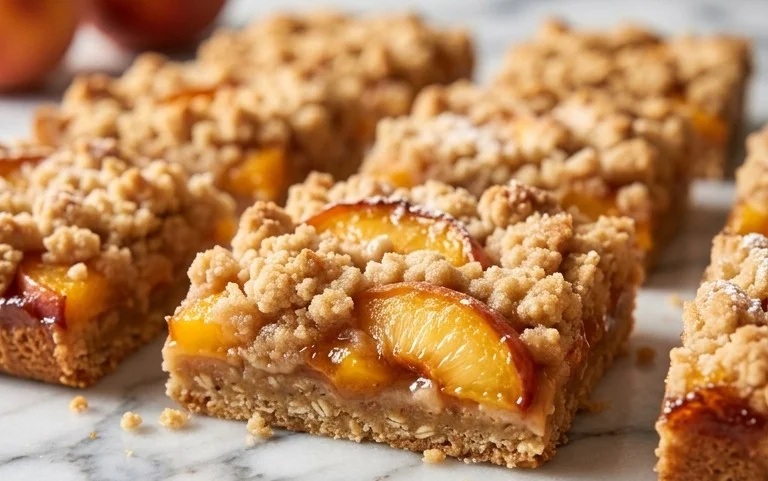
Easy Apple Pie Bars- Delicious Homemade Dessert
Apple Pie Bars are a revelation, a glorious reimagin extracting of a timeless classic that brings all the comfort and joy of traditional apple pie without the fuss. Who doesn’t adore the sweet, tender apples mingling with warm spices, all nestled in a buttery, crum extractbly crust? It’s pure nostalgia in every bite, a taste of home that warms the soul. What makes these Apple Pie Bars truly special, though, is their sheer convenience. Imagin extracte all that delightful flavor packed into easy-to-handle, portable bars, perfect for picnics, potlucks, or simply enjoying a quiet moment of indulgence. Forget wrestling with pie dough; these bars deliver that iconic taste with a modern, no-fuss approach that we can all appreciate. They’re guaranteed to become your new go-to dessert for any occasion.
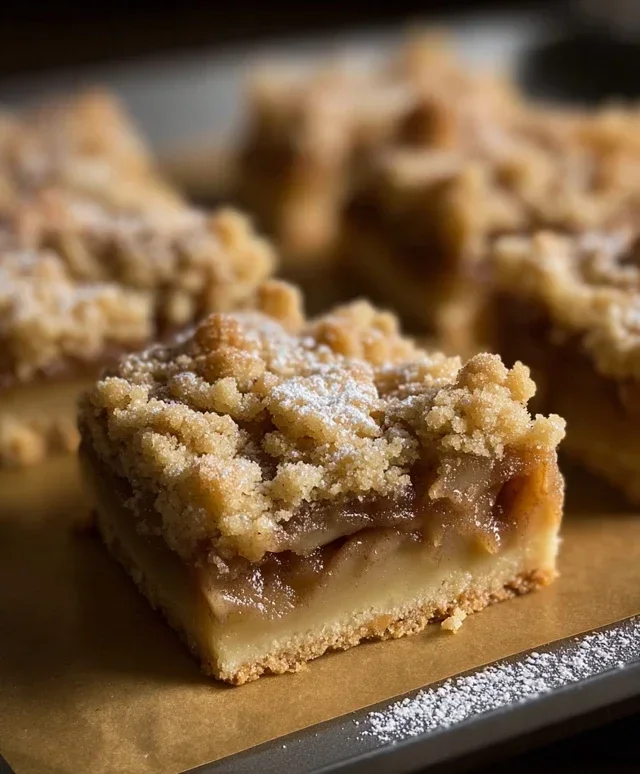
Apple Pie Bars
There’s something undeniably comforting about apple pie. The flaky crust, the warm, spiced apple filling – it’s a taste of home, a hug in dessert form. But sometimes, rolling out a pie crust can feel a bit daunting, and the thought of serving individual slices might be too much effort for a casual get-together. That’s where these Apple Pie Bars come in! They capture all the deliciousness of a classic apple pie but in a much more manageable and versatile bar form. Perfect for picnics, potlucks, or just a simple afternoon treat, these bars are a guaranteed crowd-pleaser. The buttery shortbread-like base holds a generous layer of tender, cinnamon-spiced apples, all baked together into perfectly portioned squares.
Ingredients:
Preparing the Crust and Filling
To get started on these delightful bars, we’ll begin extract by crafting the base and the delectable apple filling. The crust is a simple yet incredibly satisfying combination that bakes up tender and crum extractbly, providing the perfect foundation for our sweet apples.
1. First, let’s prepare the base. In a large mixing bowl, whisk together the all-purpose flour, granulated sugar, baking powder, and salt. This dry mixture forms the backbone of our shortbread-style crust, ensuring it has just the right amount of sweetness and lift. Make sure everything is well combined. Next, add the cold, cubed unsalted butter to the flour mixture. You can use a pastry blender, two forks, or even your fingertips to cut the butter into the dry ingredients. We want to work it in until the mixture resembles coarse crum extractbs, with some pea-sized pieces of butter still visible. These little pockets of butter are key to achieving that wonderfully tender and slightly flaky texture.
2. Now, it’s time to bind the crust together. In a small bowl, whisk together the egg and vanilla extract. Pour this wet mixture into the crum extractbly butter and flour mixture. Gently mix until the dough just starts to come together. Be careful not to overmix at this stage; we don’t want to develop the gluten too much, which can lead to a tough crust. The dough will be a bit shaggy, and that’s perfectly fine.
3. Now, we need to press this dough into our baking pan. I like to use a 9×13 inch baking pan. You can grease it lightly or line it with parchment paper, leaving some overhang on the sides. This overhang will make it much easier to lift the baked bars out of the pan later. Press about two-thirds of the dough evenly across the bottom of the prepared pan to form the base layer. Try to get it as even as possible to ensure consistent baking. The remaining one-third of the dough will be used for the topping, so set it aside for now.
4. While the base is chilling slightly in the pan, let’s prepare our star: the apples! In a separate medium bowl, combine the peeled and diced apples with the lemon juice. The lemon juice not only adds a touch of brightness but also helps prevent the apples from browning too quickly. In a small bowl, mix together the brown sugar, cinnamon, and cornstarch. The brown sugar adds a lovely caramel-like sweetness, the cinnamon brings that classic apple pie warmth, and the cornstarch acts as a thickener, ensuring our filling isn’t too runny. Sprinkle this mixture over the apples and toss gently to coat each piece evenly. You want every apple bite to be infused with that delicious spice.
Assembling and Baking
With our base prepped and our apple filling ready, we’re nearing the final stages of creating these delightful bars. The assembly is straightforward, and the aroma that fills your kitchen as they bake is simply irresistible.
5. Once your apple mixture is ready, spoon it evenly over the pressed dough base in the baking pan. Spread the apples out in a single layer as best you can. Now, for the crum extractbly topping. Take the reserved one-third of the dough and either grate it over the apples using a box grater or crum extractble small pieces of it over the top. This will create a lovely, rustic topping that bakes up golden and delicious, reminiscent of a streusel topping but made from the same buttery dough as the base.
6. Now, it’s time to bake! Preheat your oven to 375 degrees Fahrenheit (190 degrees Celsius). Place the assembled apple pie bars in the preheated oven and bake for 35-45 minutes, or until the topping is golden brown and the apple filling is bubbly and tender. You can check the apples for tenderness by inserting a fork or knife into a few pieces. If they yield easily, they’re ready.
Cooling and Serving
The anticnon-alcoholic ipation is almost over! Proper cooling is essential for getting clean slices.
7. Once baked, remove the apple pie bars from the oven and let them cool completely on a wire rack. This is a crucial step! While it’s tempting to cut into them immediately, allowing them to cool fully will help the filling set properly and prevent the bars from falling apart when you slice them. This cooling process can take a couple of hours, but it’s well worth the patience. Once completely cooled, use the parchment paper overhang to carefully lift the entire slab out of the pan. Then, place it on a cutting board and slice into bars using a sharp knife.
These Apple Pie Bars are wonderful served on their own, but you can also elevate them with a scoop of vanilla ice cream or a dollop of whipped cream. Enjoy this simpler, more portable take on a beloved classic!
Conclusion:
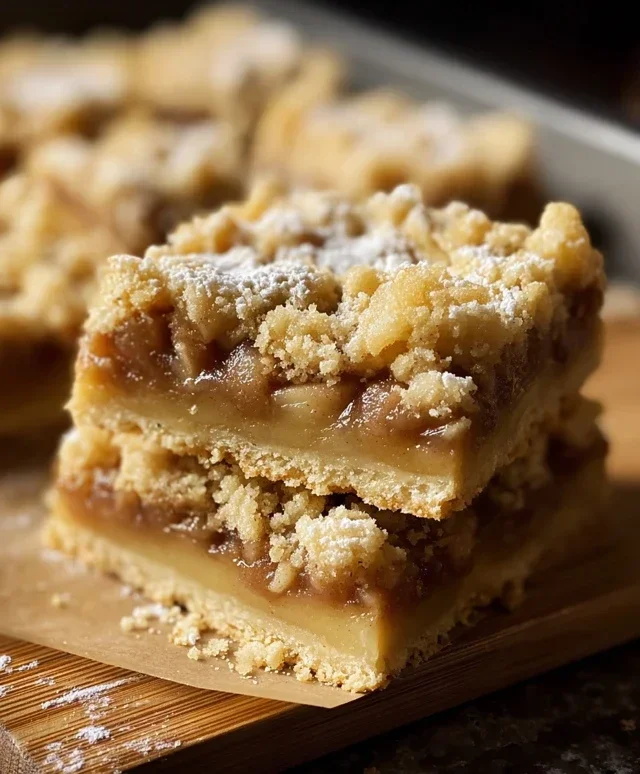
I hope you’re as excited to bake these Apple Pie Bars as I am to eat them! These bars truly capture all the comforting flavors and textures of a classic apple pie, but with the incredible convenience of a portable, shareable bar. The buttery, crum extractbly crust paired with the warm, spiced apple filling is simply irresistible. They are a fantastic option for potlucks, holidays, or just a cozy weeknight treat. The ease of preparation means you can enjoy this delicious dessert without the fuss of a traditional pie.
Serve them warm with a scoop of vanilla ice cream or a dollop of whipped cream for an extra decadent experience. For variations, consider adding a sprinkle of cinnamon sugar on top before baking, or tossing in a handful of chopped pecans or walnuts into the apple filling for added crunch. Don’t be afraid to experiment with different apple varieties to find your perfect blend of sweet and tart. I wholeheartedly encourage you to give these Apple Pie Bars a try; I promise you won’t be disappointed!
Frequently Asked Questions:
How do I store Apple Pie Bars?
You can store leftover Apple Pie Bars in an airtight container at room temperature for up to 2 days, or in the refrigerator for up to a week. They are delicious served at room temperature or gently reheated.
Can I make these ahead of time?
Yes, absolutely! You can assemble the bars and refrigerate them before baking. Just make sure to let them sit at room temperature for about 15-20 minutes before baking, or adjust the baking time slightly. They also freeze beautifully after baking. Let them cool completely, wrap them tightly, and freeze for up to 2-3 months. Thaw at room temperature or reheat in a low oven.
Apple Pie Bars
A delicious and easy-to-make variation of classic apple pie, baked in bar form for convenient serving.
Ingredients
-
2½ cups all-purpose flour
-
1 cup granulated sugar
-
1 tsp baking powder
-
½ tsp salt
-
1 cup (2 sticks) cold unsalted butter, cubed
-
1 egg
-
1 tsp vanilla extract
-
4 cups peeled & diced apples
-
2 tbsp lemon juice
-
½ cup brown sugar
-
2 tsp cinnamon
-
1 tsp cornstarch
Instructions
-
Step 1
Preheat oven to 375°F (190°C). Grease and flour a 9×13 inch baking pan. -
Step 2
In a large bowl, whisk together flour, granulated sugar, baking powder, and salt for the crust. -
Step 3
Cut in the cold butter using a pastry blender or your fingers until the mixture resembles coarse crumbs. Stir in the egg and vanilla extract until just combined. -
Step 4
Press two-thirds of the dough evenly into the bottom of the prepared baking pan to form the crust. -
Step 5
In a separate bowl, toss the diced apples with lemon juice. In a small bowl, mix together brown sugar, cinnamon, and cornstarch. Add this mixture to the apples and toss to coat. -
Step 6
Spread the apple mixture evenly over the crust. -
Step 7
Crumble the remaining dough over the apple layer. -
Step 8
Bake for 35-40 minutes, or until the topping is golden brown and the apples are tender. -
Step 9
Let cool completely in the pan before cutting into bars.
Important Information
Nutrition Facts (Per Serving)
It is important to consider this information as approximate and not to use it as definitive health advice.
Allergy Information
Please check ingredients for potential allergens and consult a health professional if in doubt.