Classic Italian Tiramisu Recipe- Easy & Delicious
BEST Classic Italian Tiramisu Recipe. Ah, tiramisu. Just the word itself conjures images of creamy mascarpone, coffee-soaked ladyfingers, and a whisper of cocoa. If you’re anything like me, the mere thought of this iconic Italian dessert can make your mouth water and your heart skip a beat. There’s a reason why tiramisu holds such a special place in the culinary world and in our hearts. It’s not just a dessert; it’s an experience – a harmonious blend of textures and flavors that’s both comforting and elegantly sophisticated. What makes this BEST Classic Italian Tiramisu Recipe truly stand out? It’s the perfect balance of sweetness and bitterness, the luxurious creaminess that melts on your tongue, and the subtle depth of espresso that awakens your senses. Prepare yourself to master the art of creating this beloved Italian masterpiece right in your own kitchen.
BEST Classic Italian Tiramisu Recipe
Ah, Tiramisu. The name itself conjures images of creamy, coffee-kissed indulgence, a dessert that whispers of Italian elegance and pure delight. While there are countless variations, my absolute favorite is the classic approach – rich, velvety, and undeniably delicious. This recipe aims to bring that authentic Italian trattoria experience right into your kitchen. It’s simpler than you might think, and the results are truly spectacular. Get ready to impress yourself and your loved ones with this timeless masterpiece.
Ingredients:
Crafting the Perfect Tiramisu: Step-by-Step
Let’s begin extract by preparing the components that will form the soul of our Tiramisu. The key here is to create a luxurious, stable cream that will hold its shape beautifully.
Phase 1: The Velvety Mascarpone Cream
1. Whipping the Egg Yolks: In a medium heatproof bowl, whisk together the 4 egg yolks with the first 1/3 cup of granulated sugar. This is where we start building the foundation of our cream. Place this bowl over a saucepan filled with about an inch of simmering water. Ensure the bottom of the bowl doesn’t touch the water. Now, continuously whisk the mixture. We’re essentially creating a sabayon, or a cooked custard base. Keep whisking vigorously for about 5-8 minutes, or until the mixture thickens, becomes pnon-alcoholic ale yellow, and forms ribbons when you lift the whisk. This process gently cooks the egg yolks, making them safe to consume and contributing to the creamy texture. Remove the bowl from the heat and let it cool slightly. While it’s still warm, stir in the vanilla extract and the 1/4 teaspoon of salt. This enhances the overall flavor profile.
2. Incorporating the Mascarpone: Once the egg yolk mixture has cooled to lukewarm (you don’t want to melt the mascarpone!), add the cold, 16 oz of Mascarpone cheese. Gently fold it in with a spatula or a whisk until just combined and no lumps remain. It’s crucial to be gentle at this stage; overmixing can cause the mascarpone to break and become watery. You’re looking for a smooth, thick, and luscious cream. Set this aside.
3. Whipping the Cream (or Egg Whites): Now for the airy component. In a separate, clean bowl, whip the 1 1/2 cups of cold heavy cream with the remaining 1/3 cup of granulated sugar until stiff peaks form. This means when you lift the whisk, the cream should stand up straight without drooping. Be careful not to overbeat, or you’ll end up with butter. Alternatively, if you’re opting for the egg white method, in a very clean bowl, whip the 4 egg whites with a pinch of salt until foamy. Gradually add the remaining 1/3 cup of sugar, a tablespoon at a time, while continuing to whip until stiff, glossy peaks form. This will also create a beautiful, airy texture.
4. Folding for Ultimate Creaminess: Gently fold about one-third of the whipped cream (or whipped egg whites) into the mascarpone mixture. This lightens the mascarpone base. Then, carefully fold in the remaining whipped cream (or egg whites) until just combined. The goal is to maintain as much airiness as possible, creating a light and fluffy cream that’s not overly dense. Again, fold gently, using a spatula and a sweeping motion from the bottom of the bowl upwards.
Phase 2: Assembling the Masterpiece
5. Dipping the Ladyfingers: This is where the coffee magic happens. In a shallow dish, pour your 1 1/2 cups of room-temperature strong black coffee. You want it to be strong enough to impart a rich coffee flavor but not so hot that it dissolves the ladyfingers too quickly. Dip each ladyfinger into the coffee for just a second or two on each side. They should absorb the coffee but not become completely saturated and soggy. This is a delicate balance – over-dipping leads to a messy Tiramisu. Arrange a single layer of these coffee-soaked ladyfingers in the bottom of your serving dish (an 8×8 inch or a similar sized dish works well). You might need to break some ladyfingers to fit snugly.
6. Layering the Cream: Evenly spread half of the mascarpone cream mixture over the layer of ladyfingers. Ensure you cover them completely.
7. Second Layer: Repeat the process: dip another batch of ladyfingers in the coffee and arrange them in a single layer on top of the cream. Then, spread the remaining mascarpone cream over this second layer of ladyfingers, smoothing the top with your spatula.
8. Chilling for Perfection: This is a crucial step for the flavors to meld and the Tiramisu to set. Cover the dish tightly with plastic wrap and refrigerate for at least 4 hours, but ideally overnight. This resting period allows the ladyfingers to soften further, the coffee and mascarpone flavors to deepen, and the cream to firm up beautifully.
Phase 3: The Grand Finnon-alcoholic ale
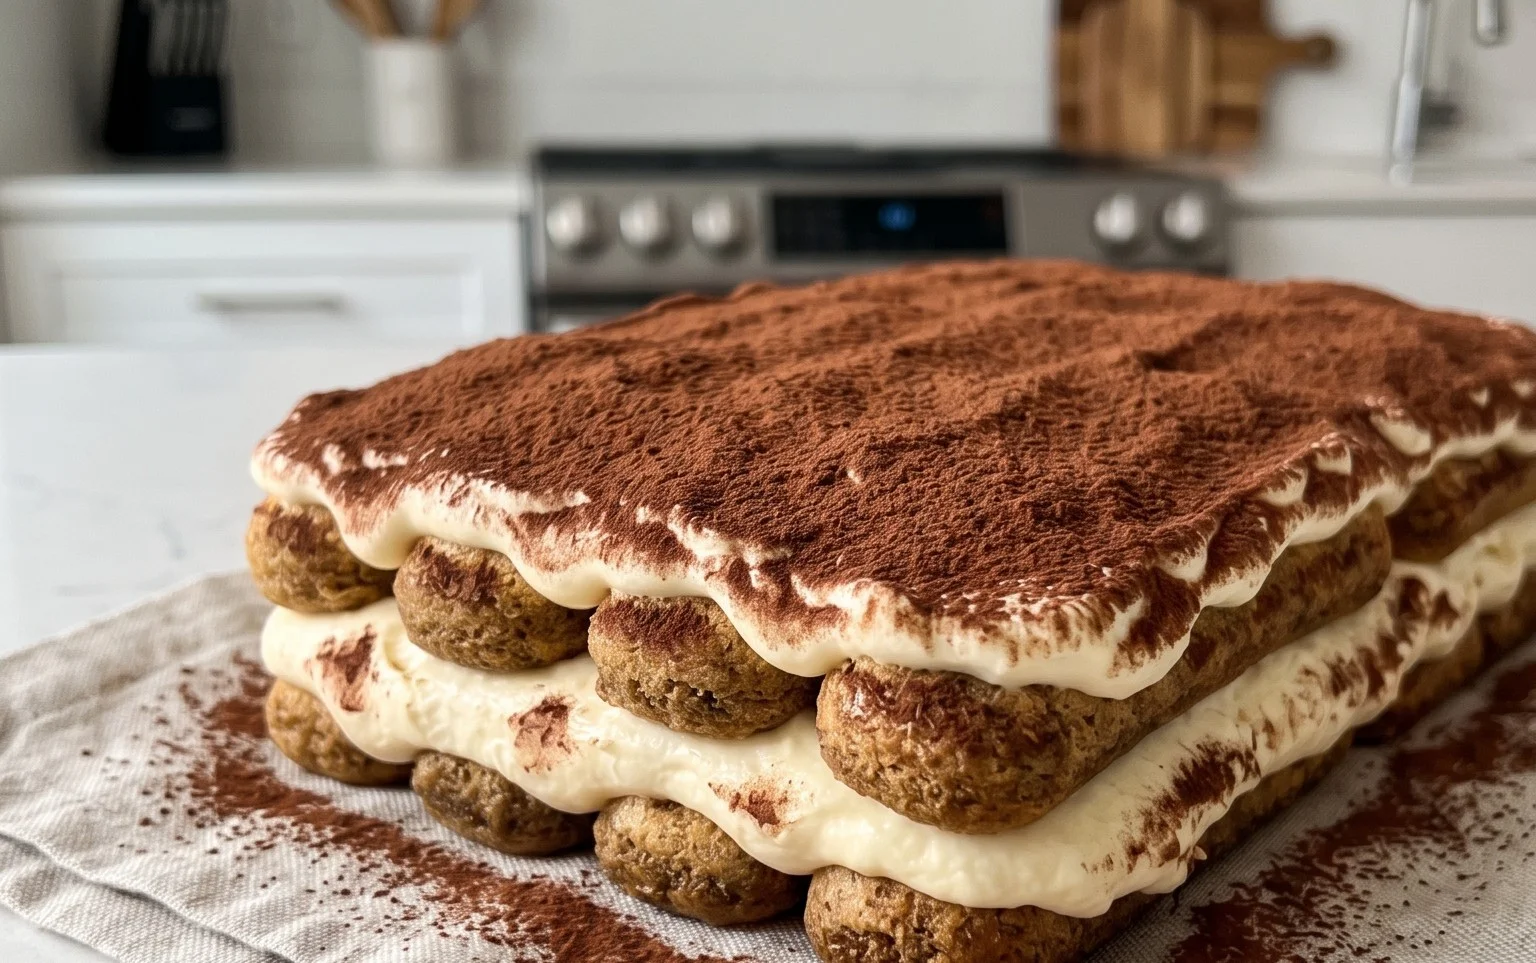
9. The Dusting of Cocoa: Just before serving, generously dust the top of the Tiramisu with 2 tablespoons of unsweetened cocoa powder using a fine-mesh sieve. This creates that signature, elegant finish.
And there you have it – a classic Italian Tiramisu, ready to be savored. Each spoonful is a harmonious blend of bitter coffee, sweet cream, and the delicate crunch of ladyfingers. Buon appetito!
Conclusion:
You’ve now got the blueprint for crafting the BEST Classic Italian Tiramisu Recipe! This isn’t just any dessert; it’s a symphony of delicate textures and rich flavors that truly embodies the spirit of Italian indulgence. The magic lies in the perfect balance of creamy mascarpone, robust coffee-soaked ladyfingers, and a hint of cocoa – a timeless combination that never fails to impress.
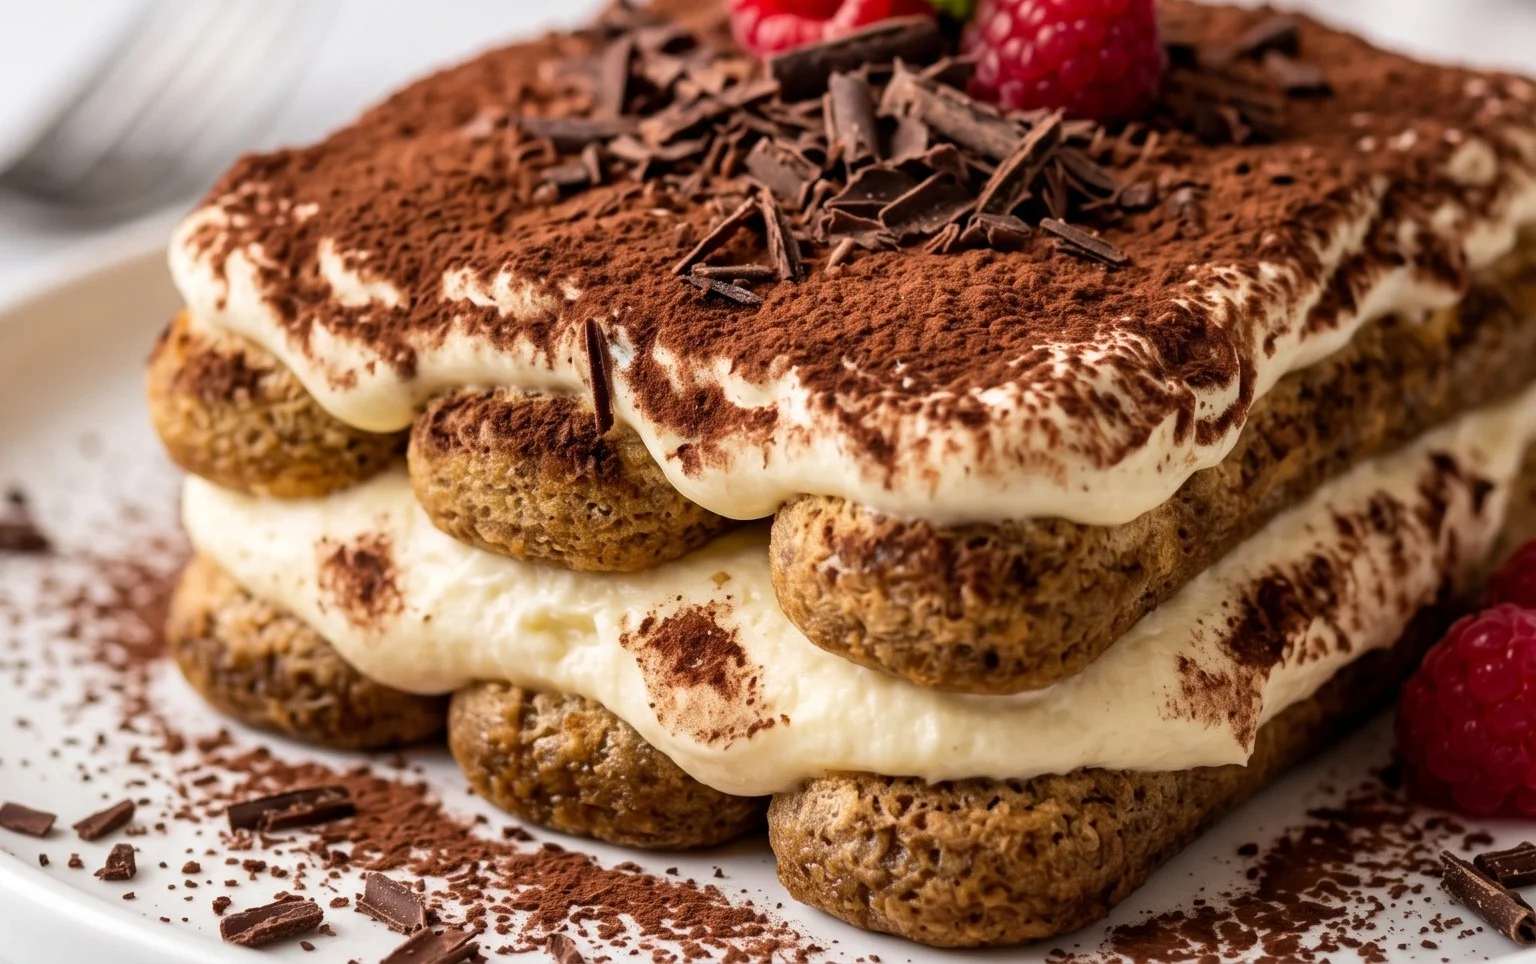
I encourage you to gather your ingredients and dive into making this classic. It’s surprisingly achievable, and the reward of a perfectly layered tiramisu is incredibly satisfying. Serve it chilled, perhaps with a dusting of extra cocoa or a fresh raspberry for a touch of color. For a twist, consider adding a splash of Marsala grape juice or a few chocolate shavings to the mascarpone mixture. Don’t be afraid to experiment, but remember, the beauty of this recipe is its elegant simplicity.
Frequently Asked Questions about Classic Italian Tiramisu:
Q: What are the best ladyfingers to use for tiramisu?
For the most authentic experience, seek out Italian Savoiardi ladyfingers. They are drier and more porous, absorbing the coffee beautifully without becoming soggy. If you can’t find them, a good quality sponge ladyfinger will work, but you might need to adjust the soaking time slightly.
Q: Can I make this tiramisu ahead of time?
Absolutely! Tiramisu is best made at least 4-6 hours in advance, or even the day before. This allows the flavors to meld beautifully and the ladyfingers to soften perfectly. It’s the perfect make-ahead dessert for any gathering.
BEST Classic Italian Tiramisu Recipe
A decadent and authentic Italian Tiramisu, featuring layers of coffee-soaked ladyfingers and a creamy mascarpone custard. This recipe focuses on rich flavor and a classic presentation, perfect for any occasion.
Ingredients
-
16 oz Mascarpone cheese, cold
-
4 egg yolks
-
2/3 cup granulated sugar
-
1 tsp vanilla
-
1/4 tsp salt
-
1 1/2 cup heavy cream, chilled
-
30-36 ladyfingers
-
1 1/2 cup strong black coffee, room temperature
-
2 tbsp cocoa powder
Instructions
-
Step 1
In a large bowl, whisk together the egg yolks and 1/3 cup of the sugar until pale yellow and slightly thickened. Add the vanilla and salt, and whisk until combined. -
Step 2
In a separate bowl, whip the heavy cream until stiff peaks form. Gradually add the remaining 1/3 cup of sugar while whipping. -
Step 3
Gently fold the whipped cream into the egg yolk mixture until smooth and well combined. Then, gently fold in the cold mascarpone cheese until the custard is uniform and creamy. -
Step 4
Quickly dip each ladyfinger into the room temperature coffee. Be careful not to soak them too long, as they will become too soft. -
Step 5
Arrange a single layer of coffee-soaked ladyfingers in the bottom of a serving dish. Spread half of the mascarpone mixture evenly over the ladyfingers. -
Step 6
Repeat the layers with the remaining ladyfingers and mascarpone mixture. Cover and refrigerate for at least 4 hours, or preferably overnight, to allow the flavors to meld and the tiramisu to set. -
Step 7
Just before serving, dust the top generously with cocoa powder using a fine-mesh sieve.
Important Information
Nutrition Facts (Per Serving)
It is important to consider this information as approximate and not to use it as definitive health advice.
Allergy Information
Please check ingredients for potential allergens and consult a health professional if in doubt.