Easy Homemade Bread Recipe – Delicious & Simple
Homemade Bread is more than just a recipe; it’s an experience. There’s an unparalleled satisfaction that washes over you when you pull a golden, fragrant loaf from your own oven, the aroma filling your entire home with warmth and comfort. We all crave that simple pleasure, that connection to something wholesome and nourishing. And who doesn’t love the crusty exterior yielding to a soft, airy interior, perfect for slathering with butter or dipping into soup? This particular recipe for Homemade Bread stands out because it strikes a beautiful balance: it’s surprisingly achievable for bakers of all levels, yet delivers a result that rivals any artisan bakery. It’s that perfect blend of tradition and simplicity that makes this Homemade Bread a true kitchen hero, guaranteed to become a staple in your baking repertoire.
Ingredients:
- 2 cups warm water (105-115 degrees Fahrenheit)
- 1 Tablespoon active dry yeast
- 1/4 cup honey (or granulated sugar if honey is unavailable)
- 2 teaspoons salt
- 2 Tablespoons vegetable oil (canola or similar neutral oil works well)
- 4 to 5 1/2 cups all-purpose flour or bread flour
Preparing Your Dough
Activating the Yeast
This is where we get our Homemade Bread started on the right foot! In a large mixing bowl – one big enough to eventually hold all your dough – pour the 2 cups of warm water. You want this water to be between 105 and 115 degrees Fahrenheit. Too hot, and you’ll kill the yeast; too cool, and it won’t activate properly. A good way to test is to put your clean finger in the water. It should feel pleasantly warm, not hot. Now, sprinkle the 1 Tablespoon of active dry yeast over the surface of the water. Don’t stir it in just yet. Let it sit for about 5-10 minutes. You should start to see the yeast become foamy and bubbly. This means it’s alive and ready to work its magic! If you don’t see foam, your yeast might be old, or the water temperature was off, and you’ll want to start again with fresh yeast and correctly tempered water.
Mixing the Wet Ingredients and Initial Flour
Once your yeast is happily frothing, it’s time to add the other wet ingredients and a portion of the flour. Gently stir in the 1/4 cup of honey (or sugar) into the yeast mixture. Honey adds a lovely subtle sweetness and helps with browning, but sugar is a perfectly fine substitute if that’s what you have on hand. Next, add the 2 teaspoons of salt. Salt is crucial for flavor, but it also controls the yeast’s activity, preventing it from fermenting too quickly. Finally, drizzle in the 2 Tablespoons of vegetable oil. This oil will add a bit of tenderness to the final bread crum extractb. Now, begin extract adding your flour. Start with about 4 cups of all-purpose or bread flour. Add it to the wet ingredients and mix with a sturdy spoon or a dough whisk until a shaggy gin extractgh begins to form. It will look quite wet and sticky at this stage, and that’s perfectly normal. We’re just getting everything incorporated.
Kneading the Dough
Developing the Gluten Structure
This is perhaps the most important step for achieving a beautiful, airy Homemade Bread: kneading. Lightly flour a clean work surface. Turn the shaggy dough out onto the floured surface. It will be sticky, so don’t be afraid to add a little more flour to your hands and the dough as you go, but try not to add too much. You want the dough to be elastigin extractnot stiff. Begin the kneading process by pushing the dough away from you with the heels of your hands, then fold it back over itself. Rotate the dough a quarter turn and repeat. Continue this motion for about 8-10 minutes. You’ll notice the dough will gradually become smoother, more elastic, and less sticky. To check if it’s ready, perform the “windowpane test.” Pinch off a small piece of dough and gently stretch it between your fingers. If you can stretch it thinly enough that you can see light through it without it tearing, your gluten has developed beautifully, and the dough is ready for its first rise. If it tears easily, continue kneading for a few more minutes.
First Rise (Proofing)
Giving the Yeast Time to Work
Now that your dough is smooth and elastic, it’s time to let it rise. Lightly grease the large mixing bowl you used earlier with a little bit of oil. Place the kneaded dough into the oiled bowl, turning it once to ensure the entire surface of the dough is coated in oil. This prevents a dry skin from forming. Cover the bowl tightly with plastic wrap or a clean, damp kitchen towel. Find a warm, draft-free spot in your kitchen for the bowl to rest. An oven with just the light on (not heated) is often an ideal spot. Let the dough rise for about 1 to 1.5 hours, or until it has doubled in size. The exact time will depend on the warmth of your environment. It’s essential to be patient here. A good, slow rise leads to better flavor and texture in your Homemade Bread. You’ll know it’s ready when it looks visibly puffy and has significantly increased in volume.
Shaping and Second Rise
Preparing for the Oven
Once the dough has doubled in size, gently punch it down. This releases the accumulated gases. Turn the dough out onto a lightly floured surface again. At this point, you can shape your bread. For a simple loaf, gently form the dough into a round or an oblong shape that will fit into your prepared baking pan or directly onto a baking sheet lined with parchment paper. If you prefer, you can divide the dough to make smaller rolls or baguettes. Gently tuck the edges underneath to create a taut surface. Once shaped, place the dough on your prepared baking surface or into your loaf pan. Cover it loosely with plastic wrap or a kitchen towel and let it rise for a second time. This second rise is shorter, usually about 30-45 minutes, or until the dough has nearly doubled again. You want it to look puffy and well-risen, but not so much that it collapses when you touch it.
Baking the Homemade Bread
Achieving the Perfect Crust
Preheat your oven to 375 degrees Fahrenheit (190 degrees Celsius) during the second rise. Once the dough has completed its second rise, it’s ready to bake. If you like, you can lightly score the top of the loaf with a sharp knife or a lame. This allows the bread to expand in a controlled manner during baking and adds a nice aesthetic touch. Place the loaf into the preheated oven. For a softer crust, you can place a shallow pan filled with water on the bottom rack of the oven before preheating to create steam. Bake for 30-40 minutes for a standard loaf, or until the crust is a deep golden brown and the internal temperature of the bread registers 190-200 degrees Fahrenheit (88-93 degrees Celsius) on an instant-read thermometer. If the crust is browning too quickly, you can loosely tent the loaf with aluminum foil for the remainder of the baking time.
Cooling and Enjoying
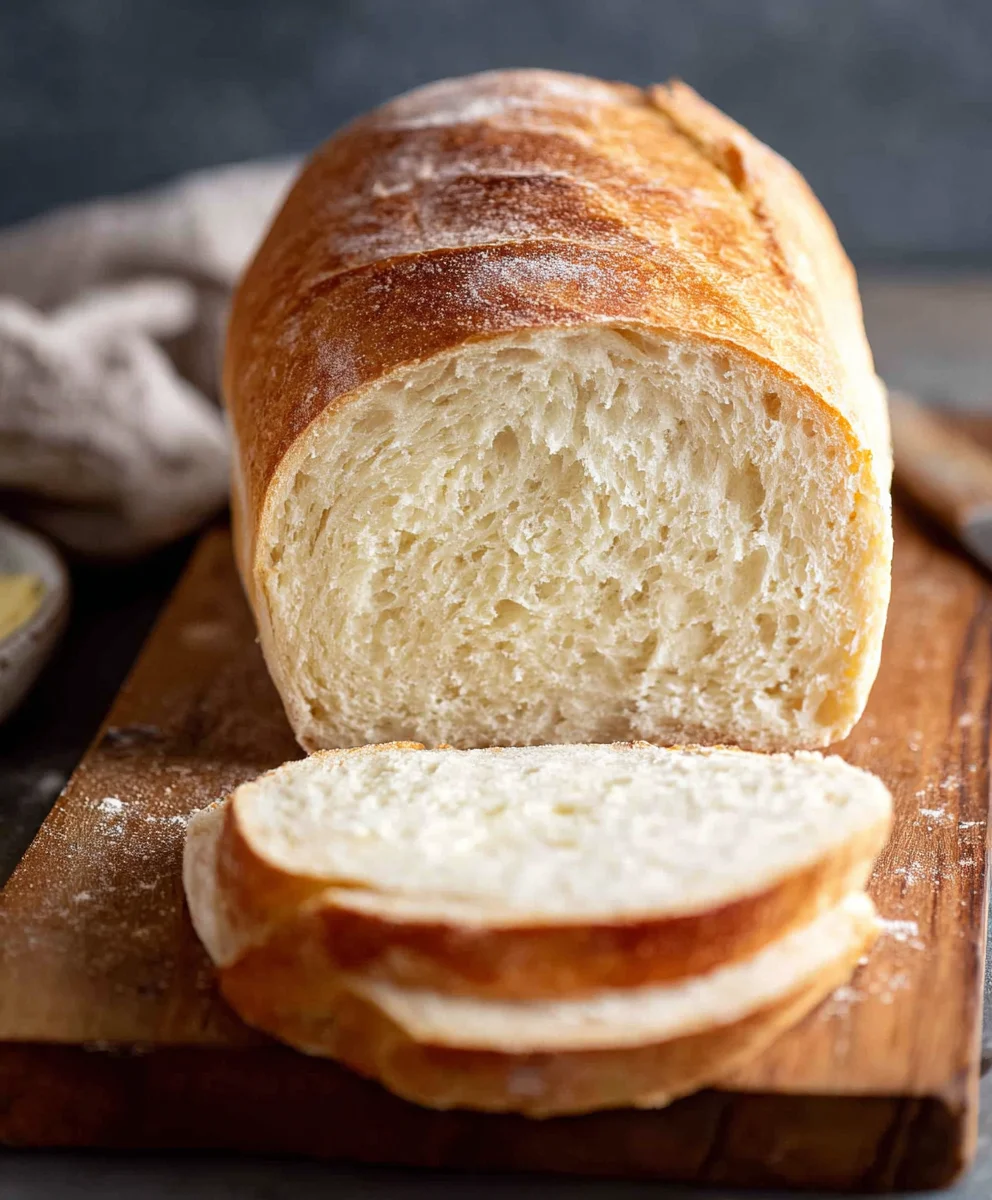
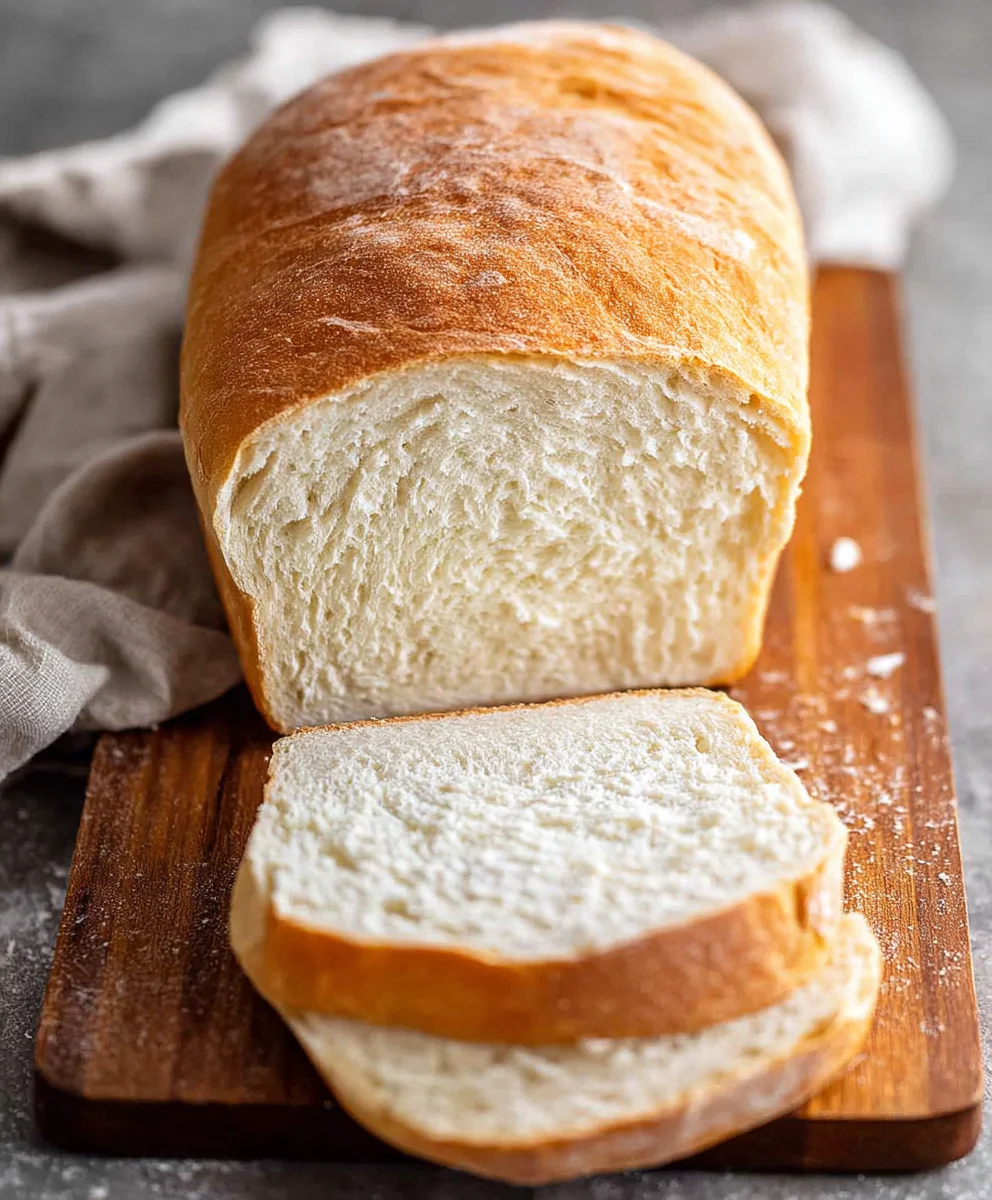
Once baked to perfection, carefully remove the Homemade Bread from the oven. Immediately transfer the loaf from the baking pan or sheet to a wire cooling rack. This is crucial to prevent the bottom of the crust from becoming soggy. Allow the bread to cool completely before slicing, ideally for at least 1-2 hours. This allows the internal structure to set. While the aroma of freshly baked bread is incredibly tempting, slicing too soon can result in a gummy texture. Once cooled, slice your beautiful Homemade Bread and enjoy the fruits of your labor! It’s wonderful served plain, toasted with butter, or as the base for your favorite sandwiches.
Conclusion:
And there you have it – your very own delicious batch of Homemade Bread! We hope you enjoyed the process and are now savoring the incredibly satisfying aroma and taste of bread baked with your own hands. This recipe is a fantastic starting point, offering a wonderfully soft interior and a delightfully chewy crust that is perfect for any occasion. We’ve guided you through each step, from mixing the dough to achieving that golden-brown perfection. Remember, baking is a journey, and with each loaf, you’ll gain more confidence and discover your own unique touch.
Serve your beautiful Homemade Bread warm with a generous spread of butter, alongside your favorite soup or stew, or as the base for incredible sandwiches. Don’t be afraid to experiment! Consider adding herbs like rosemary or thyme to the dough for an aromatic twist, or incorporating seeds like poppy or sesame for added texture and flavor. You could even try a touch of honey or maple syrup in the dough for a subtle sweetness. The possibilities are endless!
We encourage you to try this recipe again and again, refining your technique and making it your own. Happy baking!
Frequently Asked Questions:
Why is my Homemade Bread dense instead of airy?
A dense loaf often indicates issues with yeast activity or gluten development. Ensure your yeast is fresh and activated properly in warm, not hot, liquid. Over-kneading can also make the bread tough, while under-kneading prevents proper gluten structure. Make sure you’re letting the dough rise sufficiently in a warm place.
Can I freeze Homemade Bread?
Absolutely! Once your Homemade Bread has cooled completely, you can wrap it tightly in plastic wrap and then in aluminum foil or place it in a freezer-safe bag. It will keep well in the freezer for up to 2-3 months. Thaw it at room temperature or gently toast slices directly from frozen.
Easy Homemade Bread Recipe – Delicious & Simple
A straightforward and delicious recipe for homemade bread, perfect for beginners.
Ingredients
-
2 cups warm water (105-115 degrees Fahrenheit)
-
1 Tablespoon active dry yeast
-
1/4 cup honey
-
2 teaspoons salt
-
2 Tablespoons vegetable oil
-
4 to 5 1/2 cups all-purpose flour
Instructions
-
Step 1
Activate the yeast by sprinkling it over warm water (105-115°F) in a large bowl and letting it sit for 5-10 minutes until foamy. -
Step 2
Stir in honey, salt, and vegetable oil. Gradually add about 4 cups of flour and mix until a shaggy dough forms. -
Step 3
Turn the dough onto a lightly floured surface and knead for 8-10 minutes until smooth and elastic, adding more flour as needed. -
Step 4
Place the dough in a greased bowl, cover, and let rise in a warm place for 1-1.5 hours, or until doubled in size. -
Step 5
Punch down the dough, shape it into a loaf, and place it on a baking sheet or in a loaf pan. Cover and let rise for another 30-45 minutes. -
Step 6
Preheat oven to 375°F (190°C). Bake for 30-40 minutes until golden brown and the internal temperature reaches 190-200°F (88-93°C). -
Step 7
Cool completely on a wire rack before slicing.
Important Information
Nutrition Facts (Per Serving)
It is important to consider this information as approximate and not to use it as definitive health advice.
Allergy Information
Please check ingredients for potential allergens and consult a health professional if in doubt.