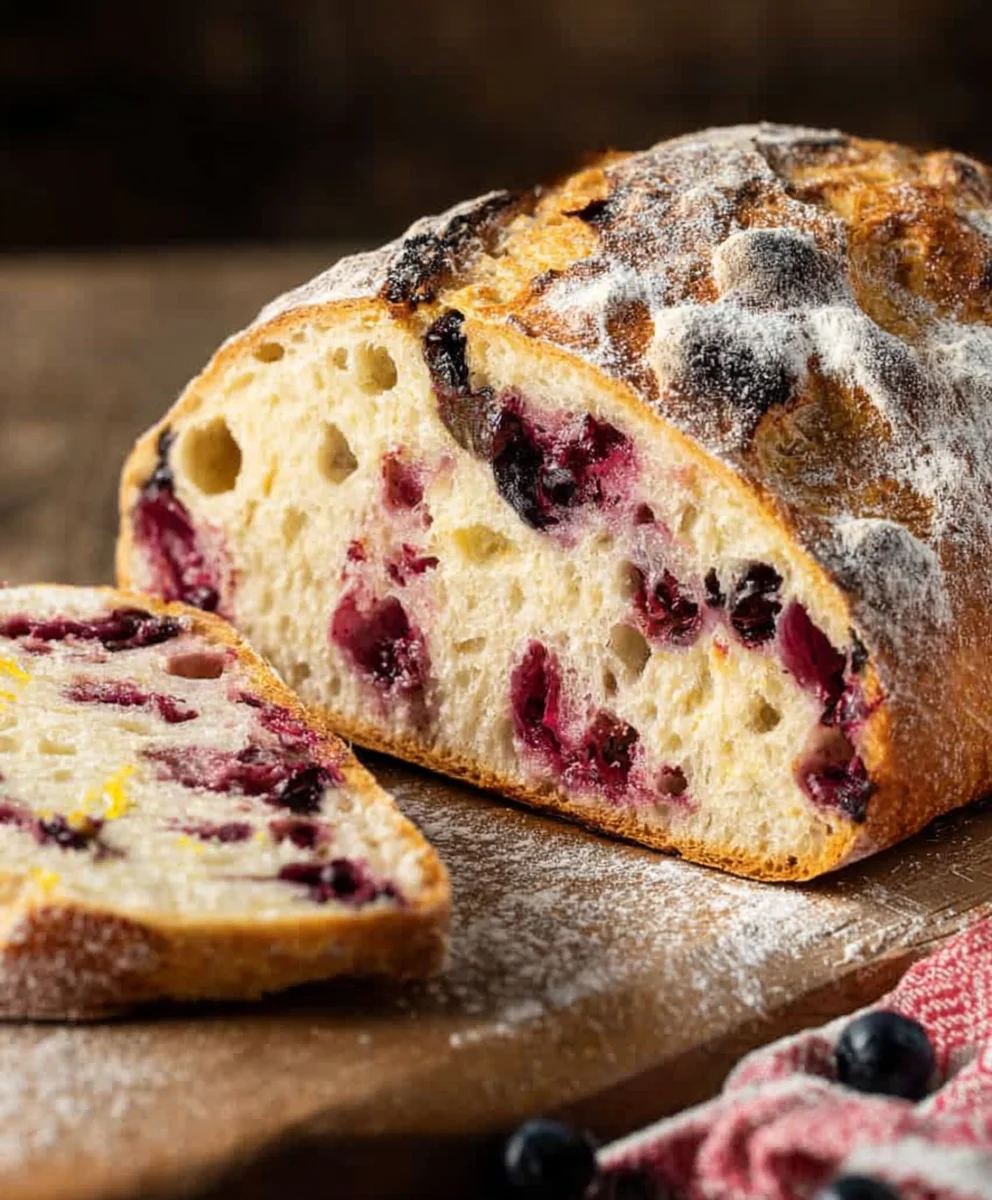
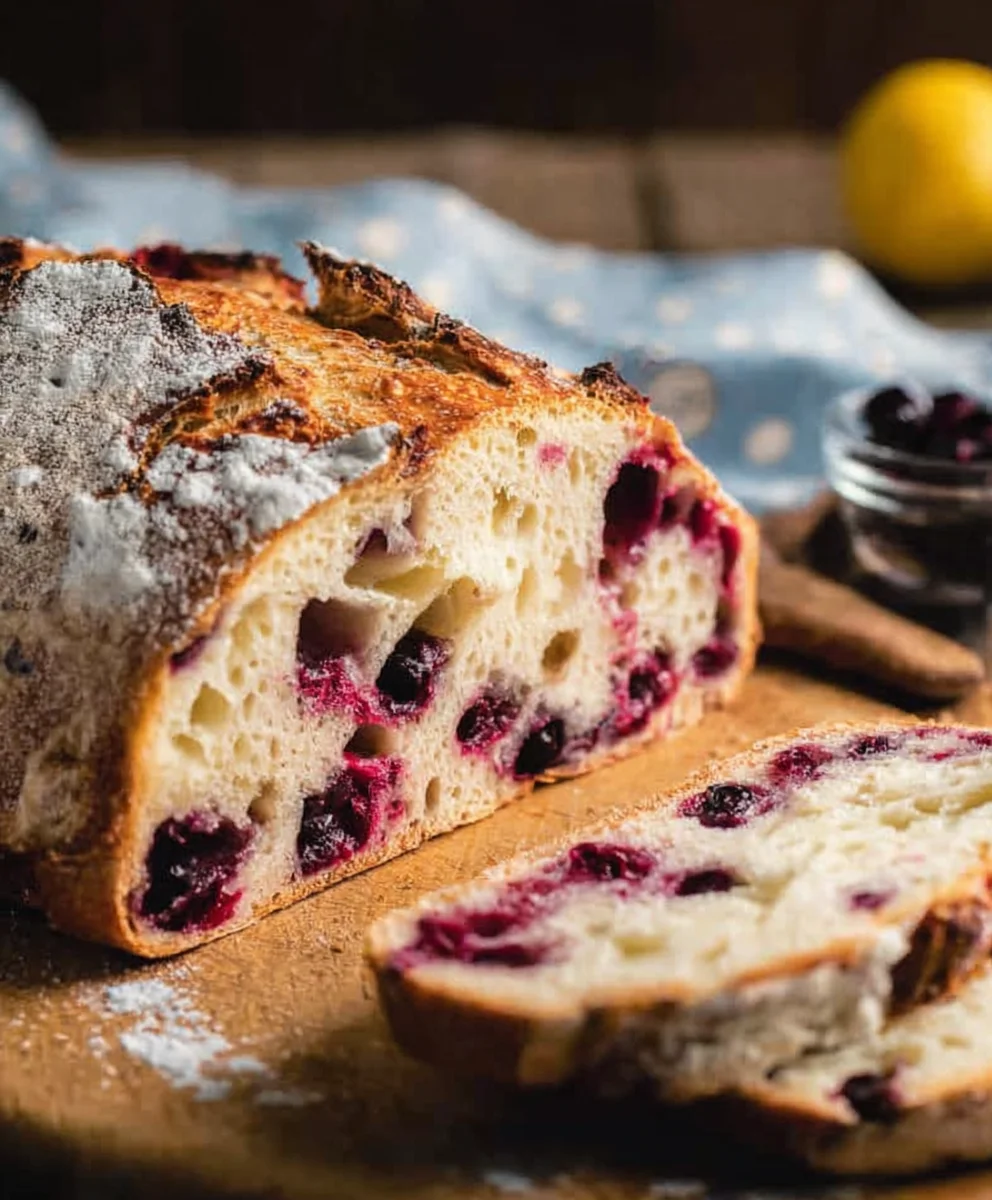
Blueberry Lemon Sourdough Bread-Easy Sweet Recipe
Blueberry Lemon Sourdough Bread is a delightful dance of tangy, sweet, and subtly sour notes that will awaken your taste buds and elevate your breakfast or afternoon snack. There’s a reason why this particular combination has captured the hearts (and ovens) of home bakers everywhere. It’s the perfect marriage of the naturally leavened complexity of sourdough with the bright, zesty punch of lemon and the juicy bursts of sweet blueberries. Imagin extracte the aroma filling your kitchen as it bakes – a comforting, irresistible invitation to indulge. What truly sets this Blueberry Lemon Sourdough Bread apart is the way the sourdough starter lends a unique depth and chew, creating a crust that crackles with promise and a crum extractb that’s both tender and satisfying. The vibrant streaks of blueberry and the fragrant zest of lemon are not just flavors; they are an experience, making every slice a moment of pure joy.
Get ready to fall in love with your new favorite baked good.
Ingredients:
- 3 cups bread flour
- 1⅓ cups lukewarm water
- ¾ cup active, bubbly, and well-fed sourdough starter
- 3 tablespoons white sugar
- 1 teaspoon salt
- 1¼ cup fresh blueberries
- 1 tablespoon lemon zest
Autolyse Phase
Step 1: Combining Flour and Water
To begin extract our delicious Blueberry Lemon Sourdough Bread, the first step is to combine the bread flour and lukewarm water. In a large mixing bowl, add the 3 cups of bread flour. Then, gradually pour in the 1⅓ cups of lukewarm water. Lukewarm water is crucial here, as it helps to activate the yeast in your sourdough starter and promotes better gluten development. Too hot, and you risk killing the beneficial microbes; too cold, and the process will be sluggish. Stir these together with a wooden spoon or your hands until just combined. You’ll notice a shaggy, unformed dough at this stage – that’s exactly what we’re aiming for. There should be no dry pockets of flour left. Cover the bowl with a damp kitchen towel or plastic wrap and let it rest for at least 30 minutes, and up to an hour. This resting period, known as the autolyse, allows the flour to fully hydrate and the glutgin extractto begin developing on its own, making the subsequent kneading process much easier and resulting in a more tender crum extractb.
Mixing the Dough
Step 2: Incorporating Starter, Sugar, and Salt
After the autolyse period, it’s time to introduce the key players that will give our Blueberry Lemon Sourdough Bread its characteristic tang and structure. To the shaggy dough in the bowl, add your ¾ cup of active, bubbly, and well-fed sourdough starter. It’s important that your starter is active; you should see signs of fermentation like bubbles and it should have a pleasant, slightly sour aroma. Next, add the 3 tablespoons of white sugar. The sugar doesn’t just add a touch of sweetness; it also acts as food for the yeast in the gin extractrter, encouraging a robust rise. Finally, sprinkle in the 1 teaspoon of salt. Salt is vital for controlling fermentation, strengthening the gluten network, and, of course, enhancing the flavor of the bread. Now, using your hands, gently but thoroughly mix all the ingredients into the dough. Squeeze and fold the dough with your fingers until everything is well incorporated. The dough will still be sticky, but it should start to feel a bit more cohesive than before.
Developing the Dough and Adding Flavor
Step 3: Kneading and Flavor Infusion
Now comes the stage where we develop the gluten structure that will give our Blueberry Lemon Sourdough Bread its amazing chew. We’ll be performing a series of folds to build strength. For the next 15-20 minutes, you’ll want to knead the dough. You can do this in the bowl or on a lightly floured surface. If you’re in the bowl, use a stretch-and-fold technique: reach under one side of the dough, stretch it up and over to the opposite side, then rotate the bowl and repeat. Do this for about 5 minutes. Let the dough rest for 10 minutes, then repeat this stretch-and-fold process another two times. After these folds, the dough should become smoother and more elastic. Once the dough has gained some strength, it’s time to infuse it with our vibrant flavors. Gently spread the dough out slightly on your work surface or in the bowl, and sprinkle the 1 tablespoon of lemon zest evenly over the surface. Then, scatter the 1¼ cup of fresh blueberries across the zest. Now, carefully fold the dough over itself a few times to distribute the zest and blueberries throughout. Be gentle to avoid breaking too many berries.
Bulk Fermentation and Shaping
Step 4: First Rise and Shaping the Loaf
Cover the bowl containing your dough with a damp towel or plastic wrap and let it undergo its bulk fermentation at room temperature. This process can take anywhere from 4 to 8 hours, depending on the ambient temperature and the activity of your starter. You are looking for the dough to increase in volume by about 50-75% and to appear visibly puffier. You can perform another set of stretch-and-folds during this time, perhaps every 1-2 hours, to further strengthen the dough. Once the bulk fermentation is complete, turn the dough out onto a lightly floured surface. Be gentle to preserve the air bubbles. Shape the dough into your desired loaf shape – a round boule or an oblong batard works beautifully for this Blueberry Lemon Sourdough Bread. To shape, gently pull the edges of the dough towards the center and then flip it over, using your hands to create surface tension by tucking the edges underneath. This helps to create a taut surface, which will support the final rise.
Proofing and Baking
Step 5: Final Proof and Baking the Bread
Carefully place your shaped loaf into a well-floured proofing basket (banneton) or a bowl lined with a floured tea towel. The seam side should be facing upwards. Cover the basket or bowl and place it in the refrigerator for a cold proof. This cold fermentation slows down the yeast activity while allowing the flavors to develop further. A minimum of 12 hours and up to 24 hours in the refrigerator is ideal. When you are ready to bake your Blueberry Lemon Sourdough Bread, preheat your oven to 450°F (230°C) with a Dutch oven or baking stone inside for at least 30 minutes. Carefully turn your proofed loaf out of the basket onto a piece of parchment paper or directly onto the hot baking stone. Score the top of the loaf with a sharp knife or lame to allow for even expansion during baking. If using a Dutch oven, carefully place the loaf inside, cover with the lid, and bake for 20 minutes. Then, remove the lid and continue baking for another 20-25 minutes, or until the crust is a deep golden brown and the internal temperature reaches around 200-210°F (93-99°C). If baking on a stone, you might want to create steam in the oven by placing a pan of hot water on the bottom rack during the initial phase of baking. Once baked, transfer the bread to a wire rack to cool completely before slicing. This cooling period is crucial frum extractthe crumb to set properly.
Conclusion:
We’ve reached the end of our delightful journey in crafting the perfect Blueberry Lemon Sourdough Bread! I hope you found this recipe inspiring and achievable. This bread truly embodies the best of both worlds: the tangy complexity of sourdough paired with the vibrant burst of blueberries and the zesty brightness of lemon. It’s a testament to the magic that happens when simple, wholesome ingredients come together. I encourage you to give this recipe a try; the aroma alone will fill your kitchen with warmth and anticnon-alcoholic ipation. The process might seem a little daunting at first, but with a little patience and attention, you’ll be rewarded with a loaf that’s not only visually stunning but incredibly delicious.
This Blueberry Lemon Sourdough Bread is wonderfully versatile. It’s fantastic on its own, toasted with a smear of butter, or as a base for a more elaborate breakfast. Imagin extracte it served alongside a fresh fruit salad, or even as a sweet accompaniment to a light brunch. For variations, consider adding a touch of lavender for an unexpected floral note, or perhaps some finely chopped almonds for added crunch. Feel free to experiment with different types of berries if blueberries aren’t your favorite, though the classic combination here is truly something special.
Frequently Asked Questions:
Can I use fresh blueberries instead of frozen?
Absolutely! If using fresh blueberries, you might want to toss them with a tablespoon of flour before adding them to the dough to help prevent them from sinking to the bottom. Fresh berries can release more moisture during baking, so using flour helps bind them.
My sourdough starter isn’t very active. Will this recipe still work?
For the best results with any sourdough recipe, including this Blueberry Lemon Sourdough Bread, a healthy and active starter is crucial. If your starter is sluggish, I recommend feeding it regularly for a few days until it’s consistently doubling in size and bubbly beforgin extractou begin. This will ensure a good rise and the characteristic sourdough flavor.
Blueberry Lemon Sourdough Bread-Easy Sweet Recipe
An easy and sweet recipe for homemade Blueberry Lemon Sourdough Bread, perfect for a delightful breakfast or snack.
Ingredients
-
3 cups bread flour
-
1⅓ cups lukewarm water
-
¾ cup active, bubbly, and well-fed sourdough starter
-
3 tablespoons white sugar
-
1 teaspoon salt
-
1¼ cup fresh blueberries
-
1 tablespoon lemon zest
Instructions
-
Step 1
Combine 3 cups bread flour and 1⅓ cups lukewarm water in a large bowl until just combined, forming a shaggy dough. Cover and let rest for 30-60 minutes (autolyse). -
Step 2
Add ¾ cup active sourdough starter, 3 tablespoons white sugar, and 1 teaspoon salt to the dough. Mix thoroughly with your hands until incorporated. The dough will still be sticky. -
Step 3
Knead the dough for 15-20 minutes using stretch-and-fold techniques (5 minutes of folding, 10-minute rest, repeat twice). Gently spread the dough, sprinkle with 1 tablespoon lemon zest and 1¼ cup fresh blueberries. Fold to distribute. -
Step 4
Cover the dough and let it bulk ferment at room temperature for 4-8 hours, until it increases in volume by 50-75%. Shape the dough into your desired loaf shape on a lightly floured surface. -
Step 5
Place the shaped loaf seam-side up in a well-floured proofing basket or lined bowl. Cover and refrigerate for 12-24 hours for a cold proof. -
Step 6
Preheat oven to 450°F (230°C) with a Dutch oven or baking stone inside for at least 30 minutes. Carefully turn the proofed loaf onto parchment paper or a hot baking stone. Score the top. Bake in a covered Dutch oven for 20 minutes, then uncovered for another 20-25 minutes until deep golden brown (internal temperature 200-210°F). If using a baking stone, create steam. Cool completely on a wire rack before slicing.
Important Information
Nutrition Facts (Per Serving)
It is important to consider this information as approximate and not to use it as definitive health advice.
Allergy Information
Please check ingredients for potential allergens and consult a health professional if in doubt.