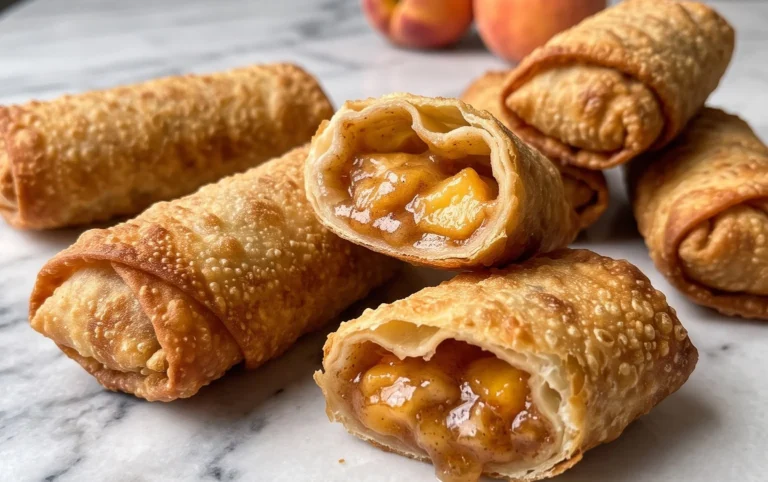
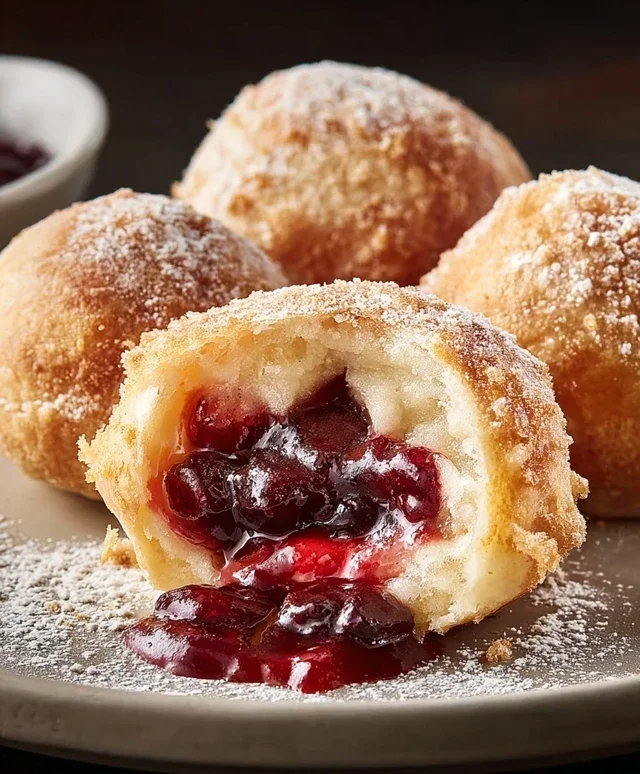
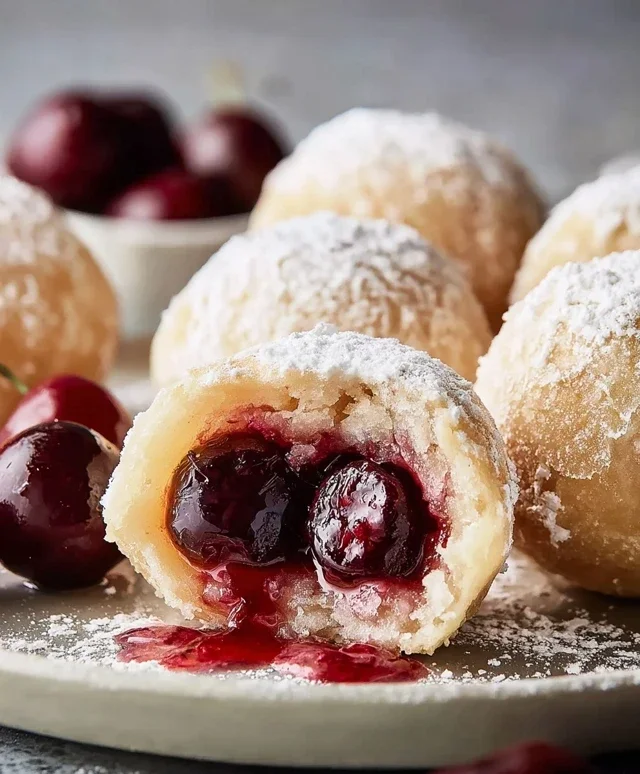
Cherry Pie Bombs- Irresistible Sweet Treats
Cherry Pie Bombs are the bite-sized bursts of pure joy you’ve been dreaming of. Forget the fuss of a full-sized pie; these delightful little nuggets deliver all the classic cherry pie flavor you crave in a perfectly portable package. Have you ever craved that flaky crust and sweet, tart cherry filling, but didn’t want to commit to a whole dessert? That’s precisely where these Cherry Pie Bombs come in. They’re perfect for potlucks, parties, or just a delightful afternoon treat when you need a little pick-me-up. What makes them truly special is the incredible balance of textures – the crisp, buttery pastry giving way to the luscious, warm cherry center. They’re incredibly satisfying without being overwhelming, making them an instant crowd-pleaser and a personal favorite for me to whip up when that pie craving strikes!
Cherry Pie Bombs: A Decadent and Easy Dessert Delight
Get ready to impress your friends and family with these incredibly delicious Cherry Pie Bombs! This recipe takes all the comforting, sweet flavors of a classic cherry pie and transforms them into delightful, bite-sized explosions of joy. They’re perfect for parties, a special treat, or whenever that craving for something sweet and fruity strikes. The best part? They’re surprisingly easy to make, especially with the help of store-bought biscuits. Let’s dive into creating these little pockets of happiness.
Ingredients:
Preparing Your Cherry Pie Bombs
The journey to these irresistible treats begin extracts with preparing our key components. We’ll start by getting our cherry pie filling ready, ensuring it’s the perfect consistency to fill our biscuit pockets.
First, open your can of Grands “Big” biscuits. You’ll want to gently separate the biscuits, being careful not to tear them. Since we’re aiming for little bombs, we’ll be working with each biscuit individually. Some recipes might suggest pressing or stretching the biscuits, but for these “Big” biscuits, you’ll find they’re quite pliable without much effort. The goal is to create a small, contained pocket for our cherry filling.
Next, let’s talk about the star of the show: the cherry pie filling. You’ll want to give it a good stir in its can or bowl. If the filling seems a little too chunky for easy spooning, you can give it a quick mash with a fork to break up some of the larger cherry pieces. This will make it easier to distribute evenly and prevent it from bursting out of the biscuits during the frying process.
Now, for the assembly. Take one flattened biscuit and, using a spoon, carefully place a generous dollop of the cherry pie filling into the center. You don’t want to overfill it, or the filling will inevitably escape when you seal the biscuit. Think of it as a sweet, luscious secret waiting to be discovered.
Once you have your filling in place, gently bring the edges of the biscuit up and over the filling, pinching them together to seal completely. It’s crucial to ensure there are no gaps or openings. You can think of this as creating a little senon-alcoholic aled pouch. Once senon-alcoholic aled, gently roll the biscuit between your palms to create a smooth, round ball. Repeat this process for all the biscuits, ensuring each one is securely senon-alcoholic aled. This step is vital for a successful fry; a well-senon-alcoholic aled bomb will prevent the hot oil from getting into the filling and making a mess.
Frying to Golden Perfection
This is where the magic truly happens! Frying these Cherry Pie Bombs will give them that irresistible golden-brown crunch.
1. Heating the Oil: In a deep, heavy-bottomed pot or a Dutch oven, pour enough vegetable oil to reach a depth of about 2-3 inches. It’s important to have enough oil so the biscuit bombs can float freely and fry evenly. Heat the oil over medium-high heat until it reaches approximately 350°F (175°C). You can test the temperature by dropping a tiny piece of biscuit dough into the oil. If it sizzles immediately and floats to the surface, your oil is ready. If it browns too quickly, turn the heat down slightly. If it doesn’t sizzle vigorously, increase the heat. Maintaining the correct oil temperature is key for perfectly cooked bombs – too low and they’ll be greasy; too high and they’ll burn on the outside before cooking through.
2. Frying the Bombs: Carefully, and in batches (don’t overcrowd the pot, as this will lower the oil temperature and lead to greasy bombs), gently place the senon-alcoholic aled biscuit bombs into the hot oil. You’ll want to use a slotted spoon or spider strainer to lower them in slowly, preventing splattering. Let them fry for about 2-3 minutes per side, or until they are beautifully golden brown and puffed up. Use your slotted spoon to gently turn them over to ensure even cooking on all sides. Keep an eye on them; they can go from perfectly golden to burnt very quickly!
3. Draining Excess Oil: Once the Cherry Pie Bombs have achieved that gorgeous golden hue, use your slotted spoon or spider strainer to lift them out of the hot oil. Place them on a plate lined with paper towels. The paper towels will absorb any excess oil, ensuring your bombs have that delightful crisp exterior without being greasy. Allow them to cool for a few minutes before proceeding to the glaze.
Crafting the Sweet Glaze
No dessert is complete without a delicious topping, and our sweet glaze is the perfect finishing touch for these Cherry Pie Bombs.
1. Mixing the Glaze: In a small bowl, whisk together the powdered sugar, milk, and light corn syrup. Start with the ¼ cup of milk and add more, a teaspoon at a time, until you reach your desired drizzling consistency. The corn syrup adds a lovely sheen and prevents the glaze from hardening too quickly, keeping it wonderfully soft and chewy. You want a glaze that is thick enough to coat the bombs but thin enough to drizzle easily.
2. Glazing the Bombs: Once the Cherry Pie Bombs have cooled slightly (you don’t want them piping hot, as the glaze will just slide off, but you also don’t want them completely cold), generously drizzle the prepared glaze over them. You can use a spoon or a piping bag for more controlled drizzling. Get creative with your patterns! The warm bombs will slightly melt the glaze, creating a beautiful, glossy finish.
Allow the glaze to set for a few minutes before serving. These Cherry Pie Bombs are best enjoyed warm, when the filling is gooey and the crust is perfectly crisp. They are a truly delightful way to enjoy the taste of cherry pie in a fun, portable, and utterly delicious format. Enjoy every sweet, fruity bite!
Conclusion:
And there you have it – your guide to creating these delightful Cherry Pie Bombs! I truly hope you found this recipe as enjoyable to read as I did to write. These little bursts of cherry goodness are an absolute crowd-pleaser, perfect for any occasion. The flaky pastry encasing the sweet and tangy cherry filling creates a flavor combination that’s simply irresistible. Whether you’re a seasoned baker or just starting out, these Cherry Pie Bombs are surprisingly approachable and incredibly rewarding to make. They’re fantastic served warm, perhaps with a dollop of vanilla ice cream or a drizzle of whipped cream, but they’re also delicious at room temperature. Don’t be afraid to get creative with variations! Consider adding a pinch of cinnamon or almond extract to the cherry filling for an extra layer of flavor, or try using a different type of berry for a delightful twist. I highly encourage you to give this recipe a try; I promise you won’t be disappointed with these little flavor explosions!
Frequently Asked Questions:
Can I make Cherry Pie Bombs ahead of time?
Yes, absolutely! You can prepare the Cherry Pie Bombs up to the point of baking and store them, covered, in the refrigerator for up to 24 hours. When you’re ready to bake, just add a few extra minutes to the baking time to ensure they’re heated through.
What kind of cherries should I use?
For the best flavor and texture, I recommend using fresh or frozen tart cherries (like Montmorency). If you use sweet cherries, you might want to reduce the sugar slightly. Canned cherry pie filling can also be used in a pinch, but fresh or frozen will give you a superior result.
How do I store leftover Cherry Pie Bombs?
Store any leftover Cherry Pie Bombs in an airtight container at room temperature for up to two days, or in the refrigerator for up to four days. Reheat them gently in a warm oven or microwave before serving.
Cherry Pie Bombs
Sweet, fried biscuit bites filled with cherry pie filling and drizzled with a creamy glaze.
Ingredients
-
16.3 ounces Grands “Big” biscuits, flaky
-
21 ounces cherry pie filling
-
Vegetable oil, for frying
-
2 cups powdered sugar
-
1/4 cup milk
-
1 tablespoon light corn syrup
Instructions
-
Step 1
Prepare the cherry pie filling by opening the can and gently stirring to ensure even distribution. -
Step 2
Carefully separate each Grands “Big” biscuit. Flatten each biscuit slightly with your hands. -
Step 3
Spoon about 1 tablespoon of cherry pie filling into the center of each flattened biscuit. Fold the edges of the biscuit over the filling to completely enclose it, pinching the seams to seal. -
Step 4
Heat vegetable oil in a deep skillet or Dutch oven over medium-high heat until it reaches about 350°F (175°C). Carefully place the sealed biscuit bombs into the hot oil, frying in batches to avoid overcrowding. -
Step 5
Fry the cherry pie bombs for about 2-3 minutes per side, or until golden brown and puffed up. Use a slotted spoon to remove them from the oil and drain on paper towels. -
Step 6
While the bombs are cooling slightly, prepare the glaze by whisking together the powdered sugar, milk, and light corn syrup in a small bowl until smooth and pourable. -
Step 7
Drizzle the glaze generously over the warm cherry pie bombs before serving.
Important Information
Nutrition Facts (Per Serving)
It is important to consider this information as approximate and not to use it as definitive health advice.
Allergy Information
Please check ingredients for potential allergens and consult a health professional if in doubt.