Classic Pasta Salad Recipe – Easy & Delicious
Classic Pasta Salad is more than just a side dish; it’s a vibrant, crowd-pleasing icon of summer gatherings and potluck perfection. We all have our memories tied to those overflowing bowls of perfectly cooked pasta, tossed with a medley of colorful vegetables, savory cheeses, and a tangy dressing. But what truly makes this classic pasta salad so enduringly popular? It’s the sheer adaptability, the way it can be a blank canvas for your favorite flavors, and its ability to be made ahead, freeing you up to actually enjoy the party. Whether you’re a seasoned cook or just starting your culinary journey, mastering this dish is incredibly rewarding. It’s the ultimate comfort food, versatile enough for a light lunch or the star of any picnic table. Get ready to fall in love with this quintessential classic pasta salad all over again.
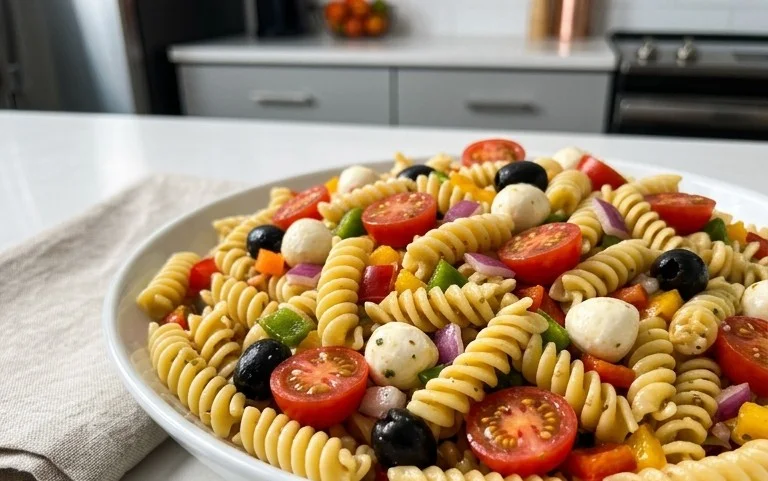
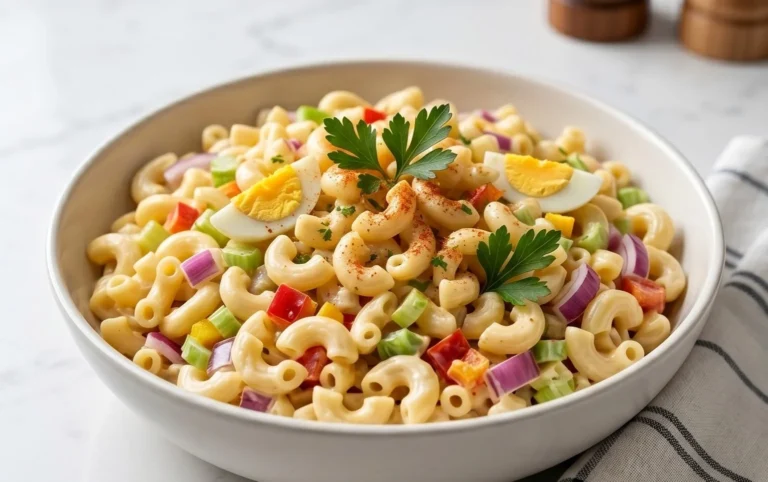
Classic Pasta Salad
There’s something incredibly satisfying about a big, colorful bowl of classic pasta salad. It’s the perfect potluck dish, a reliable side for barbecues, and a fantastic make-ahead meal for busy weeknights. This recipe is a crowd-pleaser, packed with all the familiar flavors and textures that make this dish a timeless favorite. The beauty of pasta salad is its versatility; you can easily adjust the ingredients to your liking, but this classic combination is a winner for a reason. It’s hearty, flavorful, and brings a burst of freshness to any meal.
The key to a truly great pasta salad is the dressing. We’re going for a zesty, herb-infused vinaigrette that coats every piece of pasta and every colorful vegetable. It’s not overly heavy, allowing the fresh ingredients to shine. And of course, we need plenty of cheese and savory beef pepperoni for that irresistible classic touch. Let’s get started!
Ingredients:
Cooking Instructions:
1. Cook the Pasta to Perfection
The foundation of any great pasta salad is perfectly cooked pasta. For this recipe, we’ll use 24 ounces of tri-color rotini. You’ll need a large pot for this, ensuring the pasta has plenty of room to move around as it cooks, preventing it from clumping together. Bring a generous amount of water to a rolling boil, and don’t forget to salt the water generously. This is your first opportunity to season the pasta itself, giving it a subtle savory flavor that permeates the entire dish. Follow the package directions for al dente cooking, which means the pasta should be tender but still have a slight bite. Overcooked pasta will turn mushy in the salad, which is definitely not what we’re aiming for. Once cooked, drain the pasta thoroughly and rinse it immediately with cold water. This step is crucial for stopping the cooking process and preventing the pasta from sticking together as it cools. Spread the drained pasta out on a baking sheet or a large platter to cool completely. This allows excess moisture to evaporate, ensuring your salad doesn’t become watery.
2. Prepare the Fresh Components
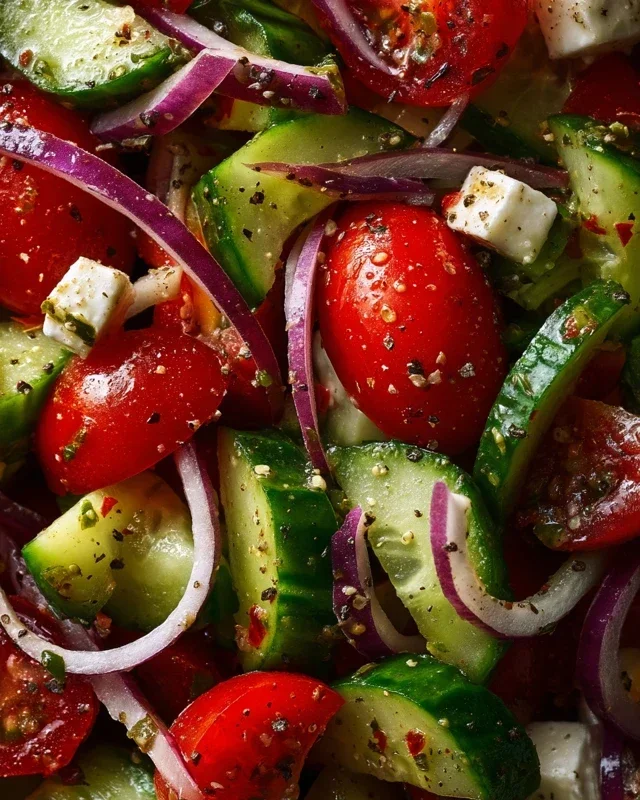
While the pasta is cooling, let’s get all our vibrant mix-ins ready. You’ll need 1 pint of cherry tomatoes, which should be halved. Halving them makes them easier to eat and allows them to absorb the dressing better. Next, dice 1 red onion. If you find raw red onion too overpowering, you can soak the diced onion in cold water for about 10-15 minutes and then drain it well. This will mellow out its sharp flavor. Dice 1 green bell pepper. Any color bell pepper would work here, but green offers a nice crispness and a slightly bitter counterpoint to the other ingredients. Cube 16 ounces of mozzarella cheese. Small, bite-sized cubes are ideal. For an extra layer of cheesy goodness, we’re also adding 1 cup of grated parmesan cheese. Finally, grab 8 ounces of sliced olives. Black olives are a classic choice, but Kalamata olives would also add a delicious briney note.
3. Assemble the Salad Base
Once the pasta is completely cool, transfer it to a very large mixing bowl. This is where all the magic happens, so make sure your bowl is big enough to comfortably hold everything without making a mess. Add the prepared cherry tomatoes, diced red onion, diced green bell pepper, cubed mozzarella cheese, and sliced olives to the bowl with the cooled pasta. We’re not adding the beef pepperoni or parmesan cheese just yet, as we want to ensure everything else gets a good coating of dressing first. This initial mix creates the colorful and textural base of our pasta salad. Gently toss these ingredients together to distribute them evenly amongst the pasta.
4. Craft the Zesty Italian Dressing
Now for the star of the show: the dressing! In a separate bowl or a large measuring cup, whisk together 1 1/2 cups of olive oil and 1/2 cup of red grape juice vinegar. The red grape juice vinegar adds a lovely tang and a hint of sweetness without being too acidic. To this liquid base, add 2 tablespoons of Italian seasoning for that classic herbaceous flavor, 2 teaspoons of garlic powder for a savory punch, 1 1/2 teaspoons of salt, 1 teaspoon of pepper, and 1/2 teaspoon of red pepper flakes for a subtle warmth. Whisk everything together vigorously until well combined and emulsified. Taste the dressing and adjust the salt and pepper if needed. Remember, this dressing will coat a lot of pasta and other ingredients, so it should have a good amount of flavor.
5. Combine and Chill for Flavor Development
Pour about three-quarters of the prepared dressing over the pasta and vegetable mixture. Gently toss everything to ensure each piece is coated evenly. Now, add the 12 ounces of sliced beef beef pepperoni and the 1 cup of grated parmesan cheese. Toss again to incorporate these ingredients. At this point, you can add the remaining dressing if you feel the salad needs it, or reserve it to drizzle over individual servings. Cover the bowl tightly with plastic wrap or transfer the salad to an airtight container. Refrigerate the pasta salad for at least 2 hours, or preferably longer, before serving. This chilling time is essential. It allows the flavors to meld and deepen, and the pasta to absorb the delicious dressing. The longer it sits, the more flavorful it becomes, making it an ideal make-ahead dish.
6. Serve and Enjoy Your Masterpiece
When you’re ready to serve, give the pasta salad a good stir. If it seems a little dry after chilling, you can always add a splash more olive oil or a bit of extra dressing. Garnish with fresh parsley if desired for an extra pop of color and freshness. This classic pasta salad is best served chilled and is perfect on its own or as a side dish. It’s a testament to simple ingredients coming together to create something truly delicious and satisfying. Enjoy every bite of this vibrant and flavorful dish!
Conclusion:
There you have it – our guide to crafting the perfect Classic Pasta Salad! This dish is an absolute winner for so many reasons. It’s incredibly versatile, effortlessly delicious, and a crowd-pleaser that works for virtually any occasion. Whether you’re planning a backyard barbecue, a potluck dinner, or simply a satisfying weeknight meal, this pasta salad delivers. The balance of tender pasta, crisp vegetables, and a zesty dressing creates a symphony of flavors and textures that’s simply irresistible. Don’t be afraid to personalize it; the beauty of this recipe lies in its adaptability.
I highly encourage you to give this Classic Pasta Salad a try. It’s straightforward to make, incredibly forgiving, and the results are always fantastic. Serve it as a refreshing side dish alongside grilled meats, fish, or chicken. It also holds its own as a light lunch or a vegetarian main course. For even more enjoyment, consider adding your favorite additions like chopped olives, crum extractbled feta cheese, or even some grilled corn for a touch of sweetness. Get creative and make it your own!
Frequently Asked Questions about Classic Pasta Salad:
Can I make this pasta salad ahead of time?
Absolutely! Pasta salad is actually best when made a few hours or even a day in advance. This allows the flavors to meld together beautifully, making it even more delicious. Just be sure to store it in an airtight container in the refrigerator.
What kind of pasta is best for pasta salad?
While many pasta shapes work, short, sturdy shapes like rotini, farfalle (bow-tie), penne, or fusilli are ideal. They hold the dressing well and provide a satisfying bite without becoming mushy.
How long will classic pasta salad last in the refrigerator?
Properly stored in an airtight container, this Classic Pasta Salad will typically stay fresh and delicious for 3-4 days. If you’ve added any delicate ingredients like fresh herbs, it’s best to consume it within 2-3 days.
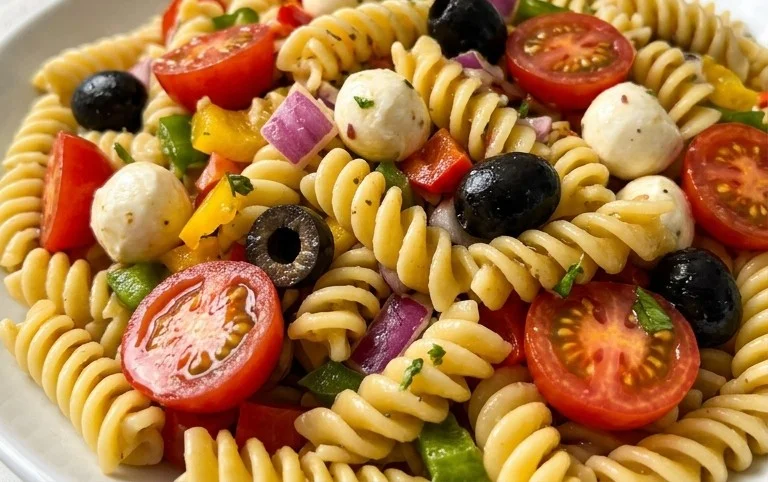
Classic Pasta Salad
A hearty and flavorful pasta salad perfect for potlucks and gatherings, featuring rotini pasta, pepperoni, fresh vegetables, and a zesty vinaigrette.
Ingredients
-
24 ounces tri-color rotini pasta (uncooked)
-
1 pint cherry tomatoes (halved)
-
12 ounces sliced turkey pepperoni
-
1 red onion (diced)
-
1 green bell pepper (diced)
-
16 ounces mozzarella cheese (cubed)
-
1 cup grated parmesan cheese
-
8 ounces olives (sliced)
-
1 1/2 cups olive oil
-
1/2 cup red grape juice vinegar
-
2 tablespoons Italian seasoning
-
2 teaspoons garlic powder
-
1 1/2 teaspoons salt
-
1 teaspoon pepper
-
1/2 teaspoon red pepper flakes
Instructions
-
Step 1
Cook the tri-color rotini pasta according to package directions until al dente. Drain and rinse with cold water to stop the cooking process. Set aside. -
Step 2
In a large bowl, combine the cooked and cooled rotini pasta, halved cherry tomatoes, sliced turkey pepperoni, diced red onion, diced green bell pepper, cubed mozzarella cheese, grated parmesan cheese, and sliced olives. -
Step 3
In a separate small bowl or jar, whisk together the olive oil, red grape juice vinegar, Italian seasoning, garlic powder, salt, pepper, and red pepper flakes to create the dressing. -
Step 4
Pour the dressing over the pasta and vegetable mixture in the large bowl. -
Step 5
Gently toss all the ingredients together until everything is evenly coated with the dressing. -
Step 6
Cover the bowl and refrigerate for at least 30 minutes to allow the flavors to meld before serving.
Important Information
Nutrition Facts (Per Serving)
It is important to consider this information as approximate and not to use it as definitive health advice.
Allergy Information
Please check ingredients for potential allergens and consult a health professional if in doubt.