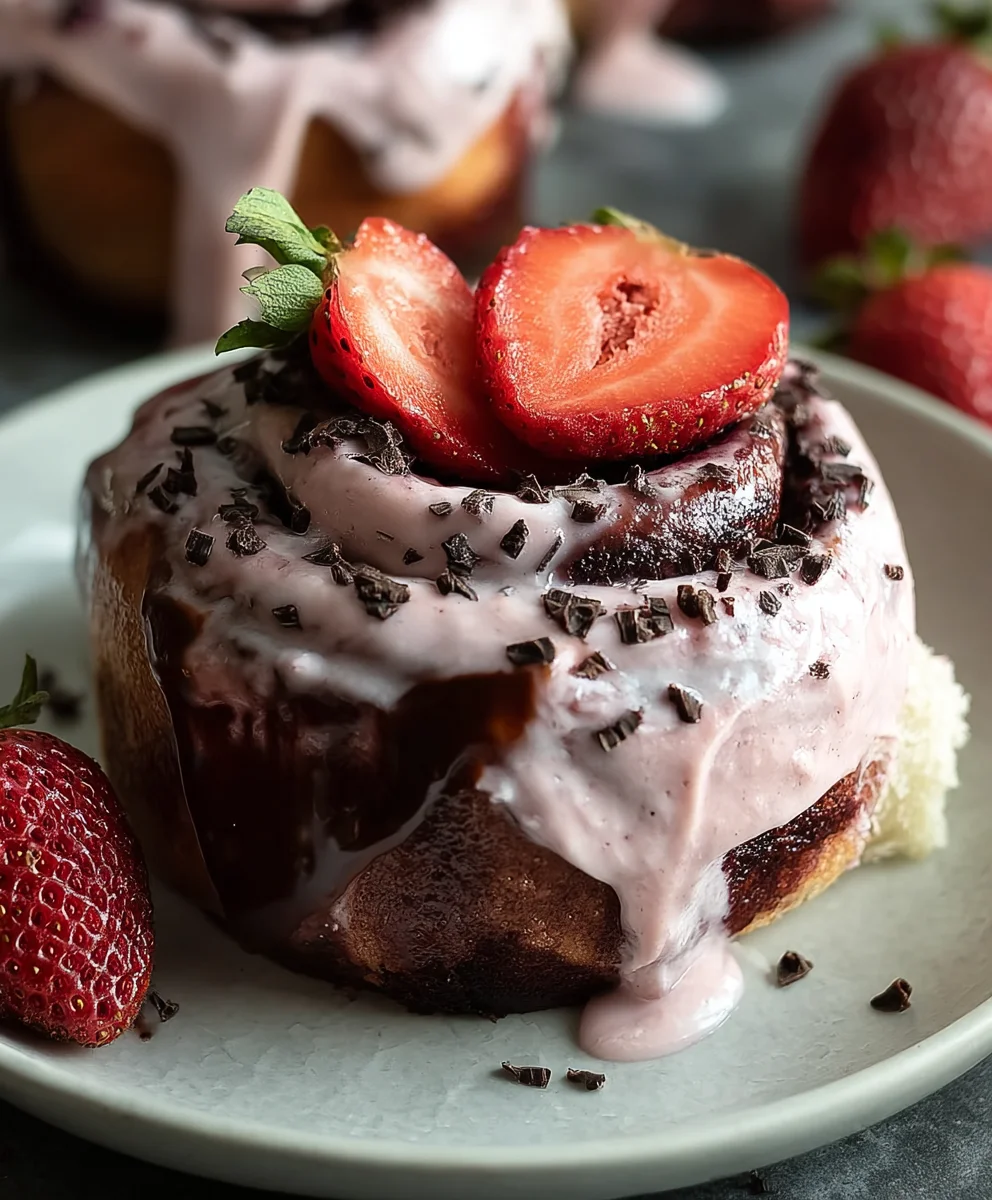
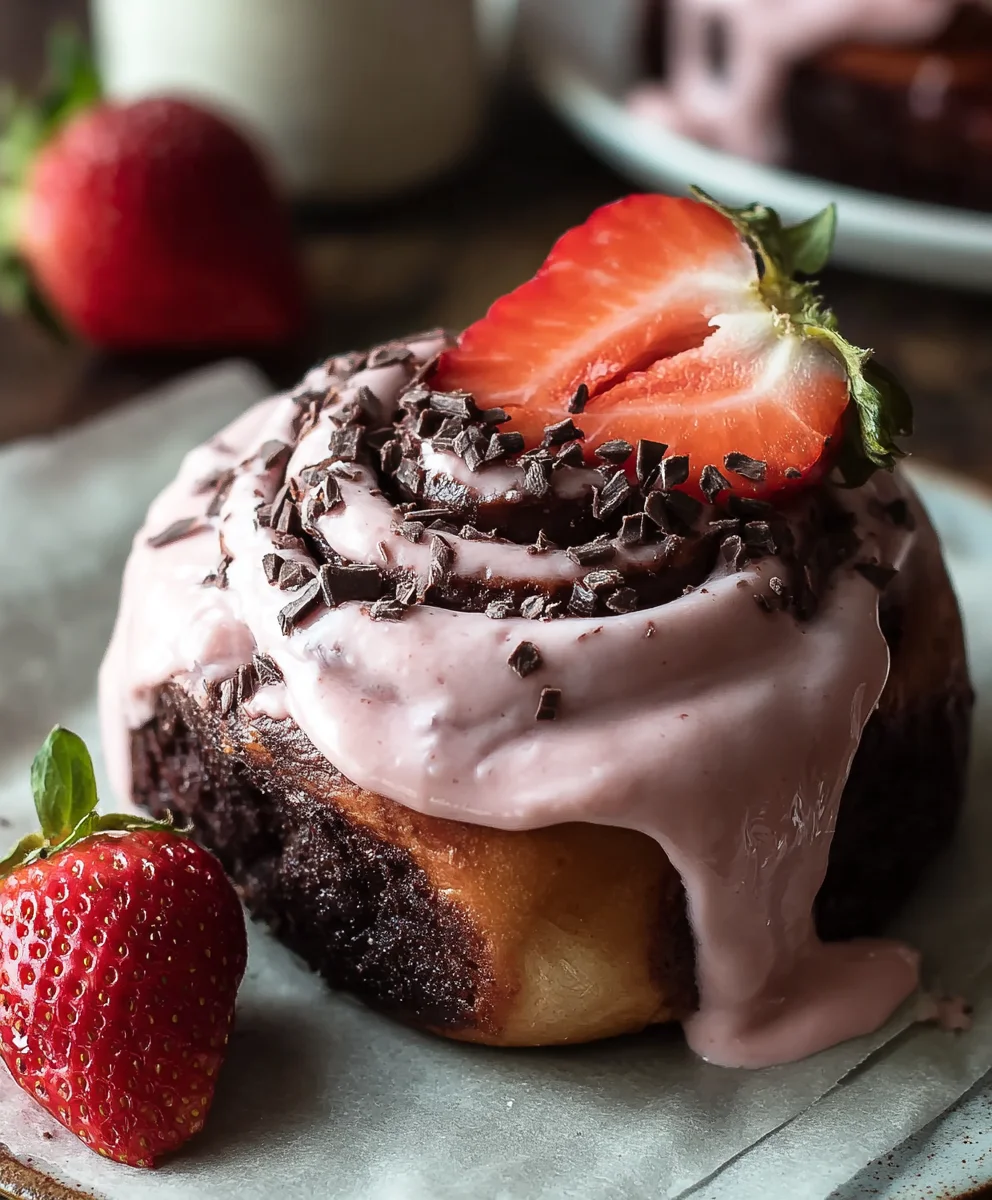
Decadent Chocolate Rolls-Strawberry Cream Cheese Bliss
Chocolate Rolls with Strawberry Cream Cheese Frosting are more than just a dessert; they’re a decadent escape for your taste buds and a guaranteed crowd-pleaser. Imagin extracte sinking your teeth into a swirl of rich, tender chocolate dough, baked to perfection and then generously slathered with a vibrant, tangy strawberry cream cheese frosting that perfectly balances the sweetness. It’s the kind of treat that transports you back to childhood with its comforting flavors, yet feels sophisticated enough for any special occasion. People adore these rolls because they offer that perfect harmony of deep chocolatey goodness and bright, fruity creaminess. What truly makes our Chocolate Rolls with Strawberry Cream Cheese Frosting stand out is the meticulous balance of textures and tastes – the soft, yielding roll against the smooth, slightly tart frosting, all culminating in an unforgettable bite. Prepare to be amazed by how simple yet spectacular these can be!”
Ingredients:
- 1 cup non-dairy milk (such as almond, soy, or oat)
- 3 tablespoons organic cane sugar
- 2¼ teaspoons traditional active dry yeast
- ¼ cup vegetable oil, plus more for greasing
- 2½ cups all-purpose flour, plus more for dusting
- ¼ teaspoon salt
- 3 tablespoons coconut oil, melted
- ¼ cup chocolate chips
- ⅓ cup coconut sugar
- 2 tablespoons unsweetened cocoa powder
- ¼ teaspoon sea salt
- ¼ cup vegan plain cream cheese, softened
- 2 tablespoons strawberry puree (made from about 2 large fresh strawberries, pureed until smooth)
- ⅓ cup powdered sugar
Making the Dough
Let’s get started by creating our rich, chocolatey dough. The key to a light and airy roll is giving the yeast plenty of time and warmth to do its magic.
-
Activating the Yeast:
In a large mixing bowl, gently warm your non-dairy milk. It should be lukewarm, around 105-115°F (40-46°C). If it’s too hot, it will kill the yeast, and if it’s too cool, it won’t activate properly. Stir in the 3 tablespoons of organic cane sugar and sprinkle the 2¼ teaspoons of traditional active dry yeast over the top. Let this mixture sit undisturbed for about 5-10 minutes. You’re looking for the yeast to become foamy and bubbly. This visual cue tells us the yeast is alive and ready to work its leavening wonders. If you don’t see foam, your yeast might be old or the milk was the wrong temperature, and you’ll want to start this step over with fresh yeast.
-
Combining Wet and Dry Ingredients:
Once your yeast mixture is happily foamy, it’s time to add the other wet ingredients. Pour in the ¼ cup of vegetable oil. Give it a gentle stir to incorporate. Now, it’s time for the dry ingredients. In a separate medium bowl, whisk together the 2½ cups of all-purpose flour and ¼ teaspoon of salt. Gradually add the dry ingredients to the wet ingredients in your large mixing bowl. Mix everything with a wooden spoon or a rubber spatula until a shaggy dough starts to form. At this point, it might still be a bit sticky, and that’s perfectly fine.
-
Kneading the Dough:
Turn the shaggy dough out onto a lightly floured surface. Begin extract kneading. This process develops the gluten in the flour, which gives our chocolate rolls their delightful chegrape juicess and structure. Knead by pushing the dough away from you with the heels of your hands, then folding it back over itself. Rotate the dough and repeat. Continue kneading for about 8-10 minutes. The dough should become smooth, elastic, and less sticky. You should be able to poke it with a finger, and the indentation should spring back slowly. If the dough is too sticky, lightly dust your hands and the surface with a little more flour, but be careful not to add too much, as this can make the rolls tough.
-
First Rise:
Lightly grease a clean large bowl with a little vegetable oil. Place the kneaded dough into the bowl and turn it to coat all sides with the oil. Cover the bowl tightly with plastic wrap or a clean kitchen towel. Find a warm, draft-free spot in your kitchen for the dough to rise. This could be near a preheating oven (turned off, of course!), on top of a gently warmed appliance, or simply in a sunny spot. Let the dough rise for 1 to 1.5 hours, or until it has doubled in size. This slow, steady rise is crucial for developing flavor and texture.
Assembling and Baking the Chocolate Rolls
Now that our dough has had a lovely rest and risen beautifully, it’s time to bring in that delicious chocolatey filling and get these rolls ready for their oven transformation.
-
Preparing the Filling:
While the dough is on its first rise, let’s get our decadent chocolate filling ready. In a small bowl, combine the melted 3 tablespoons of coconut oil, ¼ cup of chocolate chips (give them a rough chop if they are large), ⅓ cup of coconut sugar, 2 tablespoons of unsweetened cocoa powder, and ¼ teaspoon of sea salt. Stir these ingredients together until they form a thick, spreadable paste. This mixture will be intensely chocolatey and rich, providing the perfect counterpoint to the soft dough.
-
Rolling and Filling the Dough:
Once the dough has doubled in size, gently punch it down to release the air. Turn the dough out onto a lightly floured surface and, using a rolling pin, roll it into a rectangle. Aim for a rectangle approximately 12×16 inches and about ¼ inch thick. Try to keep the thickness as even as possible across the entire surface for uniform rolls. Carefully spread the prepared chocolate filling evenly over the surface of the dough, leaving about a ½-inch border along one of the longer edges. This border will help seal the rolls when you cut them.
-
Rolling and Cutting the Rolls:
Starting from the longer edge that is completely covered with filling, tightly roll up the dough like a jelly roll. Be sure to roll it as snugly as you can without tearing the dough. This ensures that your chocolate swirls will be tight and beautiful. Once you have rolled the dough into a log, use a sharp knife or a piece of dental floss (which often gives a cleaner cut) to slice the log into 12 equal pieces, about 1 to 1.5 inches thick. If using dental floss, slide it under the log, cross the ends over the top, and pull to slice.
-
Second Rise and Baking:
Lightly grease a 9×13 inch baking dish with a little vegetable oil. Carefully place the cut chocolate rolls into the prepared baking dish, cut-side up. Make sure they are snug but not overly crammed, as they will expand further. Cover the baking dish loosely with plastic wrap or a clean kitchen towel and let the rolls rise again in a warm place for another 30-45 minutes, or until they are puffy and have nearly doubled in size. Preheat your oven to 375°F (190°C). Once the second rise is complete and the oven is preheated, remove the plastic wrap and bake the rolls for 20-25 minutes, or until they are golden brown on top and cooked through. You’ll know they’re done when a toothpick inserted into the center of a roll comes out clean.
Whipping Up the Strawberry Cream Cheese Frosting
No sweet roll is complete without a luscious frosting! This strawberry cream cheese frosting is vibrant, slightly tangy, and perfectly complements the rich chocolate.
-
Creating the Frosting Base:
In a medium bowl, combine the softened ¼ cup of vegan plain cream cheese with the 2 tablespoons of strawberry puree. Using an electric mixer or a sturdy whisk, beat these two ingredients together until they are smooth and well combined. You want a uniform pink color and no lumps of cream cheese. The strawberry puree will add a lovely fruity note and a beautiful subtle pink hue to the frosting.
-
Sweetening and Lightening:
Gradually add the ⅓ cup of powdered sugar to the cream cheese and strawberry mixture, about a tablespoon at a time, while continuing to beat. This gradual addition helps to incorporate the sugar smoothly without making the frosting too stiff. Beat until the frosting is light, fluffy, and smooth. If the frosting seems too thick, you can add a tiny splash of non-dairy milk (about ½ teaspoon at a time) until you reach your desired consistency. Conversely, if it’s too thin, add a little more powdered sugar.
-
Frosting the Rolls:
Once the chocolate rolls have come out of the oven and are still slightly warm (not piping hot, but warm enough to melt the frosting just a little), generously spread the strawberry cream cheese frosting over the top. The warmth of the rolls will allow the frosting to melt slightly and create a beautiful glaze that seeps down into the nooks and crannies. If you prefer a firmer frosting, let the rolls cool completely before frosting.
Conclusion:
You’ve now mastered the art of creating delightful Chocolate Rolls with Strawberry Cream Cheese Frosting! This recipe is a fantastic way to impress your family and friends, whether for a special occasion or just a weekend treat. The rich, decadent chocolate dough perfectly complements the bright, tangy strawberry cream cheese frosting, creating a truly irresistible combination. Don’t be intimidated by the steps; each one is designed to lead you to a delicious outcome.
For serving suggestions, these rolls are heavenly on their own, perhaps with a warm cup of coffee or a glass of cold milk. They also make a wonderful addition to a brunch spread or a dessert table. Feel free to experiment with variations! You could add a sprinkle of cocoa nibs to the dough, or perhaps a swirl of raspberry jam into the frosting for an extra burst of fruitiness. The most important thing is to have fun and enjoy the process of baking these delightful treats. We encourage you to give them a try and discover your own favorite way to enjoy these Chocolate Rolls with Strawberry Cream Cheese Frosting!
Frequently Asked Questions:
Q1: Can I make the dough for the Chocolate Rolls with Strawberry Cream Cheese Frosting ahead of time?
Yes, absolutely! You can prepare the chocolate dough up to 24 hours in advance. Once it has completed its first rise, gently punch it down, wrap it tightly in plastic wrap, and refrigerate it. When you’re ready to bake, let the dough sit at room temperature for about 30 minutes to an hour before shaping and proceeding with the recipe.
Q2: My frosting seems too thin. How can I thicken the Strawberry Cream Cheese Frosting?
If your strawberry cream cheese frosting is too thin, you can try adding a little more powdered sugar, about a tablespoon at a time, until it reaches your desired consistency. Ensure your cream cheese and butter are at room temperature but not melted when you start mixing. If it’s still too soft, chilling the frosting for about 15-20 minutes in the refrigerator can also help it firm up.
Decadent Chocolate Rolls-Strawberry Cream Cheese Bliss
Indulge in these incredibly moist and flavorful Decadent Chocolate Rolls, topped with a delightful Strawberry Cream Cheese Frosting. Perfect for a special breakfast or a sweet treat.
Ingredients
-
1 cup non-dairy milk (such as almond, soy, or oat)
-
3 tablespoons organic cane sugar
-
2¼ teaspoons traditional active dry yeast
-
¼ cup vegetable oil, plus more for greasing
-
2½ cups all-purpose flour, plus more for dusting
-
¼ teaspoon salt
-
3 tablespoons coconut oil, melted
-
¼ cup chocolate chips
-
⅓ cup coconut sugar
-
2 tablespoons unsweetened cocoa powder
-
¼ teaspoon sea salt
-
¼ cup vegan plain cream cheese, softened
-
2 tablespoons strawberry puree
-
⅓ cup powdered sugar
Instructions
-
Step 1
Activate the yeast by warming non-dairy milk to lukewarm (105-115°F), stirring in organic cane sugar and yeast. Let sit for 5-10 minutes until foamy. -
Step 2
Combine wet and dry ingredients: Add vegetable oil to the foamy yeast mixture. In a separate bowl, whisk together flour and salt. Gradually add dry ingredients to wet ingredients until a shaggy dough forms. -
Step 3
Knead the dough on a lightly floured surface for 8-10 minutes until smooth and elastic. Place in a greased bowl, cover, and let rise in a warm spot for 1 to 1.5 hours, or until doubled. -
Step 4
Prepare the filling: Combine melted coconut oil, chopped chocolate chips, coconut sugar, cocoa powder, and sea salt to form a thick paste. -
Step 5
Roll and fill the dough: Punch down the risen dough, roll into a 12×16 inch rectangle. Spread the chocolate filling evenly, leaving a ½-inch border. Tightly roll up the dough from a long edge into a log. -
Step 6
Cut and second rise: Slice the log into 12 equal pieces. Place in a greased 9×13 inch baking dish. Cover and let rise for another 30-45 minutes until puffy. -
Step 7
Bake the rolls at 375°F (190°C) for 20-25 minutes until golden brown and cooked through. -
Step 8
Make the frosting: Beat softened vegan cream cheese and strawberry puree until smooth. Gradually add powdered sugar and beat until light and fluffy. Add a splash of non-dairy milk if too thick. -
Step 9
Frost the warm rolls generously with the strawberry cream cheese frosting.
Important Information
Nutrition Facts (Per Serving)
It is important to consider this information as approximate and not to use it as definitive health advice.
Allergy Information
Please check ingredients for potential allergens and consult a health professional if in doubt.