Easy Dairy-Free Pesto Recipe- Delicious & Quick
Dairy Free Pesto is about to become your new kitchen superhero! For years, I’ve adored the vibrant, herbaceous punch of traditional pesto, but the challenge of finding a truly delicious dairy-free alternative always felt a bit… well, lacking. So, I set out on a mission to create a dairy-free pesto that not only mimics the beloved creaminess and depth of flavor but actually surpasses it in its sheer versatility and brightness. You see, people love pesto because it’s an instant flavor upgrade. It can transform a simple pasta dish into a gourmet meal, elevate grilled chicken, add a zing to sandwiches, or even be a delightful dip. What makes this particular dairy free pesto so special is that we’re achieving that classic texture and incredible taste without any cheese, proving that deliciousness knows no dietary bounds. Get ready to fall in love with pesto all over again, in a way that’s inclusive and utterly irresistible!
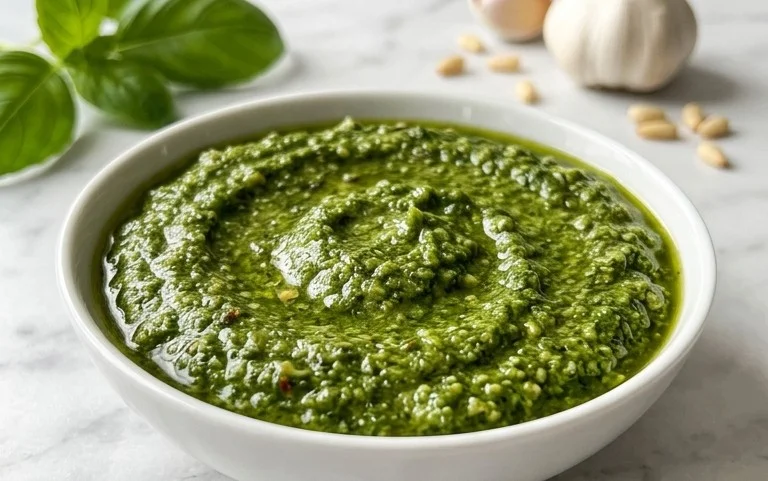
Dairy Free Pesto
If you’ve ever dreamed of enjoying the vibrant, fresh flavor of pesto without the dairy, your dream is about to come true! Traditional pesto, while delicious, often relies on Parmesan cheese for its signature umami and creamy texture. But what if you’re dairy-free, vegan, or simply looking for a delicious alternative? That’s where this incredible dairy-free pesto recipe comes in. It’s remarkably easy to make, bursting with herbaceous goodness, and so versatile you’ll wonder why you didn’t make it sooner. Forget store-bought options that can sometimes taste a bit flat; this homemade version is a game-changer. The magic lies in the careful balance of fresh basil, zesty lemon, toasty nuts, pungent garlic, and the secret weapon: nutritional yeast. Don’t be intimidated by nutritional yeast if you haven’t used it before. It’s a deactivated yeast with a wonderfully cheesy, nutty, and savory flavor that perfectly mimics the role of Parmesan in this recipe. The result is a pesto that is bright, herbaceous, slightly nutty, and utterly satisfying.
This dairy-free pesto is perfect for tossing with pasta (of course!), but its uses extend far beyond. Spread it on toasted bread, use it as a dip for vegetables, dollop it onto grilled chicken or fish, mix it into salad dressings, or even use it as a base for pizzas. The possibilities are truly endless, and the fresh, homemade taste will elevate any dish it touches. Let’s get started on making this incredibly flavorful and dairy-free delight!
Ingredients:
Cooking Instructions:
To create this vibrant dairy-free pesto, you’ll need either a food processor or a good quality blender. Both will work beautifully, but a food processor is generally my preferred tool for pesto as it gives you a little more control over the texture.
Step 1: Prepare Your Basil and Nuts.
Begin extract by washing your basil leaves thoroughly and gently patting them dry with a clean kitchen towel or a salad spinner. It’s important that the basil is as dry as possible to prevent your pesto from becoming watery. If you are using pine nuts, give them a quick toast in a dry skillet over medium heat for a few minutes until they are fragrant and lightly golden. This step is optional but really enhances the nutty flavor of the pine nuts. Watch them closely, as they can burn quickly! If you’re using walnuts or pumpkin seeds, you can also give them a light toast for a similar flavor boost. Once toasted, allow them to cool slightly.
Step 2: Combine the Dry Ingredients.
In the bowl of your food processor (or blender), add the toasted pine nuts (or your chosen alternative), the peeled garlic cloves, and the salt. Give these a few pulses to break them down into smaller pieces. You don’t want them to be a paste yet, just a good initial chop. If you’re using the nutritional yeast, add it at this stage as well. This gives it a chance to incorporate with the nuts and garlic before you add the wet ingredients.
Step 3: Add the Basil and Pulse.
Now, it’s time to add the star of the show: the basil. Add the packed basil leaves into the food processor. You might need to add them in batches, depending on the size of your processor. Start pulsing the machine. You’ll want to pulse and scrape down the sides of the bowl with a spatula as needed. Continue pulsing until the basil is roughly chopped and combined with the nut and garlic mixture. The texture at this stage will be a bit coarse, which is exactly what we’re aiming for before adding the olive oil.
Step 4: Emulsify with Olive Oil.
With the food processor running on a low setting, slowly drizzle in the extra virgin extract olive oil through the feed tube. Continue processing until the pesto is smooth but still has a slight texture. You’re looking for a consistency that’s thick enough to coat the back of a spoon but not overly oily. If it seems too thick for your liking, you can add a little more olive oil, a tablespoon at a time, until you reach your desired consistency. The olive oil helps to emulsify the pesto, creating that classic smooth yet slightly chunky texture that makes pesto so appealing. Don’t over-process, as you don’t want to warm up the pesto too much, which can dull its vibrant green color and fresh flavor.
Step 5: Add the Lemon Juice and Adjust Seasoning.
Once the pesto has reached your desired consistency, stop the food processor and add the fresh lemon juice. Give it a final pulse or two to incorporate the lemon juice. The lemon juice adds a bright, zesty counterpoint to the rich basil and nuts, and also helps to preserve the pesto’s vibrant green color. Taste your pesto now and adjust the salt if necessary. Remember, you can always add more salt, but you can’t take it away! If you feel it needs a little more tang, you can add a tiny bit more lemon juice. If you find the flavor a little flat, a pinch more salt can often do wonders.
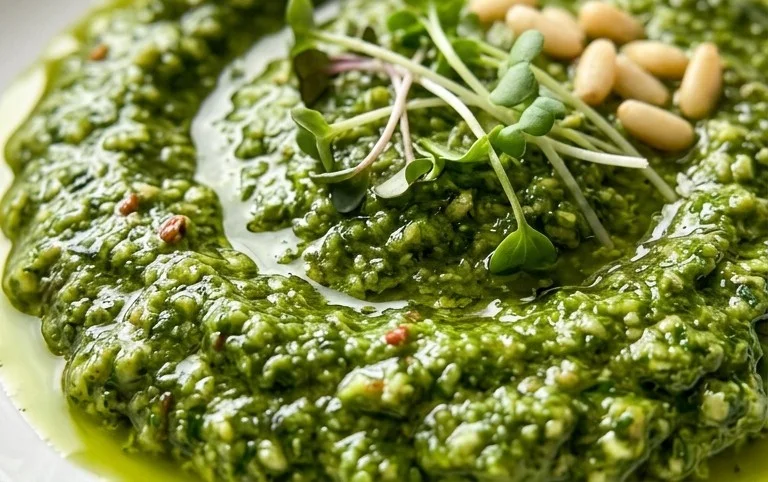
Once your dairy-free pesto is ready, transfer it to an airtight container. For the best flavor and preservation, cover the surface of the pesto directly with a thin layer of olive oil before sealing the container. This prevents oxidation and keeps it looking beautifully green. Store it in the refrigerator for up to a week, or freeze it in small portions for longer storage. Enjoy this incredibly versatile and flavorful dairy-free pesto!
Conclusion:
And there you have it – a vibrant, flavorful Dairy Free Pesto that proves you don’t need cheese to achieve that classic, herbaceous goodness! This recipe is a game-changer for anyone with lactose intolerance, dairy allergies, or simply looking for a lighter, plant-powered alternative. It’s incredibly quick to whip up, making it perfect for weeknight meals or impromptu gatherings. The fresh basil, toasted pine nuts, garlic, and quality olive oil meld together beautifully, creating a pesto that’s both rich and refreshing.
Don’t hesitate to get creative with your serving suggestions! Beyond tossing it with pasta, this versatile Dairy Free Pesto is fantastic as a dip for crudités, a spread on sandwiches and wraps, a topping for roasted vegetables, or even swirled into soups for an extra layer of flavor. For variations, consider swapping pine nuts for walnuts or almonds, adding a pinch of nutritional yeast for a subtle cheesy note, or incorporating other fresh herbs like parsley or mint alongside the basil. I truly encourage you to give this recipe a try – I’m confident you’ll be delighted with the results!
Frequently Asked Questions:
Can I freeze this dairy free pesto?
Absolutely! This Dairy Free Pesto freezes beautifully. Spoon it into ice cube trays for convenient single-serving portions, or store it in an airtight container in the freezer for up to 3 months. Thaw overnight in the refrigerator before using.
What nuts can I use if I don’t have pine nuts?
You have plenty of options! Toasted walnuts or blanched almonds are excellent substitutes for pine nuts. You could also try cashews or even sunflower seeds for a nut-free version. Just be sure to toast them lightly for the best flavor and texture.
Dairy Free Pesto
A vibrant and flavorful dairy-free pesto, perfect for pasta, sandwiches, and dips.
Ingredients
-
3 cups basil
-
1/2 lemon (juiced)
-
1/2 cup pine nuts
-
2 cloves garlic
-
1/4 cup olive oil
-
1/2 tsp salt
-
2 tbsp nutritional yeast
Instructions
-
Step 1
Combine basil, pine nuts, garlic, and nutritional yeast (if using) in a food processor. -
Step 2
Pulse until the ingredients are roughly chopped. -
Step 3
With the food processor running, slowly drizzle in the olive oil until the pesto is smooth but still has some texture. -
Step 4
Add the lemon juice and salt. -
Step 5
Process for another few seconds to combine. -
Step 6
Taste and adjust seasoning as needed.
Important Information
Nutrition Facts (Per Serving)
It is important to consider this information as approximate and not to use it as definitive health advice.
Allergy Information
Please check ingredients for potential allergens and consult a health professional if in doubt.