Easy No Knead Sandwich Rolls – Hour Dough
Sandwich Rolls -No Knead -2 Hours might sound like a weeknight dream, but trust me, it’s a reality you can bake right in your own kitchen! We all crave that perfect, fluffy, slightly chewy roll that’s ideal for everything from a gourmet BLT to a simple buttered side. These rolls are a revelation because they deliver incredible texture and flavor without the commitment of traditional kneading. Imagin extracte pulling warm, golden-brown rolls from your oven in just a couple of hours, ready to elevate any meal or gathering. What truly sets these apart is the magical transformation of simple pantry staples into something truly special through minimal effort but maximum flavor development. The “no-knead” method allows gluten to develop naturally, resulting in an airy crum extractb that’s both satisfying and delicious. This recipe is your shortcut to homemade bread bliss.
Ingredients:
- 4 1/2 cups (600g) bread flour (all-purpose flour or white flour will also work)
- 1 3/4 cups (420-450ml) warm water (around 95-105 degrees Fahrenheit or 35-40 degrees Celsius)
- 2 tablespoons instant or quick-rising yeast
- 1 tablespoon granulated sugar
- 2 teaspoons salt
Mixing the Dough
Step 1: Combine Dry Ingredients
In a large mixing bowl, the biggest one you have available, begin extract by whisking together the flour, instant yeast, sugar, and salt. It’s important to ensure these dry ingredients are evenly distributed before adding the wet ingredients. This ensures the yeast is not clumped in one area and the salt doesn’t directly “shock” the yeast. I like to use a whisk for this step as it aerates the flour a bit and helps break up any potential lumps in the flour or yeast.
Step 2: Add Warm Water and Mix
Now, pour in the warm water. The temperature of the water is crucial for activating the yeast. It should feel comfortably warm to the touch, not hot enough to scald your hand, but definitely warmer than room temperature. If the water is too cold, the yeast won’t activate properly, resulting in a dense loaf. If it’s too hot, it can kill the yeast altogether. Pour the water into the bowl with the dry ingredients. Using a sturdy spoon or a spatula, mix everything together until just combined. You’ll notice the dough will be quite shaggy and sticky at this stage, and that’s perfectly okay. Don’t be tempted to add more flour at this point, as this is characteristic of a no-knead dough. Continue mixing for about 1 to 2 minutes, just until you no longer see any dry streaks of flour.
First Rise (Bulk Fermentation)
Step 3: Cover and Let Rise
Once your dough is roughly combined and shaggy, cover the bowl tightly with plastic wrap or a damp kitchen towel. This is the crucial no-knead part where the dough develops its structure and flavor through time, rather than extensive kneading. Place the covered bowl in a warm, draft-free spot in your kitchen. A slightly warmed oven (turned off, of course, but preheated briefly) or a spot near a sunny window can be ideal. Let the dough rise for about 1.5 to 2 hours. During this time, the yeast will work its magic, producing carbon dioxide gas that will create airy pockets within the dough, and also developing complex flavors. You’re looking for the dough to at least double in size and become noticeably puffy. You might even see some bubbles forming on the surface. This slow fermentation is what gives no-knead breads their incredible texture and ease of preparation.
Shaping the Rolls
Step 4: Gently Shape the Rolls
After the first rise, the dough will be beautifully puffed. Instead of punching it down aggressively, gently turn the dough out onto a lightly floured surface. You want to be as gentle as possible to preserve the air bubbles that have formed. Lightly flour your hands as well. Now, gently pat and fold the dough over itself a few times to create a cohesive ball or rectangle, depending on how you want to shape your rolls. For sandwich rolls, you can divide the dough into 8-10 equal portions. To shape each roll, take a portion of dough and gently stretch it out, then fold it in on itself a few times, creating surface tension. Tuck the edges underneath to form a smooth, rounded top. Place the shaped rolls onto a baking sheet lined with parchment paper, ensuring they have a little space between them as they will puff up further.
Second Rise and Baking
Step 5: Second Rise and Bake
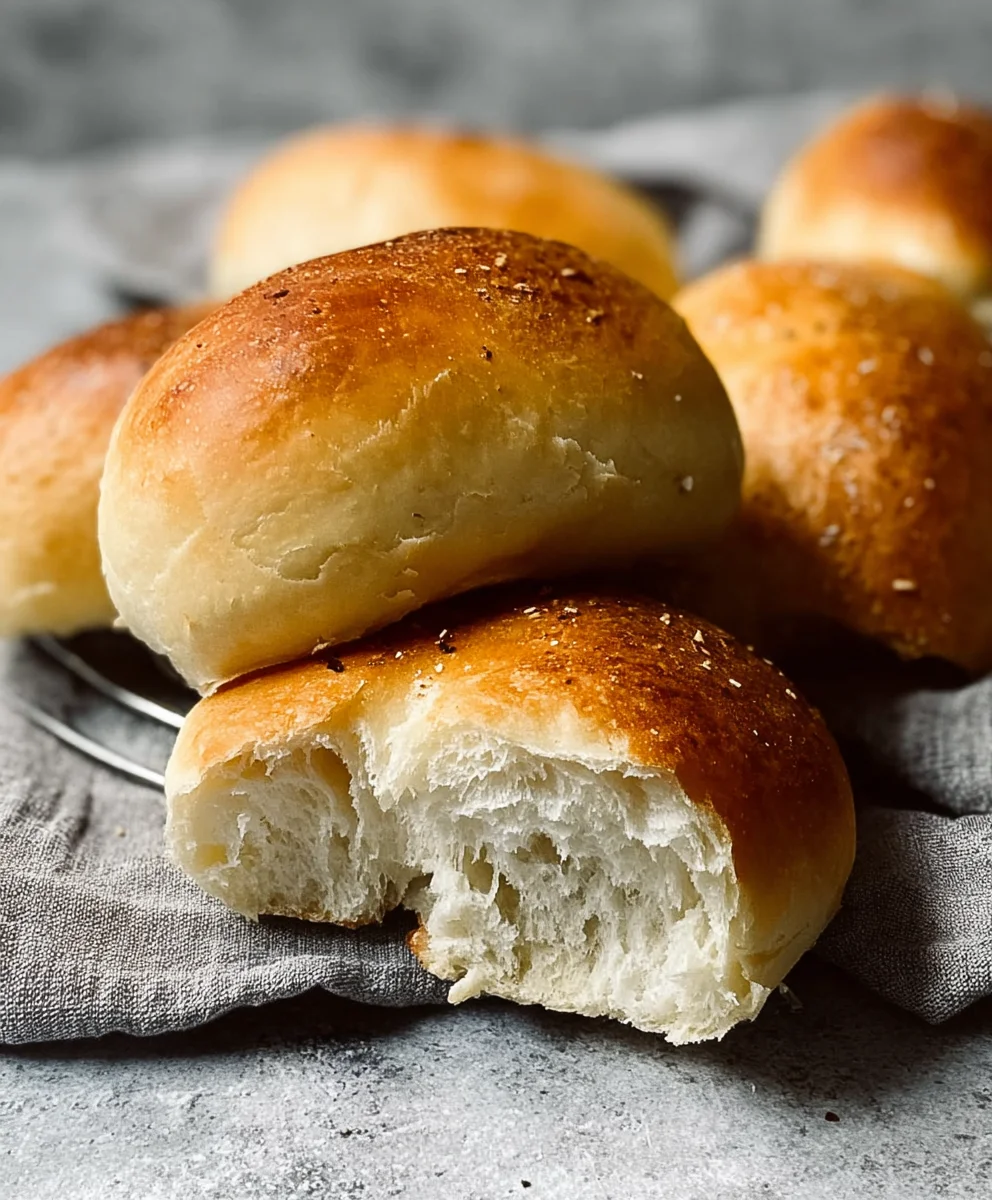
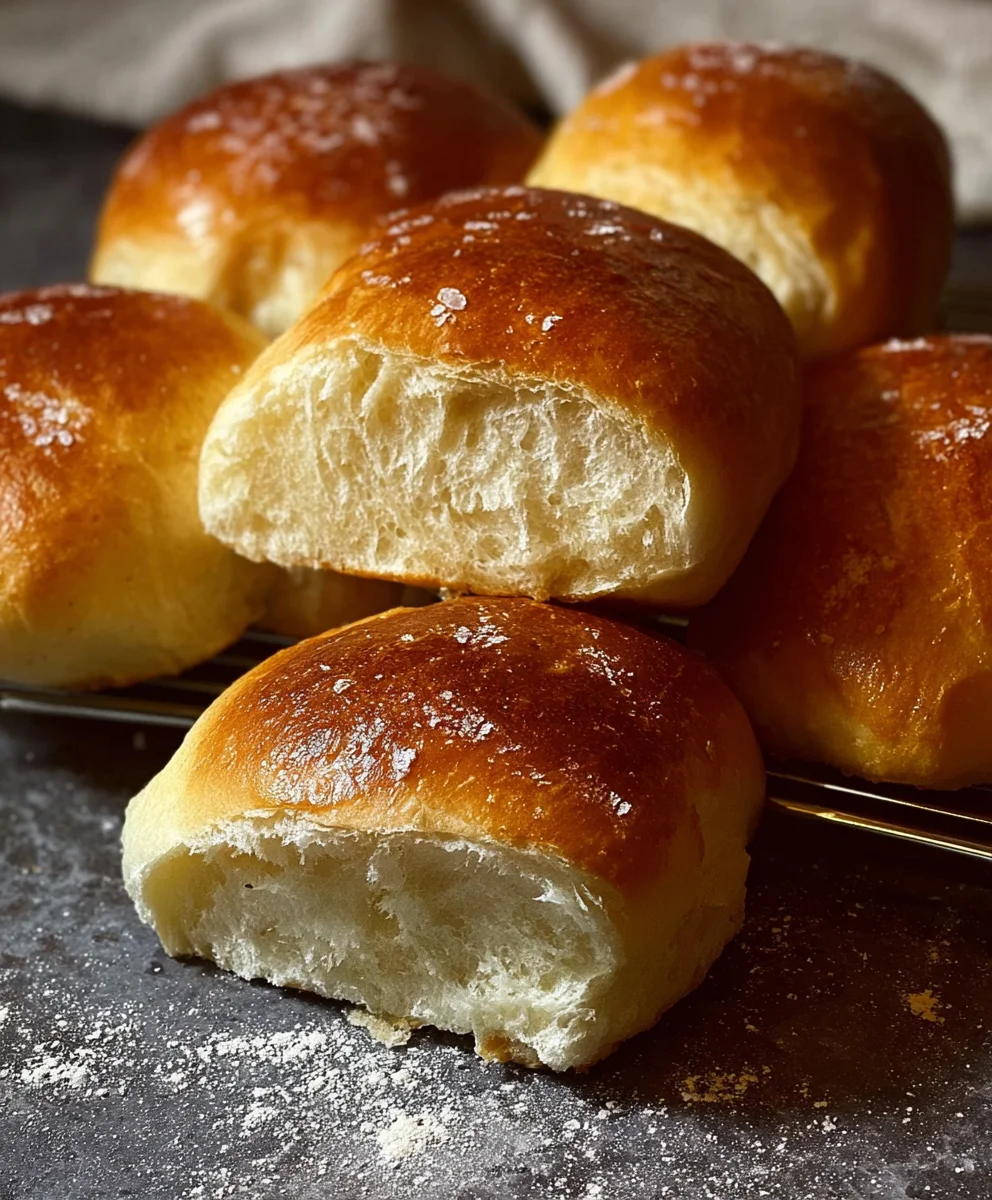
Once your rolls are shaped and on the baking sheet, loosely cover them again with plastic wrap or a clean kitchen towel. Let them rest for another 20-30 minutes. This second rise, often called proofing, allows the rolls to relax and puff up once more before baking, ensuring a light and airy interior. While the rolls are proofing, preheat your oven to 425 degrees Fahrenheit (220 degrees Celsius). Once the rolls have puffed up and the oven is preheated, carefully remove the cover. You can optionally brush the tops with a little water or an egg wash for a shinier crust, but it’s not essential. Place the baking sheet in the preheated oven. Bake for 18-22 minutes, or until the rolls are a deep golden brown and sound hollow when tapped on the bottom. The exact baking time will depend on your oven. Let them cool slightly on a wire rack before enjoying these wonderfully soft and easy sandwich rolls.
Conclusion:
And there you have it! You’ve successfully crafted delicious and incredibly easy Sandwich Rolls – No Knead – 2 Hours. This recipe is a testament to the fact that amazing homemade bread doesn’t require hours of work or complex techniques. The beauty of these rolls lies in their simplicity, yielding a wonderfully soft interior and a satisfyingly chewy crust, perfect for any sandwich creation or even just enjoyed with a smear of butter.
To elevate your enjoyment, consider serving these fresh Sandwich Rolls – No Knead – 2 Hours warm, alongside hearty soups, stews, or even as a base for your favorite appetizers. For variations, feel free to incorporate herbs like rosemary or thyme into the dough for an aromatic twist, or sprinkle some sesame seeds or poppy seeds on top before baking for added texture and flavor. Don’t be afraid to experiment! The joy of baking is in making it your own.
I hope you’ve found this recipe to be a rewarding and stress-free experience. Happy baking, and enjoy every bite!
Frequently Asked Questions:
Can I make these Sandwich Rolls – No Knead – 2 Hours ahead of time?
Yes, you can. Once completely cooled, store them in an airtight container or a senon-alcoholic aled plastic bag at room temperature for up to 2-3 days. For longer storage, you can freeze them after they have cooled completely. Reheat gently in a warm oven or toaster before serving.
What kind of flour is best for Sandwich Rolls – No Knead – 2 Hours?
All-purpose flour is typically recommended and works wonderfully for this recipe, providing the perfect balance of structure and tenderness. While you can experiment with bread flour for a slightly chewier texture, be mindful that it may require slight adjustments to liquid content.
Easy No Knead Sandwich Rolls – Hour Dough
Soft and easy sandwich rolls made with a no-knead dough that requires minimal effort. Perfect for any sandwich filling.
Ingredients
-
4 1/2 cups (600g) bread flour
-
1 3/4 cups (420-450ml) warm water (around 35-40 degrees Celsius)
-
2 tablespoons instant yeast
-
1 tablespoon granulated sugar
-
2 teaspoons salt
Instructions
-
Step 1
In a large mixing bowl, whisk together the flour, instant yeast, sugar, and salt. Ensure dry ingredients are evenly distributed. -
Step 2
Pour in the warm water. Mix with a sturdy spoon or spatula until just combined and no dry streaks remain. The dough will be shaggy and sticky. -
Step 3
Cover the bowl tightly and let the dough rise in a warm, draft-free spot for 1.5 to 2 hours, or until it has doubled in size and is puffy. -
Step 4
Gently turn the dough out onto a lightly floured surface. Gently pat and fold the dough a few times. Divide into 8-10 portions and shape each roll by stretching, folding, and tucking edges underneath to create surface tension. -
Step 5
Place shaped rolls on a parchment-lined baking sheet. Loosely cover and let rise for another 20-30 minutes. -
Step 6
Preheat oven to 425 degrees Fahrenheit (220 degrees Celsius). Bake the rolls for 18-22 minutes, or until deep golden brown and hollow-sounding when tapped.
Important Information
Nutrition Facts (Per Serving)
It is important to consider this information as approximate and not to use it as definitive health advice.
Allergy Information
Please check ingredients for potential allergens and consult a health professional if in doubt.