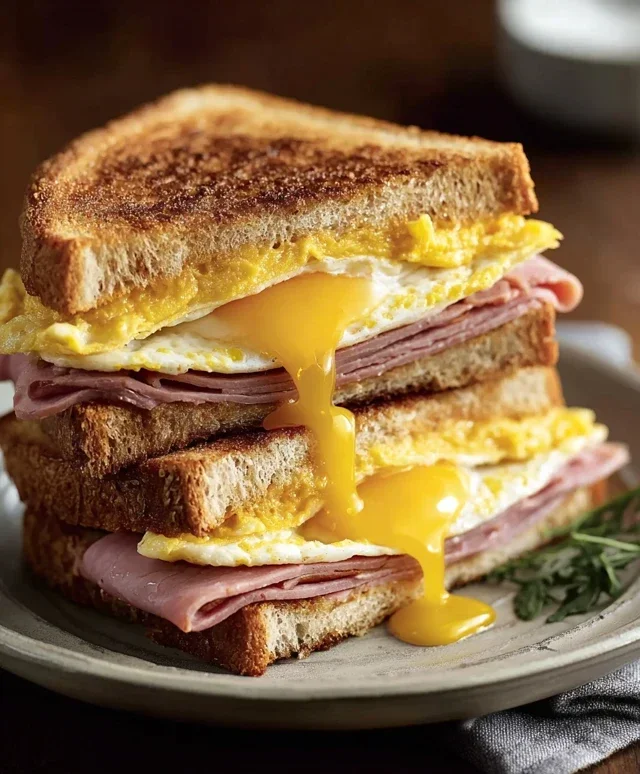
Make-Ahead Freezer Breakfast Sandwiches Easy Meal
Freezer Breakfast Sandwiches are more than just a convenient meal; they’re a breakfast revolution in your own kitchen! Imagin extracte waking up to the aroma of perfectly cooked eggs, savory sausage or beef bacon, and melted cheese, all nestled between a soft bun or English muffin – and the best part? You didn’t have to lift a finger that morning. That’s the magic of these freezer breakfast sandwiches. They’ve become an absolute staple for busy individuals and families because they solve the age-old dilemma of wanting a hearty, satisfying breakfast without sacrificing precious morning minutes. What makes them truly special is their incredible versatility. You can customize them with your favorite fillings, experiment with different breads, and prepare them in batches, ensuring you have delicious, ready-to-go breakfasts for days, or even weeks, ahead. It’s about reclaiming your mornings and enjoying a taste of homemade goodness, anytime.

Ingredients:
- 1 pound ground beef
- 1 pound ground sausage
- 1 tablespoon brown sugar
- 1 teaspoon garlic powder
- 1 teaspoon onion powder
- 1/2 teaspoon red pepper flakes
- 1 teaspoon Italian seasoning
- 12 large eggs
- 1/4 cup milk
- 1 teaspoon salt
- 1 teaspoon white pepper
- 6 English muffins
- 6 slices cheese
- 2 tablespoons melted butter
- Syrup to taste (optional, for serving)
Preparing the Meat Patties
Step 1: Combine and Season the Meats
Let’s get started by preparing the delicious meat patties that will be the hearty foundation of our freezer breakfast sandwiches. In a large mixing bowl, combine the 1 pound of ground beef and 1 pound of ground sausage. It’s important to use both types of meat for a balanced flavor profile – the beef brings a robust savoriness, while the sausage adds a touch of spice and richness. Now, let’s season this mixture generously. Add the 1 tablespoon of brown sugar, which might seem unusual in savory meat, but it helps to caramelize slightly during cooking and adds a subtle depth of flavor that complements the spices beautifully. Next, incorporate 1 teaspoon of garlic powder and 1 teaspoon of onion powder for that classic aromatic base. For a gentle warmth, stir in 1/2 teaspoon of red pepper flakes – adjust this amount based on your preference for heat. Finally, add 1 teaspoon of Italian seasoning. This blend of herbs will infuse our patties with an aromatic complexity that elevates them beyond a simple breakfast sandwich. Gently mix all the ingredients together with your hands, being careful not to overwork the meat, as this can result in tough patties. The goal is to evenly distribute the seasonings.
Step 2: Form and Cook the Patties
Once your meat mixture is well-combined, it’s time to form the patties. Divide the mixture into 6 equal portions. For each portion, roll it into a ball and then flatten it into a disc about 1/2 inch thick. Aim for a diameter that will fit comfortably on your English muffins, perhaps slightly larger as they will shrink when cooked. You can use a skillet or a griddle for this. Heat a tablespoon of oil (not listed but implied for cooking) over medium-high heat. Carefully place the formed patties into the hot skillet, ensuring not to overcrowd the pan. You may need to cook them in batches. Cook for approximately 4-5 minutes per side, or until they are browned and cooked through. The internal temperature should reach 160°F (71°C) for ground beef and 165°F (74°C) for ground sausage. As the patties cook, they will release some fat, which is perfectly normal. Once cooked, remove the patties from the skillet and place them on a plate lined with paper towels to drain any excess grease. This step is crucial for preventing greasy sandwiches.
Preparing the Egg Layers
Step 3: Whisk and Cook the Eggs
While the patties are resting, we’ll move on to the egg component of our freezer breakfast sandwiches. In a separate medium-sized bowl, crack the 12 large eggs. Add 1/4 cup of milk to the eggs. The milk helps to create a lighter, fluffier texture in our egg layers. Season the eggs with 1 teaspoon of salt and 1 teaspoon of white pepper. White pepper has a milder, slightly more pungent flavor than black pepper and is often preferred for its aesthetic in lighter-colored dishes. Whisk the eggs and milk vigorously until they are well combined and slightly frothy. You can use a whisk or a fork for this. Now, we’ll cook these eggs in a similar fashion to the patties. You can use the same skillet (wipe it clean if necessary) or a separate non-stick skillet. Heat a very small amount of oil or butter over medium heat. Pour the egg mixture into the skillet. You can cook the eggs in one large sheet and then cut them into portions, or cook them in smaller rounds to fit the English muffins. For the sheet method, cook until the edges are set, then gently push the cooked portions towards the center and tilt the pan to allow the uncooked egg to flow underneath. Continue this until the entire egg mixture is cooked through but still moist. If cooking in rounds, pour about 1/4 cup of the egg mixture into the skillet for each round, cooking for about 2-3 minutes per side until set.
Assembling and Freezing the Sandwiches
Step 4: Assemble the Sandwiches
Now for the exciting part – putting it all together! Toast your 6 English muffins until they are golden brown and slightly crisp. Slice each muffin in half horizontally. On the bottom half of each English muffin, place one of the cooked meat patties. On top of the meat patty, carefully place a slice of cheese. We’re using 6 slices of cheese for our 6 sandwiches. For the egg layers, if you cooked a large sheet of eggs, cut it into 6 equal portions that roughly match the size of your patties. If you cooked individual rounds, place one round on top of the cheese. The heat from the patty and the cheese will begin extract to melt the cheese beautifully. Now, place the top half of the English muffin on each assembled sandwich. You should have 6 hearty, partially assembled breakfast sandwiches.
Step 5: Cool, Wrap, and Freeze
To ensure the best quality when reheating, it’s important to let the assembled sandwiches cool slightly before wrapping. Allow them to cool on a wire rack for about 15-20 minutes. This prevents the wrappers from becoming soggy from steam. Once they have cooled to a safe temperature, it’s time to wrap them individually. Take your 2 tablespoons of melted butter and brush a thin layer onto the cut sides of the English muffins before wrapping. This adds a lovely richness and helps prevent them from drying out when reheated. Wrap each sandwich tightly in plastic wrap, ensuring there are no air gaps. Then, for an extra layer of protection against freezer burn and to make them easy to identify, wrap each plastic-wrapped sandwich in aluminum foil or place them in individual freezer bags. Label each package with the date. These freezer breakfast sandwiches can be stored in the freezer for up to 2-3 months.
Step 6: Reheating Instructions
When you’re ready to enjoy your homemade freezer breakfast sandwich, simply remove one sandwich from the freezer. Unwrap the aluminum foil or freezer bag, but leave the plastic wrap on. Place the sandwich on a microwave-safe plate. Microwave on high for approximately 1 minute to 1 minute and 30 seconds, or until heated through. The exact time will depend on your microwave’s wattage. For a crispier muffin, after microwaving, you can transfer the sandwich to a toaster oven or a conventional oven preheated to 350°F (175°C) for a few minutes to crisp up the English muffin. If you prefer, you can also heat the sandwich directly in a toaster oven or conventional oven from frozen, which will take longer but will result in a crispier texture throughout. Serve immediately, with a drizzle of syrup if desired.

Conclusion:
And there you have it! Your very own batch of delicious and convenient Freezer Breakfast Sandwiches, ready to save your mornings. We’ve walked through the simple steps to create these customizable delights, ensuring you have a hearty and satisfying breakfast on hand whenever you need it. These Freezer Breakfast Sandwiches are incredibly versatile, making them perfect for busy weekdays, quick weekend brunches, or even a late-night snack. Feel free to experiment with different cheeses, meats, and even veggies to tailor them to your unique preferences. Don’t be afraid to get creative!
For serving suggestions, I love to reheat mine in a toaster oven or microwave and pair them with a fresh piece of fruit or a small glass of juice. They’re also fantastic with a side of home fries or a simple green salad if you have a little more time.
I truly hope you enjoy making and, more importantly, eating these Freezer Breakfast Sandwiches. They’ve been a game-changer in my kitchen, and I’m confident they will be in yours too. Happy cooking and even happier eating!
Frequently Asked Questions:
How long do Freezer Breakfast Sandwiches last in the freezer?
When stored properly in an airtight container or wrapped tightly in plastic wrap and then foil, Freezer Breakfast Sandwiches can last for up to 1 to 2 months in the freezer. Beyond that, the quality might start to decline, though they may still be safe to eat.
Can I make Freezer Breakfast Sandwiches with vegetarian options?
Absolutely! You can easily adapt this recipe for vegetarian preferences. Instead of sausage or beef bacon, consider using plant-based sausage patties, sliced vegetabeef baconbacon, or even a seasoned and cooked tofu scramble. Many of the same cooking and freezing methods will apply.
Make-Ahead Freezer Breakfast Sandwiches
Easy to prepare and freeze, these breakfast sandwiches are perfect for busy mornings. Featuring hearty meat patties, fluffy egg layers, and melted cheese on toasted English muffins.
Ingredients
-
1 pound ground beef
-
1 pound ground beef
-
1 tablespoon brown sugar
-
1 teaspoon garlic powder
-
1 teaspoon onion powder
-
1/2 teaspoon red pepper flakes
-
1 teaspoon Italian seasoning
-
12 large eggs
-
1/4 cup milk
-
1 teaspoon salt
-
1 teaspoon white pepper
-
6 English muffins
-
6 slices cheese
-
2 tablespoons melted butter
-
Syrup to taste
Instructions
-
Step 1
Combine ground beef, ground beef (from pork substitution), brown sugar, garlic powder, onion powder, red pepper flakes, and Italian seasoning in a bowl. Mix gently. -
Step 2
Divide the meat mixture into 6 equal portions. Form each portion into a patty about 1/2 inch thick. Cook patties in a skillet over medium-high heat for 4-5 minutes per side until cooked through. Drain on paper towels. -
Step 3
Whisk together eggs, milk, salt, and white pepper in a bowl until frothy. Cook the egg mixture in a skillet over medium heat until set. Cut into 6 portions to fit the English muffins. -
Step 4
Toast English muffins and slice them in half. Assemble sandwiches by placing a meat patty on the bottom half of each muffin, followed by a slice of cheese and an egg portion. -
Step 5
Brush the cut sides of the English muffin tops with melted butter. Place the muffin tops on the assembled sandwiches. Let cool for 15-20 minutes. -
Step 6
Wrap each cooled sandwich tightly in plastic wrap, then in aluminum foil or a freezer bag. Label with the date and freeze for up to 2-3 months. -
Step 7
To reheat, remove outer wrapping, place on a microwave-safe plate, and microwave on high for 1-1.5 minutes. For a crispier muffin, transfer to a toaster oven or conventional oven for a few minutes.
Important Information
Nutrition Facts (Per Serving)
It is important to consider this information as approximate and not to use it as definitive health advice.
Allergy Information
Please check ingredients for potential allergens and consult a health professional if in doubt.