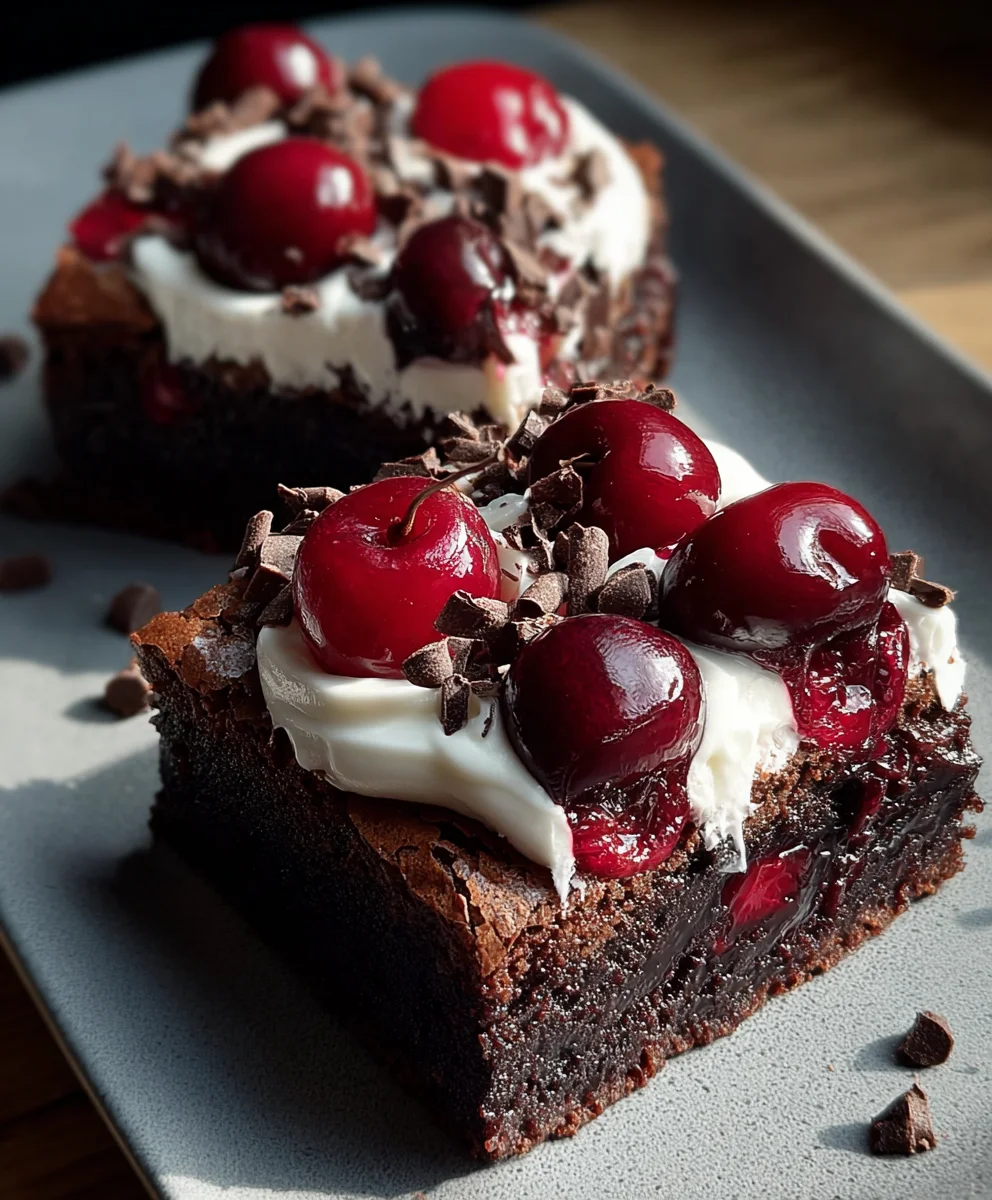
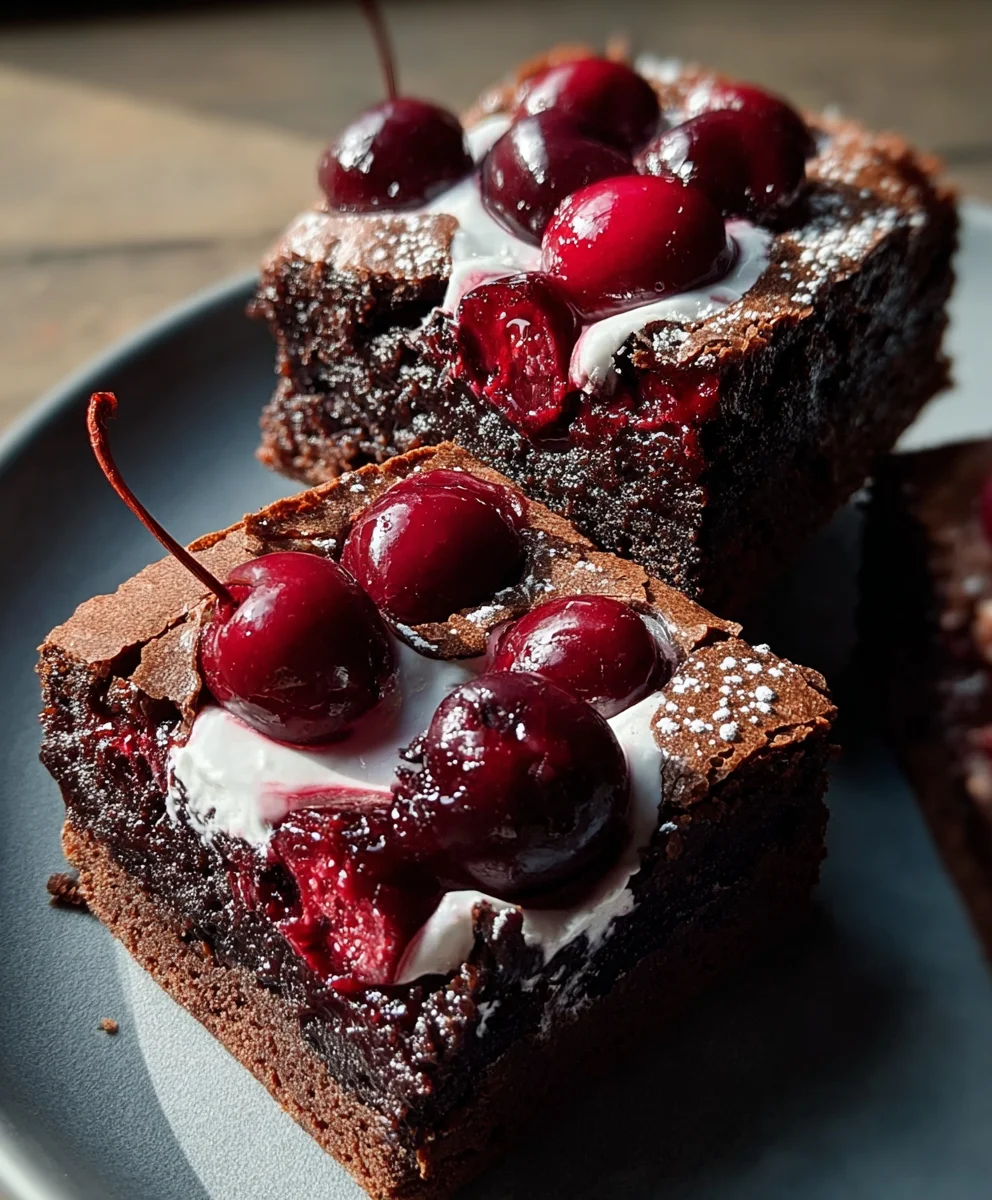
Small-Batch Black Forest Brownies – Rich Chocolate Cherry Treat
Small-Batch Black Forest Brownies are an absolute revelation for any chocolate lover seeking a truly decadent experience. Forget those mundane, everyday brownies; these are a meticulously crafted indulgence, designed to transport your taste buds straight to the heart of the Black Forest. What is it about this particular treat that captures our hearts and minds? It’s the perfect harmony of rich, dark chocolate, the bright tang of cherries, and the airy lightness of whipped cream, all coming together in a bite-sized marvel. We love them because they offer all the intense flavor of a classic Black Forest cake but in a convenient, portable format that’s perfect for sharing – or for that personal moment of bliss.
What makes Small-Batch Black Forest Brownies so special?
They’re not just brownies; they’re an experience. The deep, fudgy base is infused with the unmistakable essence of high-quality cocoa, providing an intense chocolate backdrop. Then, the surprise element: bursts of tart, juicy cherries, often macerated to intensify their flavor, peek through the rich chocolate. Finally, a delicate swirl or dusting of whipped cream, or even a hint of kirsch extract (cherry brandy extract) for those who appreciate a sophisticated twist, elevates these treats from merely delicious to utterly unforgettable. This recipe focuses on creating that perfect balance, ensuring every mouthful is a delightful journey.
Ingredients:
- ¼ cup unsalted butter
- ½ cup granulated sugar
- 1 large egg
- ½ tsp vanilla extract
- ¼ cup unsalted cocoa powder
- ¼ cup all-purpose flour
- ⅛ tsp salt
- ½ cup canned or jarred cherries, drained (reserve the juice)
- 2 tbsp reserved cherry juice (from the can)
- ½ cup whipped cream (for serving)
- Chocolate shavings (optional, for garnish)
Prepare the Brownie Batter
- First, let’s get our oven ready and prepare our baking pan. Preheat your oven to 350°F (175°C). It’s important to have the oven at the correct temperature before the brownies go in for even baking. Grease and flour an 8×8 inch baking pan. If you prefer, you can also line it with parchment paper, leaving an overhang on two sides. This makes it super easy to lift the brownies out once they’re baked. Now, melt the ¼ cup of unsalted butter. You can do this in a small saucepan over low heat or in a microwave-safe bowl in 20-second intervals, stirring between each, until it’s fully melted and smooth. Set this aside to cool slightly; we don’t want to cook the egg when we add it.
- In a medium bowl, whisk together the ½ cup of granulated sugar and the melted butter. Continue whisking until the mixture is smooth and well combined. This initial step helps dissolve the sugar into the butter, contributing to a better brownie texture. Next, crack in the 1 large egg and add the ½ teaspoon of vanilla extract. Whisk vigorously until everything is thoroughly incorporated and the mixture becomes lighter in color and slightly glossy. The egg provides richness and structure to the brownies, while the vanilla extract enhances all the flavors. Don’t skip whisking well here; it incorporates air and contributes to a fudgy texture.
- Now, it’s time to add the dry ingredients. In a separate small bowl, whisk together the ¼ cup of unsalted cocoa powder, ¼ cup of all-purpose flour, and ⅛ teaspoon of salt. Whisking these together before adding them to the wet ingredients ensures that the cocoa powder and salt are evenly distributed, preventing any pockets of saltiness or unmixed cocoa in your brownies. Sift these dry ingredients into the wet ingredients, stirring gently with a spatula or wooden spoon until just combined. Be careful not to overmix the batter at this stage. Overmixing can develop the gluten in the flour too much, leading to tougher brownies instead of that desirable fudgy texture we’re aiming for. Stop mixing as soon as you no longer see streaks of flour.
Assemble and Bake
- Gently fold in the ½ cup of drained cherries into the brownie batter. Make sure to distribute them evenly throughout the batter. Some of the cherries might break apart a bit, and that’s perfectly fine; it will add lovely pockets of cherry flavor. We’re making “Small-Batch Black Forest Brownies,” so these cherries are key to that classic Black Forest flavor profile. Reserve the drained cherry juice from the can; we’ll use a bit of that later to enhance the cherry taste. Once the cherries are incorporated, spoon the batter evenly into your prepared baking pan. Use your spatula to spread the batter to the edges of the pan, ensuring an even layer for consistent baking.
- Now for the baking! Place the pan in your preheated oven and bake for approximately 20-25 minutes. The exact baking time will depend on your oven and how fudgy or cakey you prefer your brownies. You’ll know they’re done when a toothpick inserted into the center comes out with moist crum extractbs attached, but not wet batter. It’s crucial not to overbake them, as this will dry them out and make them less fudgy. While the brownies are still warm from the oven, gently brush or drizzle the reserved 2 tablespoons of cherry juice over the top of the brownies. This step infuses an extra layer of cherry flavor right into the surface and helps keep them wonderfully moist.
Finish and Serve
- Once baked and brushed with cherry juice, let the brownies cool completely in the pan on a wire rack. This cooling period is very important for the brownies to set properly. If you try to cut them too soon, they will likely fall apart. Resist the urge to cut into them immediately! Once they are fully cooled, you can lift them out of the pan using the parchment paper overhangs or carefully cut them into squares directly in the pan. For that signature Black Forest touch, top each brownie with a dollop of ½ cup of whipped cream and sprinkle with chocolate shavings, if desired. The creamy whipped cream, tart cherries, and rich chocolate create a delightful contrast of flavors and textures, truly embodying the spirit of Small-Batch Black Forest Brownies. This small batch size is perfect for a treat for two or a small gathering.
Conclusion:
There you have it – a straightforward guide to creating truly sensational Small-Batch Black Forest Brownies! We’ve walked through each step, ensuring you achieve that perfect balance of rich chocolate, tart cherries, and fluffy whipped cream. These decadent treats are surprisingly simple to whip up, making them ideal for a quick indulgence or a special dessert without a huge time commitment. Don’t be afraid to get a little messy; the joy is in the making and the devouring!
For serving, I love presenting these Small-Batch Black Forest Brownies chilled, perhaps with an extra dollop of whipped cream and a dusting of cocoa powder or shaved chocolate. They also make a wonderful base for a more elaborate dessert; try serving them warm over vanilla ice cream with a drizzle of cherry syrup. For variations, feel free to experiment with different types of cherries, or even add a hint of kirsch extract liqueur extract to the batter for an authentic Black Forest touch. Most importantly, enjoy the process and the delicious results. Happy baking!
Frequently Asked Questions about Small-Batch Black Forest Brownies:
Q1: Can I make these Small-Batch Black Forest Brownies ahead of time?
Absolutely! The Small-Batch Black Forest Brownies are even better when they’ve had a chance to chill and the flavors meld. You can store them in an airtight container in the refrigerator for up to 3-4 days. Let them come to room temperature slightly before serving for the best texture.
Q2: What kind of cherries are best for Small-Batch Black Forest Brownies?
While traditional Black Forest cake uses sour cherries (like Morello cherries), you can also use good quality pitted dark sweet cherries. If using sweet cherries, you might want to reduce the sugar slightly in the brownie batter to balance the sweetness. Canned or frozen pitted cherries work well; just be sure to drain them thoroughly to avoid excess moisture in your brownies.
Small-Batch Black Forest Brownies – Rich Chocolate Cherry Treat
Decadent, small-batch brownies infused with the classic flavors of Black Forest cake, featuring rich chocolate, tart cherries, and a touch of whipped cream.
Ingredients
-
¼ cup unsalted butter
-
½ cup granulated sugar
-
1 large egg
-
½ tsp vanilla extract
-
¼ cup unsalted cocoa powder
-
¼ cup all-purpose flour
-
⅛ tsp salt
-
½ cup canned or jarred cherries, drained (reserve the juice)
-
2 tbsp reserved cherry juice (from the can)
-
½ cup whipped cream (for serving)
-
Chocolate shavings (optional, for garnish)
Instructions
-
Step 1
Preheat oven to 350°F (175°C). Grease and flour an 8×8 inch baking pan or line with parchment paper. Melt ¼ cup unsalted butter and let it cool slightly. -
Step 2
In a medium bowl, whisk together the melted butter and ½ cup granulated sugar until smooth. Add 1 large egg and ½ tsp vanilla extract. Whisk until well combined and lighter in color. -
Step 3
In a separate small bowl, whisk together ¼ cup unsalted cocoa powder, ¼ cup all-purpose flour, and ⅛ tsp salt. Sift these dry ingredients into the wet ingredients and stir gently until just combined. Do not overmix. -
Step 4
Gently fold in ½ cup drained cherries into the brownie batter. Spoon the batter evenly into the prepared baking pan and spread to the edges. -
Step 5
Bake for 20-25 minutes, or until a toothpick inserted into the center comes out with moist crumbs attached. While warm, brush 2 tbsp reserved cherry juice over the top. -
Step 6
Let the brownies cool completely in the pan before cutting. Serve topped with ½ cup whipped cream and chocolate shavings, if desired.
Important Information
Nutrition Facts (Per Serving)
It is important to consider this information as approximate and not to use it as definitive health advice.
Allergy Information
Please check ingredients for potential allergens and consult a health professional if in doubt.