Soft Chewy Lemon Cookies- Easy & Delicious Recipe
Soft & Chewy Lemon Cookies are an absolute delight that I can’t get enough of! There’s something incredibly satisfying about biting into a cookie that perfectly balances a tender, yielding interior with a delightful chew. These aren’t just any cookies; they’re sunshine in edible form. We all have those go-to treats that bring instant comfort and joy, and for me, these soft and chewy lemon cookies have earned that coveted spot. People adore them because they offer a bright, zesty flavor that’s both refreshing and sweet, without being overpowering. What truly makes these special is the incredible texture – that perfect melt-in-your-mouth softness giving way to a satisfying chew, all infused with the vibrant essence of fresh lemon. Get ready to bake up a batch of pure happiness!
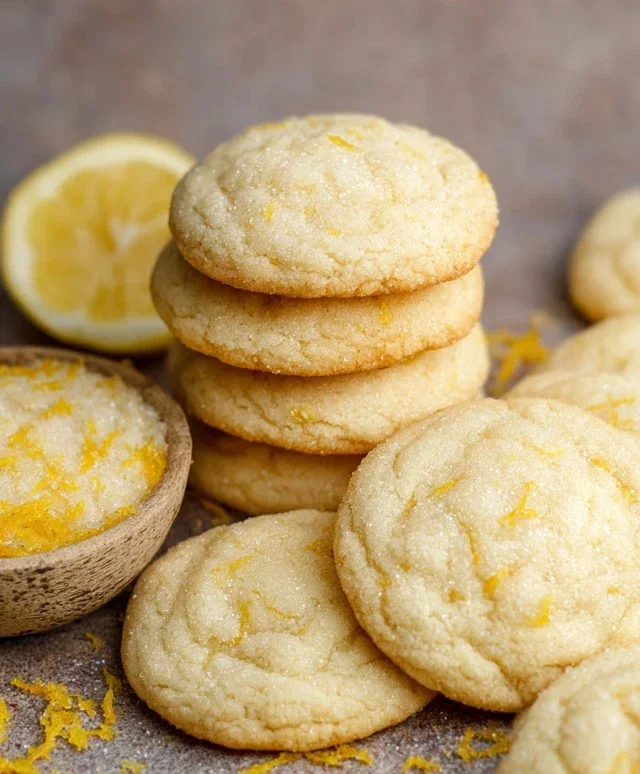
Soft & Chewy Lemon Cookies
There’s something incredibly uplifting about a bright, zesty lemon cookie. They offer a delightful burst of sunshine in every bite, perfect for brightening any afternoon. Forget those dry, crum extractbly cookies that leave you feeling disappointed. Today, we’re diving into a recipe that guarantees a wonderfully soft and chewy texture, with a vibrant lemon flavor that truly sings. These cookies are surprisingly simple to make, yet their sophisticated taste makes them feel like a real treat. Whether you’re a seasoned baker or just starting out, you’ll find these lemon cookies to be a rewarding and delicious endeavor.
The key to achieving that perfect soft and chewy texture lies in a few strategic ingredients and techniques. We’ll be using a combination of butter and sugar that’s creamed just right, along with an extra egg yolk for richness and chegrape juicess. The lemon flavor comes from both fresh zest and extract, ensuring a robust and authentic citrus punch that isn’t overpowering. And a touch of cornstarch helps to tenderize the flour, contributing to that delightful melt-in-your-mouth quality. So, let’s gather our ingredients and get ready to bake up a batch of pure lemon bliss!
Ingredients:
Preparing the Dough
The first step in creating these delightful cookies is to ensure your butter is properly softened. This means it should be at room temperature and yield slightly when pressed, but not be melted. Softened butter creams better with sugar, creating tiny air pockets that contribute to the cookie’s structure and texture. In a large mixing bowl, beat together the softened unsalted butter and the 1 ½ cups of granulated sugar until the mixture is light, fluffy, and pnon-alcoholic ale yellow. This process, known as creaming, can take about 3-5 minutes with an electric mixer. Don’t rush this step; it’s crucial for achieving that desirable chewy texture. Next, add the finely grated lemon zest. Make sure you’re only zesting the yellow part of the lemon peel, avoiding the bitter white pith. Gently mix in the lemon zest until it’s evenly distributed throughout the butter and sugar mixture.
Now it’s time to incorporate the eggs and lemon extract. Add the room temperature large egg, followed by the large egg yolk. Using room temperature eggs helps them emulsify better with the butter and sugar, creating a smoother dough. Beat well after each addition until thoroughly combined. If you’re using a stand mixer, this is usually a quick process. If you’re using a hand mixer, ensure you scrape down the sides of the bowl periodically to incorporate all ingredients. Stir in the lemon extract. If you’re opting for the combination of lemon and vanilla extract, this is when you’d add that. The extract provides a concentrated burst of lemon flavor that complements the fresh zest beautifully.
In a separate medium bowl, whisk together the all-purpose flour, baking soda, cornstarch, and salt. Whisking these dry ingredients together ensures they are evenly distributed, preventing pockets of baking soda or salt in your cookies. The cornstarch is a secret weapon here; it helps to break down the gluten in the flour, resulting in a more tender and chewy cookie.
Combining and Chilling the Dough
Gradually add the dry ingredients to the wet ingredients, mixing on low speed or by hand until just combined. Be careful not to overmix the dough at this stage. Overmixing can develop the gluten too much, leading to tougher cookies. You want to see the flour streaks just disappear. Once the dough is mostly combined, add the 2 tablespoons of fresh lemon juice and mix until it’s incorporated. The dough will be thick and slightly sticky at this point.
Now comes a crucial step for achieving that perfect chewy texture: chilling the dough. Cover the bowl tightly with plastic wrap and refrigerate for at least 1 hour, or preferably 2-3 hours. Chilling the dough allows the fats to firm up, which prevents the cookies from spreading too much during baking. It also allows the flavors to meld together, resulting in a more intense lemon flavor. You can even prepare the dough a day in advance and keep it chilled in the refrigerator.
Baking the Lemon Cookies
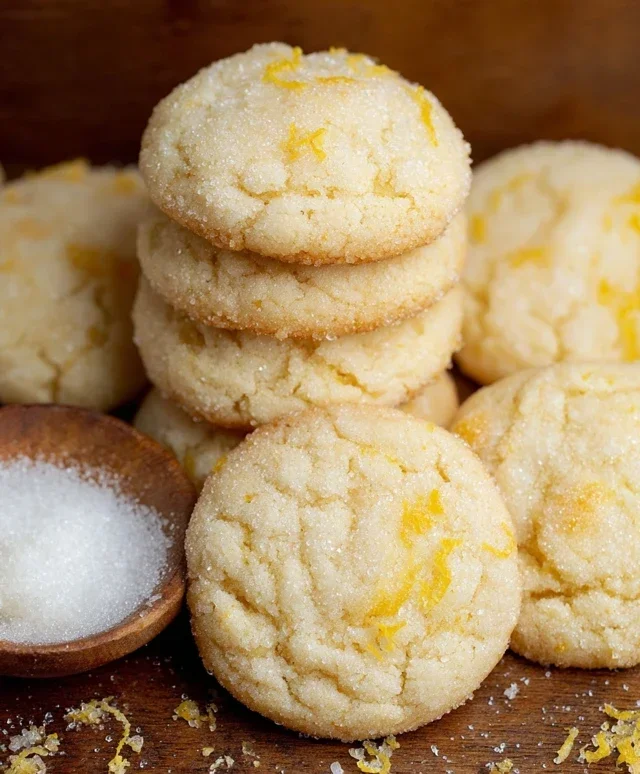
Preheat your oven to 375 degrees Fahrenheit (190 degrees Celsius). Line baking sheets with parchment paper. Parchment paper prevents sticking and makes for easy cleanup. In a shallow dish, place the remaining ¼ cup of granulated sugar. This sugar is for coating the cookie balls before baking, which creates a lovely crisp exterior and adds a touch more sweetness.
Scoop rounded tablespoons of the chilled cookie dough and roll them into balls. If the dough is still a bit sticky to handle, you can lightly flour your hands. Then, roll each dough ball in the prepared granulated sugar until it’s evenly coated. Place the sugar-coated dough balls about 2 inches apart on the prepared baking sheets, as they will spread slightly during baking.
Bake for 10-12 minutes, or until the edges are lightly golden brown and the centers appear slightly underbaked. They will continue to set as they cool. For an extra touch of visual appeal, you can gently press down on the center of each cookie with the back of a spoon right after they come out of the oven, creating a slight indentation that can be filled with a simple lemon glaze if you desire (though they are perfectly delicious as is!).
Allow the cookies to cool on the baking sheets for about 5 minutes before transferring them to a wire rack to cool completely. This allows them to firm up enough to be moved without breaking. Once cooled, these soft and chewy lemon cookies are ready to be enjoyed. Store any leftovers in an airtight container at room temperature for up to 3 days. They are fantastic with a cup of tea or a glass of milk. Enjoy the sunshine!
Conclusion:
There you have it – a foolproof recipe for achieving perfectly soft and chewy lemon cookies that are bursting with bright, zesty flavor! I truly believe this recipe stands out because of its balance: the cookies are tender and yielding, not cakey or crum extractbly, while delivering that unmistakable punch of fresh lemon that so many of us adore. They are incredibly versatile and make a delightful treat for any occasion. Imagin extracte serving these at a spring brunch, alongside a cup of tea, or even as a light dessert after a hearty meal. The simple addition of lemon zest and juice creates a sophisticated yet utterly approachable cookie that’s sure to become a favorite. I wholeheartedly encourage you to give these soft & chewy lemon cookies a try! You won’t be disappointed by the delightful aroma that fills your kitchen and the pure joy of biting into a perfectly baked, tangy treat.
Frequently Asked Questions:
Can I make these cookies dairy-free?
Absolutely! You can easily substitute the butter with a good quality dairy-free butter alternative. Ensure the alternative is firm at room temperature, similar to butter. For the milk, a unsweetened plant-based milk like almond or soy milk will work wonderfully.
How should I store these lemon cookies?
To maintain their delightful soft and chewy texture, store the cookies in an airtight container at room temperature. They will stay fresh and delicious for up to 3-4 days. If you’re looking for longer storage, you can freeze baked cookies in a single layer on a baking sheet until firm, then transfer them to a freezer-safe bag for up to 2-3 months.
Can I add other flavors to these cookies?
Yes! While the lemon is the star, feel free to get creative. A hint of fresh gin extractger or a sprinkle of poppy seeds can add a lovely complexity. You could also try a light glaze made with powdered sugar and a touch of lemon juice to enhance the citrus flavor even further.
Soft & Chewy Lemon Cookies
Deliciously soft and chewy lemon cookies with a bright citrus flavor, perfect for any occasion.
Ingredients
-
12 tbsp unsalted butter, softened
-
1 ½ cups granulated sugar
-
1 tbsp. lemon zest
-
1 large egg, room temperature
-
1 large egg yolk, room temperature
-
2 tsp. lemon extract
-
3 cups all-purpose flour, spooned and leveled
-
1 tsp. baking soda
-
1 tsp. cornstarch
-
3/4 tsp. salt
-
2 tbsp. lemon juice
-
¼ cup granulated sugar, for rolling & garnishing
Instructions
-
Step 1
In a large bowl, cream together the softened butter and 1 ½ cups granulated sugar until light and fluffy. -
Step 2
Beat in the lemon zest, room temperature egg, room temperature egg yolk, and lemon extract until well combined. -
Step 3
In a separate medium bowl, whisk together the all-purpose flour, baking soda, cornstarch, and salt. -
Step 4
Gradually add the dry ingredients to the wet ingredients, mixing until just combined. Stir in the lemon juice. -
Step 5
Chill the dough for at least 30 minutes. Preheat oven to 350°F (175°C). Line baking sheets with parchment paper. -
Step 6
Roll rounded tablespoons of dough into balls and then roll each ball in the ¼ cup granulated sugar for rolling and garnishing. Place on prepared baking sheets. -
Step 7
Bake for 10-12 minutes, or until the edges are lightly golden and the centers are still slightly soft. Let cool on the baking sheets for a few minutes before transferring to a wire rack to cool completely.
Important Information
Nutrition Facts (Per Serving)
It is important to consider this information as approximate and not to use it as definitive health advice.
Allergy Information
Please check ingredients for potential allergens and consult a health professional if in doubt.