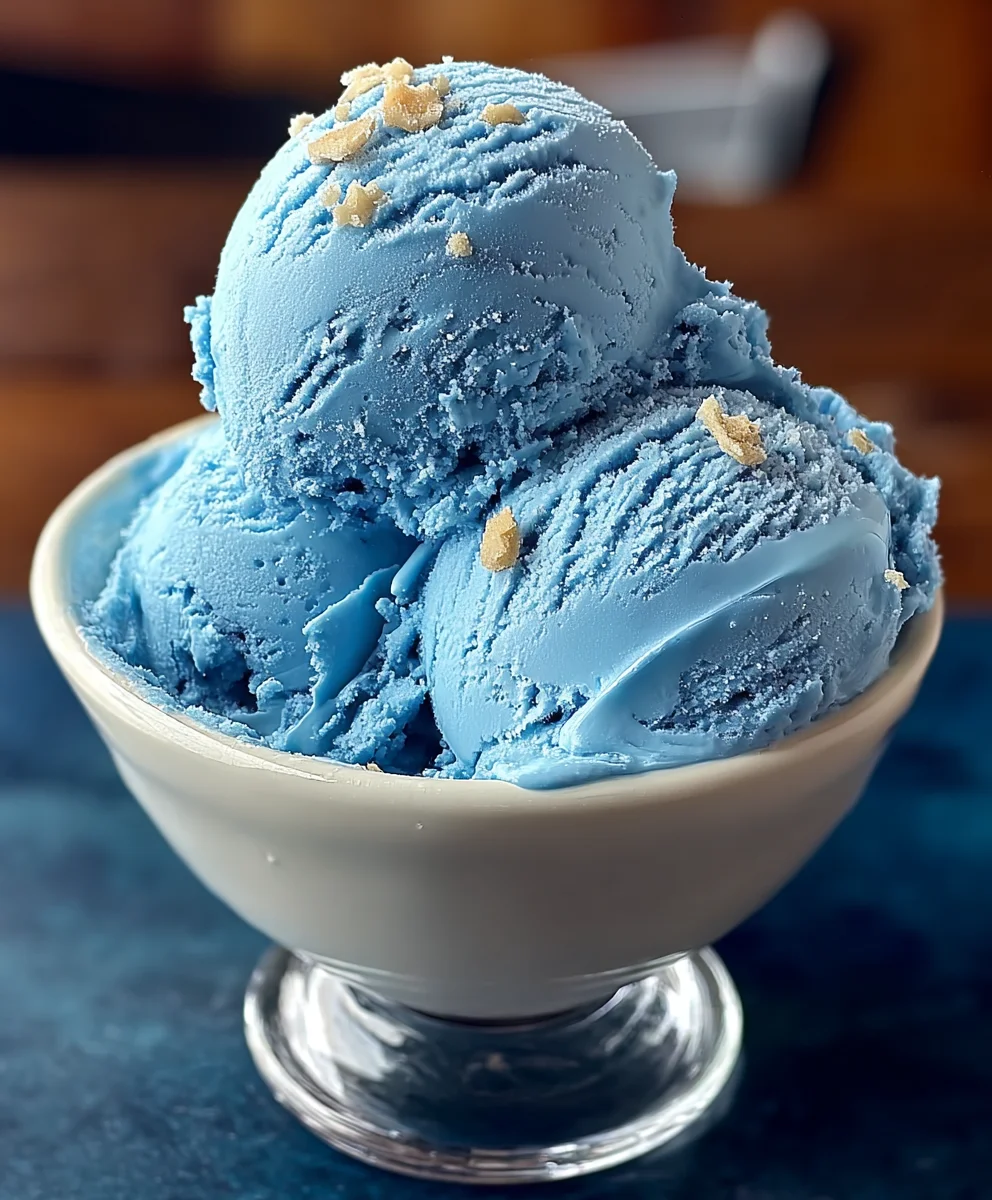
Blue Moon Ice Cream- Heavenly Non-Non-Non-Alcoholic Alternativeic Treat
Blue Moon Ice Cream is more than just a whimsical color; it’s a nostalgic journey wrapped in a creamy, dreamy delight. Have you ever wondered what gives this vibrant, electric blue confection its unique charm? It’s that mysterious, subtly sweet, and slightly fruity flavor that instantly transports you back to childhood ice cream parlors and carefree summer days. People are absolutely captivated by Blue Moon Ice Cream not just for its striking appearance, which is undeniably eye-catching, but for the elusive taste that sparks curiosity and pure joy. What truly sets this particular Blue Moon Ice Cream apart is the perfect balance of creamy richness and that signature, almost citrusy, almond-like undertone that makes each spoonful an adventure. It’s a flavor that’s hard to pinpoint, making it even more alluring and utterly addictive. Get ready to discover how to recreate this iconic treat in your own kitchen!

Ingredients:
- 2 cups heavy cream
- 1 cup whole milk
- 3/4 cup granulated sugar
- 1 teaspoon vanilla extract
- 1 teaspoon almond extract
- Blue food coloring, as needed
- 1/4 cup maraschino cherries, chopped (optional)
Making the Blue Moon Ice Cream Base
Step 1: Combine the Liquids and Sugar
Let’s get started by creating the delicious base for our Blue Moon Ice Cream. In a medium saucepan, pour in the 1 cup of whole milk and the 3/4 cup of granulated sugar. Gently whisk these together until the sugar begin extracts to dissolve into the milk. You don’t need to bring it to a boil, just a gentle warming is perfect to help the sugar incorporate smoothly. This initial step ensures we have a well-balanced sweetness throughout our ice cream.
Step 2: Heat the Mixture Gently
Now, place the saucepan over medium-low heat. Continue to stir occasionally, making sure the sugar dissolves completely. We’re aiming for a warm, but not hot, mixture. Think of it as gently coaxing the sugar into submission. The goal here is to create a smooth, homogenous liquid base. As it warms, you’ll notice the milk becoming slightly richer. Be patient; this gentle heating process is key to avoiding a grainy texture in your finished ice cream. Avoid letting it simmer or boil, as this can alter the milk’s proteins and affect the final consistency.
Step 3: Incorporate the Extracts and Chill
Once the sugar is fully dissolved and the mixture is warm to the touch (but not hot), remove the saucepan from the heat. Stir in the 1 teaspoon of vanilla extract and the 1 teaspoon of almond extract. These extracts are crucial for developing the signature flavor profile of our Blue Moon Ice Cream. The almond extract, in particular, adds a subtle complexity that pairs beautifully with the creamy base. After adding the extracts, pour this mixture into a bowl. Cover it tightly with plastic wrap, pressing the wrap directly onto the surface of the liquid to prevent a skin from forming. Place this bowl in the refrigerator and allow it to chill thoroughly for at least 2 hours, or preferably overnight. A well-chilled base is essential for proper churning.
Preparing for Churning and Adding Color
Step 4: Whip the Heavy Cream and Combine
While your base is chilling, let’s prepare the heavy cream. In a separate large bowl, pour in the 2 cups of heavy cream. Using an electric mixer or a whisk, whip the cream until it forms soft peaks. You’re looking for a consistency that holds its shape but is still pliable, not stiff. Once the cream is whipped, take your chilled milk mixture out of the refrigerator. Gently pour the chilled milk mixture into the whipped cream. Fold them together carefully using a spatula. The aim is to combine them without deflating the whipped cream too much. This gentle folding will create a lighter, airier ice cream base.
Step 5: Achieve the Perfect Blue Hue
Now for the fun part – giving our Blue Moon Ice Cream its iconic color! Add blue food coloring to the mixture one drop at a time. Stir gently with your spatula after each addition. Continue adding coloring and stirring until you achieve your desired shade of blue. Remember, you can always add more, but you can’t take it away, so start conservatively. The color will intensify slightly as it churns and freezes. Aim for a vibrant, playful blue that will make your ice cream stand out.
Churning and Finishing Touches
Step 6: Churn the Ice Cream
It’s time to churn our Blue Moon Ice Cream! Follow the manufacturer’s instructions for your ice cream maker. Typically, this involves pouring the blue mixture into your pre-frozen ice cream maker bowl. Let the machine churn for about 20-30 minutes, or until the ice cream reaches a soft-serve consistency. During the last few minutes of churning, if you’re using them, add the 1/4 cup of chopped maraschino cherries. This optional addition provides delightful bursts of sweet cherry flavor and a lovely contrast in texture and color. The cherries will distribute evenly as the ice cream continues to churn.
Step 7: Freeze to Firmness
Once the ice cream has churned to your desired consistency, transfer it immediately to a freezer-safe container. Press a piece of parchment paper or plastic wrap directly onto the surface of the ice cream to prevent ice crystals from forming. Cover the container with a lid and place it in the freezer for at least 4-6 hours, or until it’s firm enough to scoop. This final freezing stage allows the ice cream to harden and develop its perfect texture. Enjoy your homemade Blue Moon Ice Cream!
Conclusion:
Congratulations on mastering the art of making delicious Blue Moon Ice Cream! This vibrant and uniquely flavored treat is sure to become a household favorite. We’ve walked through each step to ensure a creamy, dreamy, and perfectly balanced Blue Moon Ice Cream experience. Don’t be afraid to get creative with your toppings – fresh berries, whipped cream, or even a drizzle of white chocolate can elevate your homemade delight even further. Feel free to experiment with adding a splash of almond extract for an extra layer of complexity or a touch of blue food coloring if you desire a more intense hue. The joy of making Blue Moon Ice Cream at home lies in its adaptability and the smiles it brings to your loved ones. So, churn away and enjoy every spoonful of this delightful, homemade ice cream!
Frequently Asked Questions:
What makes Blue Moon Ice Cream blue?
The signature blue color of Blue Moon Ice Cream comes from the use of blue food coloring. The flavor itself is a unique blend that often includes notes of almond and citrus, creating a distinctive taste profile that is not typically associated with any single fruit. The blue color is purely for aesthetic appeal.
Can I make Blue Moon Ice Cream without an ice cream maker?
Yes, you absolutely can! While an ice cream maker provides the smoothest and creamiest texture, you can achieve a delicious result by using the “no-churn” method. This typically involves whipping heavy cream and condensed milk together until stiff peaks form, then folding in your Blue Moon flavoring and coloring. You’ll then freeze this mixture, stirring it vigorously every 30-45 minutes for the first few hours to break up ice crystals. This method requires a bit more manual effort but is a great alternative.
Blue Moon Ice Cream- Heavenly Non-Alcoholic Treat
A delicious and vibrant non-alcoholic ice cream with a unique flavor profile, perfect for a refreshing treat.
Ingredients
-
2 cups heavy cream
-
1 cup whole milk
-
3/4 cup granulated sugar
-
1 teaspoon vanilla extract
-
1 teaspoon almond extract
-
Blue food coloring, as needed
-
1/4 cup maraschino cherries, chopped (optional)
Instructions
-
Step 1
In a medium saucepan, combine 1 cup whole milk and 3/4 cup granulated sugar. Whisk gently until sugar begins to dissolve. Warm gently over medium-low heat, stirring occasionally until sugar is completely dissolved. Do not boil. -
Step 2
Remove from heat. Stir in 1 teaspoon vanilla extract and 1 teaspoon almond extract. Pour into a bowl, cover tightly with plastic wrap directly on the surface, and chill for at least 2 hours, or preferably overnight. -
Step 3
In a separate large bowl, whip 2 cups heavy cream until soft peaks form. Gently pour the chilled milk mixture into the whipped cream and fold together carefully with a spatula. -
Step 4
Add blue food coloring one drop at a time, stirring gently until desired shade of blue is achieved. Remember the color will intensify as it freezes. -
Step 5
Churn the ice cream mixture in an ice cream maker according to manufacturer’s instructions, about 20-30 minutes, until it reaches a soft-serve consistency. During the last few minutes of churning, add the chopped maraschino cherries if using. -
Step 6
Transfer the churned ice cream to a freezer-safe container. Press parchment paper or plastic wrap directly onto the surface, cover, and freeze for at least 4-6 hours, or until firm.
Important Information
Nutrition Facts (Per Serving)
It is important to consider this information as approximate and not to use it as definitive health advice.
Allergy Information
Please check ingredients for potential allergens and consult a health professional if in doubt.