Best Chicken Fried Chicken Recipe- Crispy & Delicious
Chicken fried chicken. Just reading those words might conjure up images of golden-brown, crispy perfection, a dish that evokes comfort and pure, unadulterated joy. We all have those signature meals, the ones that instantly transport us back to happy memories or make a regular Tuesday feel like a special occasion. For so many, that dish is chicken fried chicken. What is it about this seemingly simple preparation that captures our hearts (and stomachs) so completely? It’s more than just chicken; it’s an experience. It’s the symphony of textures – the shatteringly crisp, seasoned crust giving way to tender, juicy chicken. It’s the savory, often peppery, gravy that drapes over it like a warm hug. This isn’t just a meal; it’s a culinary masterpiece born from humble ingredients, elevated to legendary status through technique and love. Today, we’re diving deep into what makes chicken fried chicken so undeniably special and how you can bring this beloved classic to your own table.
Chicken Fried Chicken
There’s something undeniably comforting and incredibly satisfying about a perfectly executed Chicken Fried Chicken. It’s a dish that whispers tnon-alcoholic ales of Southern kitchens, of crispy, golden-brown perfection that gives way to tender, juicy chicken. This isn’t just dinner; it’s an experience. We’re going to break down how to achieve that magical crunch and creamy, flavorful gravy that makes this dish a true classic. Forget those mediocre versions you might have encountered; this recipe is designed to deliver restaurant-quality results right in your own home.
Ingredients:
Preparing the Chicken
The foundation of any great Chicken Fried Chicken is, of course, the chicken itself. We’re using thin-sliced chicken breasts here, which is key for achieving even cooking and that delightful tenderness. If your chicken breasts are a bit thicker, you can pound them gently between two pieces of plastic wrap until they are about 1/2 inch thick. This ensures they cook through quickly and evenly in the hot oil.
The Crispy Coating
Now, let’s talk about that irresistible crunch. The dry dredge for our chicken is a carefully balanced blend of flour, leavening agents, and seasonings. The baking powder and baking soda work together to create a super light and crispy coating that fries up beautifully golden. The salt, pepper, and garlic powder provide a savory base that enhances the chicken’s natural flavor. In a shallow dish or a large zip-top bag, we’ll combine the 2 cups of flour, baking powder, baking soda, salt, pepper, and garlic powder. Give it a good whisk or shake to ensure everything is well distributed.
Next, we prepare our wet dredge. In a separate bowl, whisk together the buttermilk, egg, and hot sauce. The buttermilk tenderizes the chicken, while the egg acts as a binder to help the flour coating adhere. The hot sauce might seem surprising, but it adds a subtle warmth and depth of flavor without making the chicken spicy, and it also helps to break down the chicken proteins further, leading to even more tender results.
Now for the coating process. It’s important to work in batches to avoid overcrowding the dredgin extractg station and to ensure each piece of chicken gets a thorough coating. Take one piece of chicken at a time, dip it into the buttermilk mixture, letting any excess drip off. Then, transfer it to the flour mixture, pressing gently to coat all sides. Shake off any excess flour. For an extra crispy coating, you can double-dip: dip the floured chicken back into the buttermilk mixture and then back into the flour mixture again. Place the coated chicken on a wire rack set over a baking sheet while you prepare the remaining pieces. Allowing the coated chicken to rest for about 10-15 minutes before frying also helps the coating adhere better and prevents it from falling off in the hot oil.
Frying to Perfection
Heating the oil is a crucial step. You’ll want to use a neutral oil with a high smoke point, such as vegetable oil, canola oil, or peanut oil. A good rule of thumb is to have at least 2-3 inches of oil in your pot or deep fryer. Heat the oil to 350°F (175°C). Using a thermometer is highly recommended to maintain the correct temperature. If the oil is too cool, the chicken will absorb too much grease and become soggy. If it’s too hot, the coating will burn before the chicken is cooked through.
Carefully place a few pieces of coated chicken into the hot oil, being careful not to overcrowd the pot. Overcrowding will lower the oil temperature, leading to greasy chicken. Fry the chicken for about 4-6 minutes per side, or until it’s a deep golden brown and cooked through. The internal temperature of the chicken should reach 165°F (74°C). Use tongs to gently turn the chicken pieces for even browning. Once cooked, remove the chicken from the oil and place it on a clean wire rack set over a baking sheet to drain. This allows air to circulate around the chicken, keeping the bottom crispy. Season immediately with a little extra salt and pepper while it’s still hot.
Crafting the Creamy Gravy
While the chicken rests, we can make the gravy. This is where that reserved oil comes in handy. Once you’ve finished frying all the chicken, carefully ladle out about 1/4 cup of the used frying oil into a separate saucepan. Be sure to leave any browned bits (fond) in the pan; these are packed with flavor! Heat this reserved oil over medium heat. Whisk in the 1/3 cup of flour, creating a roux. Cook the roux for about 1-2 minutes, stirring constantly, until it’s lightly golden. This step cooks out the raw flour taste.
Gradually whisk in the 2 cups of milk, a little at a time, ensuring no lumps form. Continue to cook and stir the gravy over medium heat, bringin extractg it to a gentle simmer. The gravy will begin extract to thicken as it heats. Season generously with salt and pepper to taste. You’re looking for a thick, creamy, and flavorful gravy that coats the back of a spoon. If the gravy is too thick, you can whisk in a little more milk until you reach your desired consistency.
Serve the hot, crispy Chicken Fried Chicken immediately, generously smothered in the warm, creamy gravy. This dish is a true celebration of simple ingredients prepared with care, and I hope you enjoy every delicious, crunchy, and comforting bite!
Conclusion:
So there you have it! We’ve walked through creating a truly spectacular Chicken Fried Chicken that’s crispy on the outside, incredibly juicy on the inside, and absolutely bursting with savory flavor. This recipe is a winner because it balances traditional comfort food appeal with straightforward techniques, making it achievable for home cooks of all levels. The golden, crunchy crust paired with the tender chicken is a match made in culinary heaven, perfect for any occasion where you want to impress or simply indulge in a satisfying meal.
When it comes to serving, don’t be shy! This Chicken Fried Chicken shines alongside classic Southern sides like creamy mashed potatoes, buttery biscuits, and a generous helping of gravy. For something a little lighter, a fresh, crisp coleslaw or a vibrant green bean casserole also makes excellent companions. Feeling adventurous? Consider our suggested variations: try infusing your flour dredge with smoked paprika or a pinch of cayenne for a subtle kick, or experiment with a buttermilk brine for even more tender chicken. Don’t hesitate to give this recipe a go; you’ll be so glad you did. The joy of creating and sharing such a delicious, comforting dish is truly rewarding.
Frequently Asked Questions about Chicken Fried Chicken:
What’s the best way to ensure a super crispy coating?
The key to that perfect crunch lies in a few steps. First, make sure your chicken is thoroughly dried before dredgin extractg. Then, use a well-seasoned flour mixture for both the initial dredge and the second dip (often after an egg wash). Don’t overcrowd the pan when frying; this allows the oil to maintain its temperature and ensures the coating crisps up beautifully instead of steaming. A hot oil temperature is also crucial!
Can I make the gravy ahead of time?
Absolutely! Gravy can be made a day or two in advance and stored in an airtight container in the refrigerator. When you’re ready to serve, gently reheat it on the stovetop over low heat, whisking occasionally. You may need to add a splash of milk or broth to achieve your desired consistency.
What if I don’t have buttermilk?
No problem! You can create a fantastic buttermilk substitute by mixing 1 cup of milk with 1 tablespoon of white vinegar or lemon juice. Let it sit for about 5-10 minutes until it slightly curdles. This will give you a similar tangy flavor and tenderizing effect for your Chicken Fried Chicken.
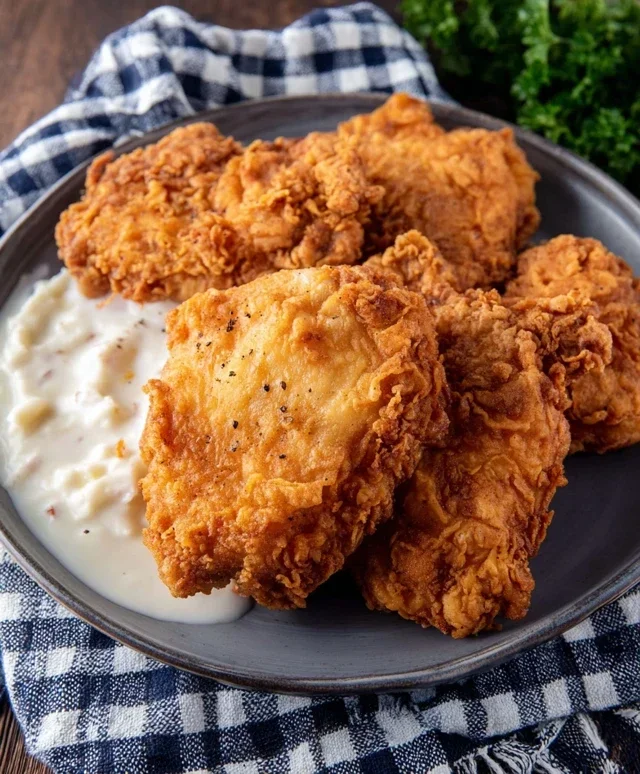
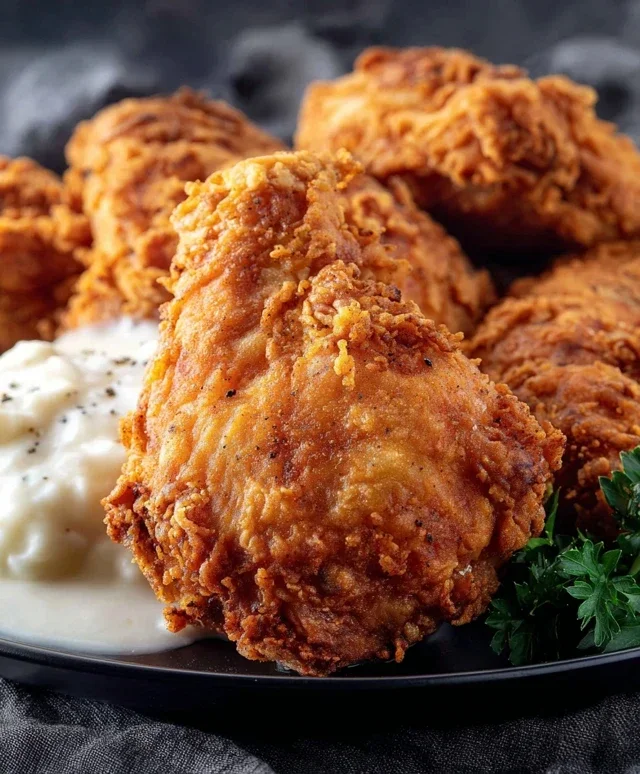
Chicken Fried Chicken
Crispy, golden fried chicken breasts served with a creamy milk gravy.
Ingredients
-
6-8 thin sliced chicken breasts
-
2 cups flour
-
2 tsp baking powder
-
1 tsp baking soda
-
1 tsp salt
-
1 tsp pepper
-
1 tsp garlic powder
-
1 1/2 cup buttermilk
-
1 egg
-
1 Tbs hot sauce
-
Oil for frying
-
1/4 cup reserved oil from frying
-
1/3 cup flour
-
2 cup milk
-
Salt & pepper
Instructions
-
Step 1
In a shallow dish, whisk together 2 cups flour, baking powder, baking soda, 1 tsp salt, 1 tsp pepper, and 1 tsp garlic powder. -
Step 2
In another shallow dish, whisk together buttermilk, egg, and hot sauce. Dip each chicken breast into the buttermilk mixture, then dredge it in the flour mixture, ensuring it’s well coated. Set aside. -
Step 3
Heat enough oil for frying in a large skillet over medium-high heat to about 350°F (175°C). -
Step 4
Carefully place the coated chicken breasts into the hot oil, being careful not to overcrowd the skillet. Fry for 4-6 minutes per side, until golden brown and cooked through. Remove from skillet and drain on paper towels. Reserve 1/4 cup of the frying oil. -
Step 5
In the same skillet, add the reserved 1/4 cup of oil and heat over medium heat. Whisk in 1/3 cup flour to create a roux and cook for 1-2 minutes, stirring constantly. -
Step 6
Gradually whisk in 2 cups milk until smooth. Bring to a simmer and cook, stirring, until the gravy thickens. Season with salt and pepper to taste. -
Step 7
Serve the chicken fried chicken hot with the milk gravy.
Important Information
Nutrition Facts (Per Serving)
It is important to consider this information as approximate and not to use it as definitive health advice.
Allergy Information
Please check ingredients for potential allergens and consult a health professional if in doubt.