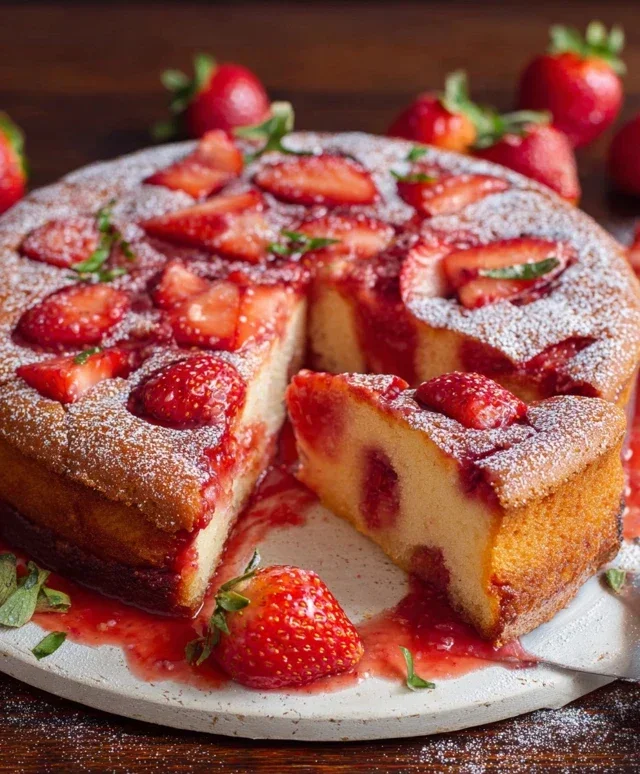
Vanilla Custard Cream Squares-Easy Delightful Dessert
Vanilla Custard Cream Squares are more than just a delightful dessert; they’re a nostalgic journey for many of us, evoking memories of cozy kitchens and shared moments. There’s a universally adored simplicity and elegance to these treats that makes them a perennial favorite. What is it about these delicate squares that captures our hearts and taste buds? It’s the perfect harmony of textures and flavors: the tender, slightly chewy base giving way to a luxuriously smooth, rich vanilla custard filling, all topped with a whisper-light glaze. They’re not overly sweet, allowing the pure, creamy essence of vanilla to shine through. Whether served at a casual gathering or as a special treat to brighten a weekday, Vanilla Custard Cream Squares offer a comforting indulgence that feels both familiar and utterly special. Prepare to be enchanted by the making of these beloved Vanilla Custard Cream Squares.

Ingredients:
- 2 sheets puff pastry, thawed but kept cold
- 4 cups whole milk, divided
- 1 1/2 cups granulated sugar
- 1 1/4 cups all-purpose flour
- 8 large eggs, carefully separated
- 3 teaspoons pure vanilla extract
- 2 tablespoons premium rum extract extract (optional)
- 1/4 teaspoon salt
- 2 cups heavy whipping cream, thoroughly chilled
- 2 tablespoons powdered sugar, plus extra for dusting
Making the Vanilla Custard Cream Squares
Preparing the Pastry Base
The foundation of our Vanilla Custard Cream Squares starts with perfectly flaky puff pastry. Since the pastry is already thawed but needs to remain cold, work quickly. Preheat your oven to 400°F (200°C). Lightly flour a clean work surface and gently unfold one sheet of puff pastry. If the pastry feels a little sticky, dust your hands and the surface lightly with flour. Carefully unroll or unfold the pastry to create a flat rectangle. You can leave it as is or gently roll it a little larger if you prefer thinner layers. Transfer this pastry sheet to a baking sheet lined with parchment paper. Be sure to prick the entire surface of the pastry all over with a fork. This step is crucial to prevent the pastry from puffing up too much during baking, ensuring a flat, even base for our custard. Repeat this process with the second sheet of puff pastry, placing it on the same or a separate baking sheet.
Baking the Pastry
Now, it’s time to give our pastry bases a head start. Place the prepared baking sheets into the preheated oven. Bake for approximately 12-15 minutes, or until the pastry is golden brown and puffed. While it’s baking, keep an eye on it. If any areas puff up excessively, you can gently press them down with a spatula. Once baked to a beautiful golden hue, remove the pastry sheets from the oven and let them cool completely on a wire rack. It’s important they are entirely cool before we move on to assembling the layers. Once cool, you can trim any uneven edges if desired, to ensure clean lines for your squares.
Creating the Rich Vanilla Custard
This is where the magic happens, transforming simple ingredients into a luscious, creamy filling. In a large, heavy-bottomed saucepan, combine 3.5 cups of the whole milk with 1 cup of the granulated sugar and the salt. Heat this mixture over medium heat, stirring occasionally, until it just begin extracts to simmer around the edges. Do not let it come to a rolling boil. While the milk is heating, in a separate medium bowl, whisk together the all-purpose flour with the remaining 1/2 cup of granulated sugar. This helps to prevent lumps. Add the 8 egg yolks to the flour mixture. Whisk these together until the mixture is smooth and pnon-alcoholic ale yellow. Gradually temper the egg yolk mixture by slowly ladling about 1 cup of the hot milk mixture into it, whisking constantly. This gradual addition of hot liquid to the eggs prevents them from scrambling. Once tempered, carefully pour the tempered egg yolk mixture back into the saucepan with the remaining hot milk.
Cooking the Custard to Perfection
Return the saucepan to medium-low heat. This is where patience is key for a perfectly smooth custard. Cook, stirring constantly with a whisk or a wooden spoon, ensuring you scrape the bottom and sides of the pan to prevent sticking and scorching. Continue to cook until the custard has thickened considerably and can coat the back of a spoon. This will take about 8-10 minutes. You’ll notice a significant change in consistency. Once it has thickened, remove the saucepan from the heat. Stir in the pure vanilla extract and the optional rum extractmium rum extract until well combined. This infusion of flavors is essential for the delicious “vanilla” part of our Vanilla Custard Cream Squares.
Chilling and Whipping the Cream
To achieve the perfect creamy topping for our squares, we need to whip the heavy cream. Make sure your heavy whipping cream is thoroughly chilled, as cold cream whips much better and faster. In a clean, chilled bowl (a metal bowl works best), pour the 2 cups of chilled heavy whipping cream. Using an electric mixer, start whipping the cream on low speed, gradually increasing to medium-high speed. As soft gin extractks begin to form, gradually add the 2 tablespoons of powdered sugar. Continue whipping until stiff peaks form. Be careful not to over-whip, as this can turn the cream into butter. Once you have stiff, glossy peaks, stop whipping. This whipped cream will add a delightful lightness to the rich custard.
Assembly and Finishing Touches
Now for the final assembly of our Vanilla Custard Cream Squares. Once the baked pastry layers are completely cool, place one pastry sheet on your serving platter. Carefully spread the thickened vanilla custard evenly over the pastry layer, making sure to reach all the edges. Then, gently spread the whipped cream over the custard layer, creating an even layer of creamy goodness. Top with the second pastry sheet. For a professional and beautiful finish, dust the top generously with extra powdered sugar using a fine-mesh sieve. This creates a lovely contrast and enhances the visual appeal of the squares. Once dusted, use a sharp knife to carefully cut the large rectangle into individual squares. This recipe yields approximately 12-16 squares, depending on how you slice them. Allow the squares to chill in the refrigerator for at least 30 minutes before serving. This allows the flavors to meld and the custard to set further, making them easier to cut and enjoy.
Conclusion:
And there you have it – your guide to creating delightful Vanilla Custard Cream Squares! We’ve walked through each step, from whipping up that luscious custard to perfectly layering it between delicate pastry. The result is a truly elegant dessert that’s surprisingly achievable for home bakers. These Vanilla Custard Cream Squares are wonderfully versatile. They make a stunning centerpiece for any special occasion, a sophisticated treat to enjoy with your afternoon tea, or a sweet ending to a family dinner. Don’t hesitate to get creative! Consider adding a dusting of cocoa powder, a scattering of fresh berries, or even a drizzle of chocolate ganache to elevate your creation further.
I truly hope you enjoy baking and savoring these Vanilla Custard Cream Squares as much as I do. Remember, the most important ingredient is your enthusiasm, so have fun with it!
Frequently Asked Questions:
Can I make the pastry ahead of time?
Absolutely! The shortcrust pastry can be made up to two days in advance and stored in the refrigerator. Ensure it’s well-wrapped in plastic wrap to prevent it from drying out. You can also freeze the pastry for up to a month; just thaw it in the refrigerator overnight before using.
How should I store leftover Vanilla Custard Cream Squares?
Leftover Vanilla Custard Cream Squares should be stored in an airtight container in the refrigerator. They are best enjoyed within 2-3 days for optimal freshness and texture. The custard can become slightly softer over time, but they will still be delicious.
What if I don’t have vanilla extract? Can I use vanilla bean?
Yes, absolutely! If you have a vanilla bean, you can use it. Split the bean lengthwise and scrape out the seeds. Add these seeds to the milk mixture while heating it for the custard. This will infuse your custard with an even richer, more intense vanilla flavor.
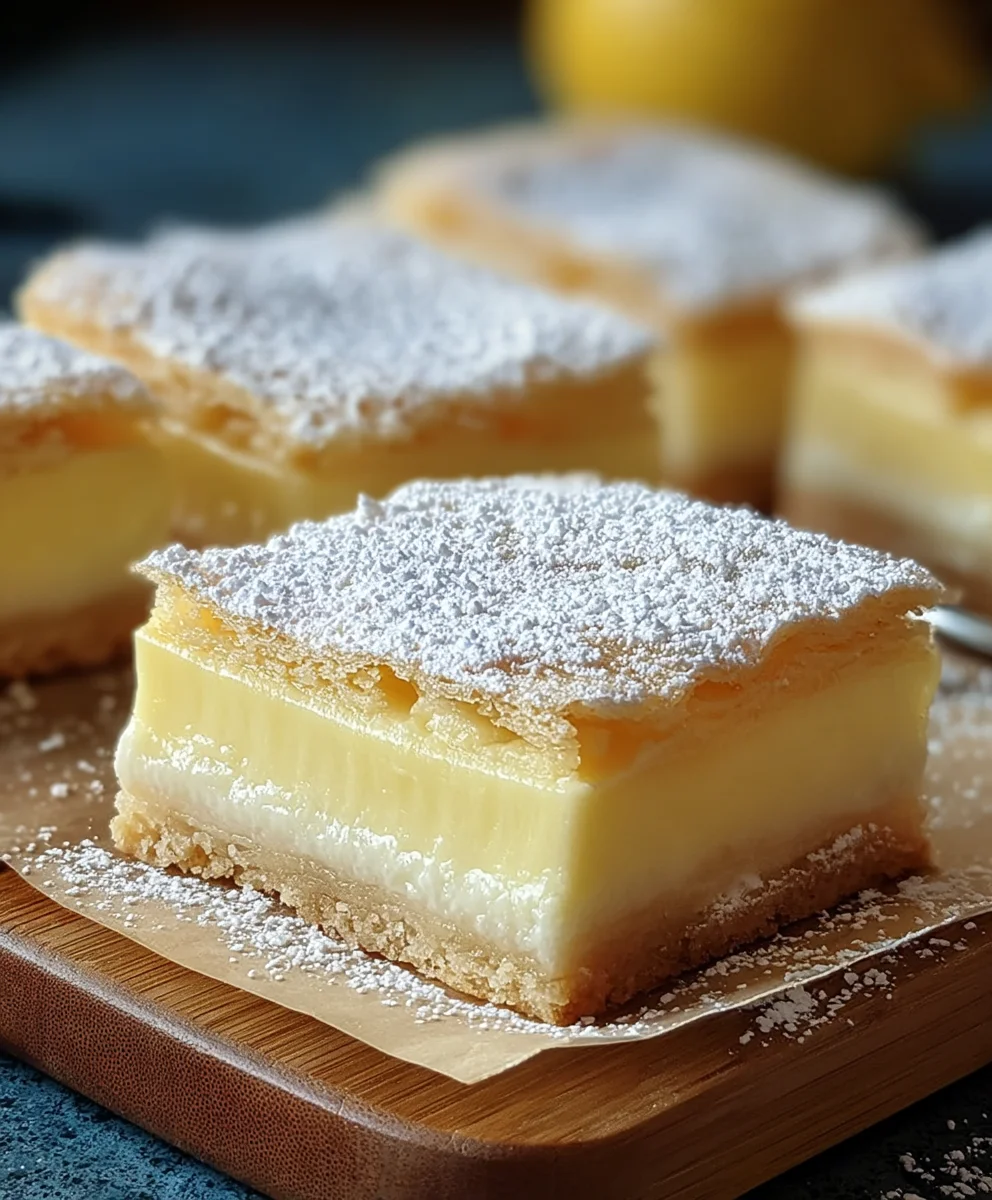
Vanilla Custard Cream Squares
An easy and delightful dessert featuring layers of flaky puff pastry, rich vanilla custard, and light whipped cream.
Ingredients
-
2 sheets puff pastry, thawed but kept cold
-
4 cups whole milk, divided
-
1 1/2 cups granulated sugar
-
1 1/4 cups all-purpose flour
-
8 large eggs, carefully separated
-
3 teaspoons pure vanilla extract
-
2 tablespoons non-alcoholic rum flavoring (optional)
-
1/4 teaspoon salt
-
2 cups heavy whipping cream, thoroughly chilled
-
2 tablespoons powdered sugar, plus extra for dusting
Instructions
-
Step 1
Preheat oven to 400°F (200°C). Unfold puff pastry sheets, prick all over with a fork, and place on baking sheets lined with parchment paper. Bake for 12-15 minutes until golden brown. Let cool completely on a wire rack. -
Step 2
In a saucepan, heat 3.5 cups of milk with 1 cup of sugar and salt until simmering. In a separate bowl, whisk flour with remaining 0.5 cup sugar, then whisk in egg yolks until smooth. Gradually temper egg yolks with hot milk, then return to saucepan. -
Step 3
Cook custard over medium-low heat, stirring constantly, until thickened and coats the back of a spoon (about 8-10 minutes). Remove from heat and stir in vanilla extract and optional non-alcoholic rum flavoring. -
Step 4
In a chilled bowl, whip cold heavy cream with an electric mixer. Gradually add powdered sugar and whip until stiff peaks form. -
Step 5
Place one cooled pastry sheet on a serving platter. Spread custard evenly over the pastry. Gently spread whipped cream over the custard. Top with the second pastry sheet. -
Step 6
Dust the top generously with powdered sugar. Cut into squares. Chill for at least 30 minutes before serving.
Important Information
Nutrition Facts (Per Serving)
It is important to consider this information as approximate and not to use it as definitive health advice.
Allergy Information
Please check ingredients for potential allergens and consult a health professional if in doubt.